
Every family has that one holiday recipe. The one that smells like Christmas morning, tastes like childhood, and brings everyone to the kitchen. In our house, it’s always been sugar cookies. But for years, I wrestled with them. One batch would spread into thin, crispy blobs. The next would be tough and dry. Most recipes demanded hours of chilling time I just didn’t have during the hectic holiday season.

I was on a mission. After what felt like an endless winter of testing—I’m talking over nine distinct batches—I finally cracked the code. I wanted a cookie that was thick, incredibly soft, and held its shape perfectly without a single minute of chilling. This is that recipe. It’s the result of all that trial and error, the one I’ve handwritten for friends, and the only one my family will let me make now. It’s simple, foolproof, and ready for all your creative decorating ideas.
Why You’ll Love This Christmas Sugar Cookie Recipe
This isn’t just another sugar cookie recipe; it’s your new holiday go-to. Here’s why it stands out from the rest:
- Truly No-Chill: I mean it. The dough is the perfect consistency right out of the mixer. You can scoop, bake, and decorate without any frustrating waiting time.
- Perfectly Soft & Chewy: These cookies have a tender, melt-in-your-mouth texture that stays soft for days. No hard, crunchy cookies here!
- They Don’t Spread: The balanced ratio of ingredients ensures your cookies look just as good coming out of the oven as they did going in. They are the perfect canvas for frosting.
- Simple, Everyday Ingredients: You likely have everything you need right in your pantry and refrigerator to whip up a batch.
- Incredibly Fun to Decorate: Whether you’re a beginner with a tub of sprinkles or an expert with piping bags, these cookies are a joy to bring to life with festive colors.
The Science Behind the Perfect Sugar Cookie: Ingredient Breakdown
Understanding the role of each ingredient is the key to my success—and yours! This recipe is carefully balanced, and each component has a critical job.
For the Cookies:
- All-Purpose Flour: Provides the structure. My #1 tip: measure your flour correctly! Spoon it into your measuring cup and level it off. Scooping directly from the bag compacts the flour, adding too much to the dough and resulting in dry, crumbly cookies.
- Unsalted Butter: This is the source of our rich flavor and tender texture. It must be softened to room temperature, not melted. Softened butter can hold air, which is what makes the cookies light and fluffy when creamed with sugar. Melted butter will cause the cookies to spread.
- Granulated Sugar: Sweetens the cookies and also helps with the creaming process, creating those air pockets for a soft texture.
- Eggs: Act as a binder, holding everything together. They also add moisture and richness.
- Vanilla Extract: For that classic, warm bakery flavor. Use pure vanilla extract if you can!
- Baking Soda: This is our primary leavening agent, giving the cookies a gentle lift so they aren’t dense.
- Cream of Tartar: This is my secret weapon! Cream of tartar is an acid that reacts with the baking soda. It does two crucial things: it prevents the sugar in the dough from crystallizing, resulting in a much softer cookie, and it helps the cookies set faster in the oven, which is key to preventing spread.
For the Fluffy Buttercream Frosting:
- Unsalted Butter: The base of our frosting. Using softened butter is key to a perfectly smooth, non-greasy texture.
- Powdered Sugar: Provides the sweetness and structure. Sifting it can help ensure a lump-free frosting, but it’s not strictly necessary.
- Milk: Thins the frosting to the perfect spreading consistency. You can use heavy cream for an even richer result.
How to Make No-Chill Christmas Sugar Cookies: A Step-by-Step Guide
This process is simple and straightforward. Just follow these steps for cookie perfection!
Prep Time: 20 minutes
Cook Time: 8 minutes per batch
Yields: ~3 dozen cookies
Step 1: Prepare Your Station
First things first, preheat your oven to 375°F (190°C). This is crucial for getting the cookies to set quickly. Line two large baking sheets with parchment paper to prevent sticking and ensure even baking.
Step 2: Combine the Dry Ingredients
In a medium-sized bowl, whisk together the sifted all-purpose flour, salt, baking soda, and cream of tartar. Whisking evenly distributes the leavening agents, so every cookie bakes up perfectly. Set this bowl aside for now.
Step 3: Cream the Butter and Sugar
In the bowl of a stand mixer fitted with the paddle attachment, or in a large bowl with a hand mixer, beat the softened unsalted butter and granulated sugar together on medium-high speed. Continue for about 3 minutes, or until the mixture is light, pale yellow, and fluffy. Don’t rush this step! This is where you’re incorporating air that will make the cookies tender.
Step 4: Add Eggs and Vanilla
Add the large eggs, one at a time, mixing well after each addition. Then, mix in the vanilla extract. The mixture should be smooth and well-combined.
Step 5: Combine Wet and Dry
With the mixer on low speed, gradually add the dry ingredient mixture to the wet ingredients. Mix only until the flour is just incorporated. You might see a few streaks of flour, and that’s okay. Do not overmix! Overmixing will develop the gluten in the flour, leading to tough cookies.
Step 6: Scoop and Bake
Use a medium cookie scoop (about 1.25 inches) to portion the dough into uniform balls. Place them about 2 inches apart on your prepared baking sheets. For a classic, crackled top, you can dip the bottom of a drinking glass in a small bowl of granulated sugar and gently press each dough ball down slightly.
Bake for 8 minutes exactly. The edges should be set and very lightly golden, but the centers will look soft and slightly underdone. This is the secret to a soft cookie!
Step 7: Cool Completely
Let the cookies rest on the hot baking sheet for 3-4 minutes to finish setting up. Then, carefully transfer them to a wire cooling rack to cool completely. It’s essential that they are no longer warm before you begin frosting.

The Easiest, Dreamiest Buttercream Frosting
While your cookies are cooling, whip up this simple and delicious buttercream.
- Beat the Butter: In a large bowl, beat the softened butter with a mixer on medium-high speed until it’s completely smooth and creamy.
- Add Sugar and Milk: Gradually add the powdered sugar, mixing on low speed until it’s mostly combined. Then, add the milk.
- Whip Until Fluffy: Increase the mixer speed to medium-high and beat for 2-3 minutes, until the frosting is light, airy, and perfectly smooth.
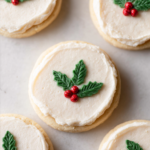
- Decorate! Once the cookies are completely cool, spread a generous layer of frosting on top. Now for the fun part—add your favorite sprinkles, sanding sugars, or candies! Let the frosting set for at least an hour before stacking or storing.
More Holiday Baking Inspiration
If you’re in a baking mood and loved the simplicity of these cookies, you’ll adore some of our other fan-favorite recipes. Each one is crafted with the same attention to detail!
- Stuffed Red Velvet Cookies Recipe
- Pistachio NYC Cookies
- Creme Egg Stuffed Cookies
- Peanut Butter Nutella Cookies
- White Chocolate Stuffed Cookies
Storage and Make-Ahead Instructions
Proper storage keeps these cookies tasting fresh for days.
- To Store Frosted Cookies: Allow the frosting to fully harden (this may take a couple of hours at room temperature). Store them in an airtight container with parchment paper between the layers for up to 5 days.
- To Store Unfrosted Cookies: Unfrosted cookies can be stored in an airtight container at room temperature for up to a week.
- To Freeze Dough: Form the dough into a disc, wrap it tightly in plastic wrap, and then place it in a freezer-safe bag. It can be frozen for up to 3 months. Thaw in the refrigerator overnight before scooping and baking.
- To Freeze Baked Cookies: Freeze unfrosted cookies in a single layer on a baking sheet, then transfer to a freezer-safe bag. They will keep for up to 3 months. Thaw at room temperature before frosting.
Frequently Asked Questions (FAQ)
Here are answers to some common questions I get about this recipe.
Why did my sugar cookies spread so much?
The most common culprits for spreading cookies are butter that is too soft (or melted) and incorrect flour measurement. Make sure your butter is softened but still cool to the touch. Also, be sure to spoon your flour into the measuring cup and level it off, rather than scooping directly from the bag, which can compact the flour and lead to a wet dough.
Is this sugar cookie recipe really no-chill?
Yes! After more than nine tests, I’ve perfected the ratio of fat (butter) to flour and leavening agents. The inclusion of cream of tartar also helps the cookies set quickly, preventing them from spreading in the oven. This means you can go from mixing bowl to oven in minutes without any frustrating chill time.
How do I store decorated Christmas sugar cookies?
Once the frosting has fully set and hardened (this can take a few hours), you can store the cookies in an airtight container at room temperature for up to 5 days. Place parchment paper between layers to prevent them from sticking together.
Can I make this dough ahead of time?
Absolutely! The dough can be made and stored in an airtight container or wrapped tightly in the refrigerator for up to 3 days before baking. You can also freeze it for up to 3 months as described in the storage section.
I truly hope this recipe brings as much joy to your holiday baking as it has to mine. It’s more than just a cookie; it’s a tradition, a creative outlet, and the perfect sweet treat to share with the people you love. Happy baking
PrintChristmas Sugar Cookies
These Soft No-Chill Christmas Sugar Cookies are thick, buttery, and melt-in-your-mouth tender — no refrigeration required! After nine rounds of testing, Sofie perfected the ultimate sugar cookie: one that keeps its shape, stays soft for days, and tastes like pure holiday magic. Topped with a fluffy vanilla buttercream frosting, they’re the perfect Christmas treat to bake and decorate with family.
- Prep Time: 20 minutes
- Cook Time: 8 minutes
- Total Time: 28 minutes
- Yield: 36 cookies
- Category: Dessert, Holiday Cookies, Christmas Recipes
- Method: Baked
- Cuisine: American
Ingredients
### For the Cookies
3 cups (375g) all-purpose flour
1 teaspoon baking soda
1 teaspoon cream of tartar
½ teaspoon salt
1 cup (226g) unsalted butter, softened
1 ¼ cups (250g) granulated sugar
2 large eggs
2 teaspoons pure vanilla extract
### For the Buttercream Frosting
1 cup (226g) unsalted butter, softened
3 cups (360g) powdered sugar
2–3 tablespoons milk or heavy cream
1 teaspoon vanilla extract
Pinch of salt
Assorted sprinkles or sanding sugar, for decorating
Instructions
1. Preheat oven to 375°F (190°C). Line two baking sheets with parchment paper.
2. In a medium bowl, whisk together flour, baking soda, cream of tartar, and salt. Set aside.
3. In a large mixing bowl, beat softened butter and granulated sugar together for about 3 minutes, until light and fluffy.
4. Add eggs one at a time, mixing well after each addition. Beat in vanilla extract.
5. Gradually add the dry ingredients to the wet mixture on low speed, mixing only until combined. Do not overmix.
6. Scoop the dough into 1.25-inch balls (about 2 tablespoons each) and place 2 inches apart on baking sheets.
7. Optionally, press the tops gently with a sugar-dipped glass for a classic crackled look.
8. Bake for 8 minutes, until edges are set and centers look soft. Do not overbake.
9. Let cookies cool on the baking sheet for 3–4 minutes, then transfer to a wire rack to cool completely.
10. While cooling, prepare the frosting: beat butter until smooth, add powdered sugar, milk, vanilla, and salt, and whip until light and fluffy.
11. Frost cooled cookies and decorate with festive sprinkles. Let frosting set for 1 hour before stacking or storing.
Notes
**Storage & Make-Ahead Tips**
• Store frosted cookies in an airtight container with parchment between layers for up to 5 days.
• Unfrosted cookies can be stored at room temperature for up to 1 week.
• Freeze dough (wrapped tightly) for up to 3 months. Thaw overnight before baking.
• Freeze baked, unfrosted cookies for up to 3 months. Thaw and decorate when ready.
**Sofie’s Pro Tips**
• Always measure flour using the spoon-and-level method to prevent dry cookies.
• Softened (not melted) butter is key to preventing spread.
• Cream of tartar gives the cookies their signature soft, chewy texture and ensures they hold shape.
• For bakery-perfect edges, use the “cookie scoot” method with a round cutter right after baking.
