
There are certain sights and smells that instantly signal the start of the holiday season. For me, it’s the crisp scent of pine, the warm glow of twinkling lights, and the delightfully sticky process of making these classic Christmas Wreath Cookies. This is more than just a recipe; it’s a cherished memory, a taste of nostalgia that brings me right back to my childhood kitchen, watching my mom melt marshmallows and create these vibrant, edible decorations.

Hi, I’m Sophie, and for years, these cornflake wreath cookies have been my go-to for holiday parties, cookie exchanges, and last-minute potlucks. They require no oven, come together in under 15 minutes, and are a guaranteed hit with both kids and adults. They are the perfect blend of sweet, crunchy, and chewy—a true American comfort-food classic.
After making these for what feels like a hundred holidays, I’ve tested this recipe more than nine times to perfect the balance. I’ve found the ideal ratio of marshmallow-to-cornflake for that perfect chew, the exact moment to add the vanilla for the best flavor, and the secret to shaping them without getting into a sticky mess. Now, I’m sharing all my tips and tricks with you!
Why You’ll Fall in Love with This Recipe
These aren’t just cookies; they’re a holiday activity! Here’s why this recipe will become a new tradition in your family:
- Absolutely No Baking Required: Free up your oven for the holiday ham! This entire recipe is made in the microwave and on the countertop.
- Incredibly Fast: From start to finish, you can have a full platter of these festive treats ready in about 15 minutes, plus a little cooling time.
- Kid-Friendly Fun: This is the perfect recipe to get the little ones involved. They can help stir, scoop, and (their favorite part) decorate with the red “holly berries.”
- Budget-Friendly: Made with simple, inexpensive pantry staples, you can make a large batch without breaking the bank.
- Perfectly Festive: With their bright green color and red candy accents, these cookies look just like tiny Christmas wreaths and add a beautiful touch to any dessert table.
Understanding the Ingredients
The magic of this recipe lies in its simplicity. Just a few key ingredients transform into something wonderfully festive.
- Butter: I often use salted butter to add a subtle savory note that balances the sweetness of the marshmallows. If you only have unsalted, that works perfectly too—just add a tiny pinch of salt with the vanilla.
- Miniature Marshmallows: These are non-negotiable for me. Mini marshmallows melt faster and more evenly than their larger counterparts, giving you a perfectly smooth, lump-free base.
- Vanilla Extract: This adds a layer of warmth and depth to the flavor. A quality pure vanilla extract really shines here.
- Green Food Coloring: To get that classic vibrant wreath color, I prefer gel food coloring. It’s more concentrated than liquid, so you need less, and it won’t water down your marshmallow mixture.
- Cornflakes: The star of the crunch! Standard cornflakes provide the perfect texture and shape. Don’t crush them too much; you want those full flakes for the classic wreath look.
- Red Hot Candies: These little cinnamon candies are the traditional “holly berries.” Their spicy kick is a lovely contrast to the sweet cookie. If they’re not your favorite, don’t worry—I have substitution ideas below!
- Baking Spray: Your best friend for this recipe! It prevents the sticky mixture from clinging to your hands, spoons, and everything else.
Step-by-Step Guide to Perfect Wreath Cookies
Ready to create some holiday magic? Let’s walk through the process together. Have your ingredients measured and your parchment paper laid out before you start—this recipe moves fast!
Step 1: Melt the Marshmallow Mixture
In a large, microwave-safe bowl, combine your butter and the miniature marshmallows. Microwave them in 30-second bursts, stirring well after each one. This prevents the sugar from scorching. Continue until the mixture is completely melted, smooth, and glossy. It usually takes me about 2 to 2 ½ minutes total.
Step 2: Add Color and Flavor
Once melted, immediately remove the bowl from the microwave. Stir in the vanilla extract and the green food coloring. Mix until the color is completely uniform. This is the best time to add the color—it distributes much more evenly in the melted marshmallow than it would after adding the cereal.
Step 3: Fold in the Cornflakes
Now, you need to work quickly! Pour all 4 cups of cornflakes into the bowl at once. Using a greased spatula, gently fold the cereal into the green marshmallow mixture until every flake is evenly coated. Be gentle to avoid crushing the cornflakes into dust.
Step 4: Scoop and Shape
Lightly grease a small cookie scoop or a regular tablespoon. Drop rounded spoonfuls of the mixture onto your prepared wax or parchment paper, leaving a little space between each one. I usually get about 24 cookies from one batch.
Step 5: Decorate and Finalize the Shape
While the mounds are still warm and pliable, it’s time to decorate! Lightly grease your fingertips and gently press a small hole in the center of each cookie to create the wreath shape. Immediately press three red hot candies onto each wreath, arranging them like holly berries. The warmth of the cookie will help them stick.
Step 6: Cool and Set
Let the cookies cool completely at room temperature for about 20-30 minutes. They will firm up as they cool. Once they are set, they’ll peel easily off the parchment paper.
My Pro-Tips for Guaranteed Success
After my many, many test batches, I’ve gathered a few tips that make all the difference:
- Grease Everything: I can’t stress this enough. The marshmallow mixture is like delicious glue. A light coating of baking spray on your spatula, your cookie scoop, and your fingers will make the shaping process a breeze.
- Don’t Overcook the Marshmallows: Heating the marshmallows for too long or at too high a power can cause them to become hard and caramelize once they cool. Short 30-second bursts in the microwave are the key to a perfectly soft and chewy final texture.
- Freshness Matters: Use a fresh bag of marshmallows. Older marshmallows can be dry and won’t melt as smoothly, resulting in a grainy texture.
- Stovetop Method: If you don’t have a microwave, you can easily make this on the stovetop. Melt the butter in a large pot or Dutch oven over low heat. Add the marshmallows and stir constantly until completely melted and smooth. Then, remove from heat and proceed with the recipe.

Fun Variations and Easy Substitutions
While the classic recipe is a treasure, it’s also a fantastic base for creativity! If you love this recipe but want to try something new, these delicious variations are a great place to start, just like my popular Stuffed Red Velvet Cookies Recipe.
- Alternative Berries: If red hots aren’t your thing, use red mini M&Ms, chopped red gumdrops, or festive red and green sprinkles.
- Flavor Twists: Try swapping the vanilla for ½ teaspoon of peppermint extract for a minty-fresh wreath, or use almond extract for a nutty, marzipan-like flavor.
- Different Cereals: While cornflakes are classic, you can also make these with Rice Krispies (for a texture similar to a classic treat bar) or even Chex cereal.
- A Touch of Chocolate: After the cookies have cooled, melt some white chocolate and drizzle it over the wreaths to look like snow. This adds another layer of sweetness and looks stunning. If you love chocolate and cookies, you have to try my Peanut Butter Nutella Cookie Recipe or my White Chocolate Stuffed Cookies.
For other unique cookie inspirations, be sure to check out my recipes for Pistachio NYC Cookies and my seasonal favorite, Creme Egg Stuffed Cookies.
Storage Instructions
Store your Christmas Wreath Cookies in an airtight container at room temperature. Place layers of wax paper between them to prevent sticking. They will stay fresh and chewy for up to 3 days. Do not refrigerate, as this can draw moisture and make them soggy. I do not recommend freezing these cookies, as the cornflakes can become soft upon thawing.
Frequently Asked Questions
Can I use regular-sized marshmallows instead of mini ones?
Yes, you can, but miniature marshmallows are highly recommended as they melt much more quickly and evenly. If using large marshmallows, you may need to add an extra minute or two to the melting time and stir more frequently to prevent hot spots. You can also cut them up with kitchen shears to speed up the process.
Why are my cookies so sticky and hard to handle?
The marshmallow mixture is naturally very sticky! The key is to grease everything. Lightly spray your hands, the cookie scoop, and your spatula with non-stick baking spray. This creates a barrier and makes shaping the wreaths a much cleaner and easier process.
Are Christmas Wreath Cookies gluten-free?
They can be! While many brands of cornflakes contain malt flavoring (derived from barley), you can easily find certified gluten-free cornflakes. Ensure your marshmallows and vanilla extract are also certified gluten-free to make this a safe treat for those with celiac disease or gluten sensitivity.
How far in advance can I make these cookies?
These cookies are best enjoyed within 2-3 days of making them. Store them in a single layer in an airtight container at room temperature. Stacking them can cause them to stick together. Do not refrigerate, as the humidity can make them soft and soggy.There are certain sights and smells that instantly signal the start of the holiday season. For me, it’s the crisp scent of pine, the warm glow of twinkling lights, and the delightfully sticky process of making these classic Christmas Wreath Cookies. This is more than just a recipe; it’s a cherished memory, a taste of nostalgia that brings me right back to my childhood kitchen, watching my mom melt marshmallows and create these vibrant, edible decorations.
Hi, I’m Sophie, and for years, these cornflake wreath cookies have been my go-to for holiday parties, cookie exchanges, and last-minute potlucks. They require no oven, come together in under 15 minutes, and are a guaranteed hit with both kids and adults. They are the perfect blend of sweet, crunchy, and chewy—a true American comfort-food classic.
After making these for what feels like a hundred holidays, I’ve tested this recipe more than nine times to perfect the balance. I’ve found the ideal ratio of marshmallow-to-cornflake for that perfect chew, the exact moment to add the vanilla for the best flavor, and the secret to shaping them without getting into a sticky mess. Now, I’m sharing all my tips and tricks with you!
Why You’ll Fall in Love with This Recipe
These aren’t just cookies; they’re a holiday activity! Here’s why this recipe will become a new tradition in your family:
- Absolutely No Baking Required: Free up your oven for the holiday ham! This entire recipe is made in the microwave and on the countertop.
- Incredibly Fast: From start to finish, you can have a full platter of these festive treats ready in about 15 minutes, plus a little cooling time.
- Kid-Friendly Fun: This is the perfect recipe to get the little ones involved. They can help stir, scoop, and (their favorite part) decorate with the red “holly berries.”
- Budget-Friendly: Made with simple, inexpensive pantry staples, you can make a large batch without breaking the bank.
- Perfectly Festive: With their bright green color and red candy accents, these cookies look just like tiny Christmas wreaths and add a beautiful touch to any dessert table.
Understanding the Ingredients
The magic of this recipe lies in its simplicity. Just a few key ingredients transform into something wonderfully festive.
- Butter: I often use salted butter to add a subtle savory note that balances the sweetness of the marshmallows. If you only have unsalted, that works perfectly too—just add a tiny pinch of salt with the vanilla.
- Miniature Marshmallows: These are non-negotiable for me. Mini marshmallows melt faster and more evenly than their larger counterparts, giving you a perfectly smooth, lump-free base.
- Vanilla Extract: This adds a layer of warmth and depth to the flavor. A quality pure vanilla extract really shines here.
- Green Food Coloring: To get that classic vibrant wreath color, I prefer gel food coloring. It’s more concentrated than liquid, so you need less, and it won’t water down your marshmallow mixture.
- Cornflakes: The star of the crunch! Standard cornflakes provide the perfect texture and shape. Don’t crush them too much; you want those full flakes for the classic wreath look.
- Red Hot Candies: These little cinnamon candies are the traditional “holly berries.” Their spicy kick is a lovely contrast to the sweet cookie. If they’re not your favorite, don’t worry—I have substitution ideas below!
- Baking Spray: Your best friend for this recipe! It prevents the sticky mixture from clinging to your hands, spoons, and everything else.
Step-by-Step Guide to Perfect Wreath Cookies
Ready to create some holiday magic? Let’s walk through the process together. Have your ingredients measured and your parchment paper laid out before you start—this recipe moves fast!
Step 1: Melt the Marshmallow Mixture
In a large, microwave-safe bowl, combine your butter and the miniature marshmallows. Microwave them in 30-second bursts, stirring well after each one. This prevents the sugar from scorching. Continue until the mixture is completely melted, smooth, and glossy. It usually takes me about 2 to 2 ½ minutes total.
Step 2: Add Color and Flavor
Once melted, immediately remove the bowl from the microwave. Stir in the vanilla extract and the green food coloring. Mix until the color is completely uniform. This is the best time to add the color—it distributes much more evenly in the melted marshmallow than it would after adding the cereal.
Step 3: Fold in the Cornflakes
Now, you need to work quickly! Pour all 4 cups of cornflakes into the bowl at once. Using a greased spatula, gently fold the cereal into the green marshmallow mixture until every flake is evenly coated. Be gentle to avoid crushing the cornflakes into dust.
Step 4: Scoop and Shape
Lightly grease a small cookie scoop or a regular tablespoon. Drop rounded spoonfuls of the mixture onto your prepared wax or parchment paper, leaving a little space between each one. I usually get about 24 cookies from one batch.
Step 5: Decorate and Finalize the Shape
While the mounds are still warm and pliable, it’s time to decorate! Lightly grease your fingertips and gently press a small hole in the center of each cookie to create the wreath shape. Immediately press three red hot candies onto each wreath, arranging them like holly berries. The warmth of the cookie will help them stick.
Step 6: Cool and Set
Let the cookies cool completely at room temperature for about 20-30 minutes. They will firm up as they cool. Once they are set, they’ll peel easily off the parchment paper.
My Pro-Tips for Guaranteed Success
After my many, many test batches, I’ve gathered a few tips that make all the difference:
- Grease Everything: I can’t stress this enough. The marshmallow mixture is like delicious glue. A light coating of baking spray on your spatula, your cookie scoop, and your fingers will make the shaping process a breeze.
- Don’t Overcook the Marshmallows: Heating the marshmallows for too long or at too high a power can cause them to become hard and caramelize once they cool. Short 30-second bursts in the microwave are the key to a perfectly soft and chewy final texture.
- Freshness Matters: Use a fresh bag of marshmallows. Older marshmallows can be dry and won’t melt as smoothly, resulting in a grainy texture.
- Stovetop Method: If you don’t have a microwave, you can easily make this on the stovetop. Melt the butter in a large pot or Dutch oven over low heat. Add the marshmallows and stir constantly until completely melted and smooth. Then, remove from heat and proceed with the recipe.
Fun Variations and Easy Substitutions
While the classic recipe is a treasure, it’s also a fantastic base for creativity! If you love this recipe but want to try something new, these delicious variations are a great place to start, just like my popular Stuffed Red Velvet Cookies Recipe.
- Alternative Berries: If red hots aren’t your thing, use red mini M&Ms, chopped red gumdrops, or festive red and green sprinkles.
- Flavor Twists: Try swapping the vanilla for ½ teaspoon of peppermint extract for a minty-fresh wreath, or use almond extract for a nutty, marzipan-like flavor.
- Different Cereals: While cornflakes are classic, you can also make these with Rice Krispies (for a texture similar to a classic treat bar) or even Chex cereal.
- A Touch of Chocolate: After the cookies have cooled, melt some white chocolate and drizzle it over the wreaths to look like snow. This adds another layer of sweetness and looks stunning. If you love chocolate and cookies, you have to try my Peanut Butter Nutella Cookie Recipe or my White Chocolate Stuffed Cookies.
For other unique cookie inspirations, be sure to check out my recipes for Pistachio NYC Cookies and my seasonal favorite, Creme Egg Stuffed Cookies.
Storage Instructions
Store your Christmas Wreath Cookies in an airtight container at room temperature. Place layers of wax paper between them to prevent sticking. They will stay fresh and chewy for up to 3 days. Do not refrigerate, as this can draw moisture and make them soggy. I do not recommend freezing these cookies, as the cornflakes can become soft upon thawing.
Frequently Asked Questions
Can I use regular-sized marshmallows instead of mini ones?
Yes, you can, but miniature marshmallows are highly recommended as they melt much more quickly and evenly. If using large marshmallows, you may need to add an extra minute or two to the melting time and stir more frequently to prevent hot spots. You can also cut them up with kitchen shears to speed up the process.
Why are my cookies so sticky and hard to handle?
The marshmallow mixture is naturally very sticky! The key is to grease everything. Lightly spray your hands, the cookie scoop, and your spatula with non-stick baking spray. This creates a barrier and makes shaping the wreaths a much cleaner and easier process.
Are Christmas Wreath Cookies gluten-free?
They can be! While many brands of cornflakes contain malt flavoring (derived from barley), you can easily find certified gluten-free cornflakes. Ensure your marshmallows and vanilla extract are also certified gluten-free to make this a safe treat for those with celiac disease or gluten sensitivity.
How far in advance can I make these cookies?
These cookies are best enjoyed within 2-3 days of making them. Store them in a single layer in an airtight container at room temperature. Stacking them can cause them to stick together. Do not refrigerate, as the humidity can make them soft and soggy.
Christmas Wreath Cookies
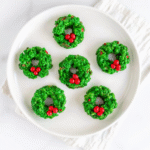
These No-Bake Christmas Wreath Cookies are the ultimate quick and festive treat. Made with buttery marshmallow, crisp cornflakes, and classic red candy ‘holly berries,’ they come together in just 15 minutes—no oven required! Sofie’s tested version delivers the perfect chewy-crunchy texture, vibrant color, and nostalgic holiday flavor that makes them a timeless favorite.
- Prep Time: 10 minutes
- Cook Time: 5 minutes
- Total Time: 15 minutes
- Yield: 24 cookies
- Category: Dessert, No-Bake, Holiday Recipes, Christmas Treats
- Method: No-Bake
- Cuisine: American
Ingredients
1/2 cup (113g) salted butter (or unsalted + pinch of salt)
1 bag (10 oz / 283g) miniature marshmallows
1 teaspoon pure vanilla extract
Green gel food coloring
4 cups (120g) cornflakes cereal
Red hot cinnamon candies (or mini M&Ms) for decoration
Non-stick baking spray or butter (for greasing hands and tools)
Instructions
1. Line two large sheets of parchment or wax paper on your counter for shaping the cookies.
2. In a large microwave-safe bowl, combine butter and miniature marshmallows.
3. Microwave in 30-second intervals, stirring after each, until completely melted and smooth (about 2 to 2½ minutes total).
4. Stir in vanilla extract and green food coloring until color is evenly distributed.
5. Add cornflakes and gently fold with a greased spatula until all flakes are coated.
6. Working quickly, drop rounded tablespoons of the mixture onto the prepared parchment paper.
7. Lightly grease your fingertips and press a small hole in the center of each mound to form the wreath shape.
8. Immediately press three red hot candies or mini M&Ms on each cookie as holly berries.
9. Let cookies cool and set at room temperature for 20–30 minutes before serving.
Notes
**Sofie’s Pro Tips**
• Grease everything—hands, spoons, spatulas—to prevent sticking.
• Use fresh mini marshmallows for the smoothest texture.
• Avoid overcooking marshmallows; short microwave bursts keep them soft and chewy.
• For stovetop prep, melt butter and marshmallows together on low heat, stirring constantly.
• Add peppermint or almond extract for a festive flavor twist.
**Storage**
• Store cookies in a single layer in an airtight container with wax paper between layers.
• Keep at room temperature up to 3 days; do not refrigerate or freeze (may soften).
• Best enjoyed within 48 hours for ideal crunch and chew.
