
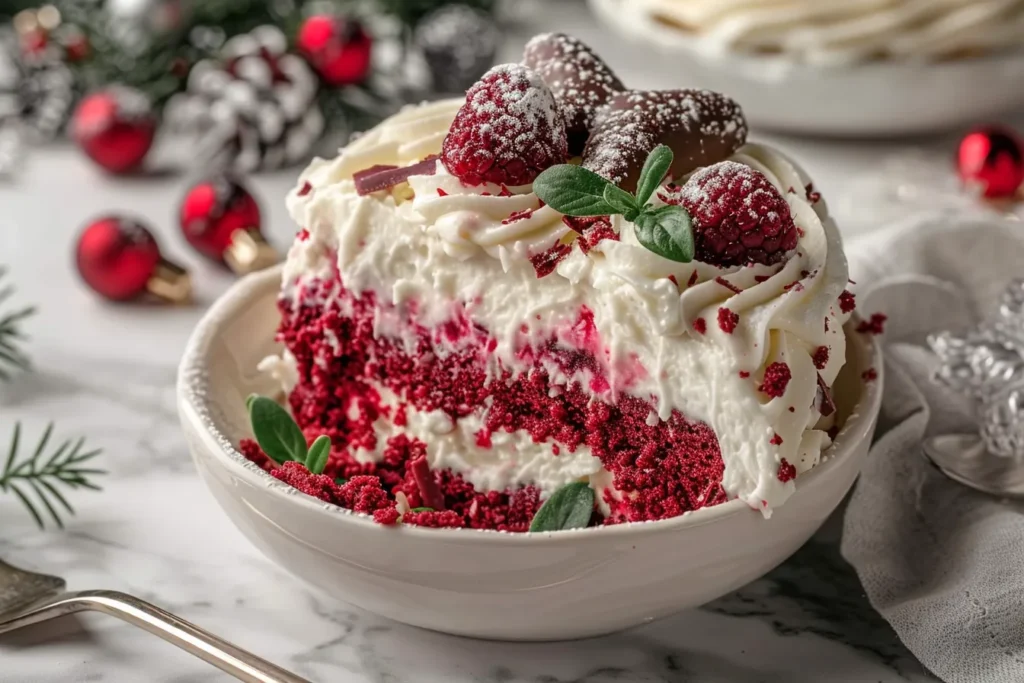
The vibrant red layers peeking through the whipped cream of this Red Velvet Christmas Lush just scream holiday cheer! I remember the first time I saw a trifle-style dessert like this at a church potluck in Waco. It was love at first bite. I’ve made this Red Velvet Christmas Lush at least a dozen times in my kitchen over the years, tweaking it until it’s the perfect balance of decadent and easy. This is one dessert even my picky eaters will gobble up! I just updated this recipe last week to streamline the process, and I promise, you’ll learn how to make a show-stopping dessert that’s surprisingly simple.
Why This Recipe Works
This Red Velvet Christmas Lush is a winner because it’s not only gorgeous but also stress-free. As a busy mom, I need recipes that deliver big flavor without requiring hours in the kitchen. This lush is exactly that!
- Quick Assembly: Using store-bought cake mix and pudding cuts down on prep time significantly.
- Kid-Approved: The layers of creamy pudding and sweet whipped cream are always a hit with my kiddos.
- Make-Ahead Friendly: You can assemble this the day before, which makes it perfect for holiday gatherings.
I’ve really focused on making sure the flavors meld together perfectly while also saving you time and effort. That’s the Texas way, y’all!
Ingredients
- 1 box (15.25 oz) Red Velvet Cake Mix, plus ingredients called for on the box
- 1 package (3.4 oz) instant vanilla pudding mix
- 3 cups milk
- 8 oz cream cheese, softened
- 1 cup powdered sugar
- 1 tsp vanilla extract
- 1 container (8 oz) frozen whipped topping, thawed
- Optional: Christmas sprinkles for garnish
Ingredient Notes
Let’s break down why each ingredient plays such a vital role in this dessert:
- Red Velvet Cake Mix: The base of our dessert. The slight tang from the buttermilk powder in most cake mixes is essential for that classic red velvet flavor. You can substitute with a chocolate cake mix if you’re in a pinch, but it won’t be quite the same.
- Instant Vanilla Pudding Mix: This helps create a creamy, stable layer. Make sure it’s instant, not cook-and-serve!
- Cream Cheese: Softened cream cheese is key to achieving that smooth, rich filling. Don’t skip this!
- Whipped Topping: For ease and stability, I use thawed whipped topping. You can certainly make your own whipped cream, but it may not hold its shape as well.
Step-by-Step Instructions
Follow these simple steps to create your own beautiful Red Velvet Christmas Lush. Don’t worry if it’s not perfect; it’ll taste delicious no matter what!
Step 1: Bake the Cake
Prepare the red velvet cake mix according to the package directions. I like to bake mine in a 9×13 inch pan. Once baked, let the cake cool completely. This step is crucial; you don’t want to melt the pudding later!
Step 2: Prepare the Pudding
In a large bowl, whisk together the instant vanilla pudding mix and milk until well combined. Let it sit for about 5 minutes to thicken. You’ll notice it firming up, creating a luscious, creamy texture. This is where the magic happens!
Step 3: Make the Cream Cheese Filling
In a separate bowl, beat the softened cream cheese and powdered sugar together until smooth and creamy. Add the vanilla extract and mix until combined. I learned after the third try that making sure the cream cheese is properly softened is very important for a smooth texture.
Step 4: Crumble the Cake
Once the cake is completely cool, crumble it into small pieces. You can do this with your hands or use a fork. We want a nice, even crumb for layering.
Step 5: Assemble the Lush
Now for the fun part! In a trifle bowl or a large glass bowl, layer half of the crumbled cake, followed by half of the pudding, and then half of the cream cheese mixture. Repeat the layers with the remaining cake, pudding, and cream cheese mixture.
Step 6: Top with Whipped Topping
Spread the thawed whipped topping evenly over the final layer. Garnish with Christmas sprinkles, if desired, for an extra festive touch.
[IMAGE SUGGESTION: Assembling red velvet lush layers in a trifle bowl | Alt: “Layering crumbled cake, pudding, and cream cheese filling in a glass trifle bowl”]
Step 7: Chill and Serve
Cover the bowl with plastic wrap and refrigerate for at least 2 hours, or preferably overnight, to allow the flavors to meld together. The longer it chills, the better it tastes! Serve cold and enjoy!
Expert Tips from My Kitchen
After making this Red Velvet Christmas Lush countless times, I’ve picked up a few tricks along the way. Here’s what I’ve learned:
- Don’t Overmix the Cake Batter: Overmixing can lead to a tough cake. Mix until just combined for a tender crumb.
- Soften the Cream Cheese: This is crucial for a smooth and lump-free cream cheese filling. Let it sit at room temperature for at least 30 minutes.
- Chill Thoroughly: Don’t rush the chilling process! The flavors really come together as it sits in the refrigerator.
- Adjust the Sweetness: If you prefer a less sweet dessert, reduce the amount of powdered sugar in the cream cheese filling.
- Add a Crunch: Mix in some chopped pecans or walnuts with the crumbled cake for added texture and flavor.
- Kid-Friendly Modification: Let the kids help with layering! It’s a fun and easy way to get them involved in the kitchen.
- Make-Ahead Strategy: This dessert is best made a day in advance. It saves you time on the day of your event and allows the flavors to meld together beautifully.
Storage & Meal Prep
Here’s how to store your Red Velvet Christmas Lush and make the most of it:
Storage: Store the lush in the refrigerator, covered tightly with plastic wrap, for up to 3 days.
Make-Ahead Options: You can assemble the entire lush the day before serving. Just make sure to keep it refrigerated until ready to serve.
Substitutions & Variations
Want to customize this Red Velvet Christmas Lush? Here are some ideas:
- Gluten-Free: Use a gluten-free red velvet cake mix. I haven’t tried it myself, but readers have told me it works well!
- Dairy-Free: Substitute the cream cheese with a dairy-free cream cheese alternative and use a dairy-free whipped topping.
- Seasonal Variations: In the summer, try adding fresh berries between the layers for a burst of flavor.
- Flavor Twist: Add a layer of chocolate shavings or drizzle with chocolate syrup for an extra decadent treat.
Frequently Asked Questions
Q: Can I make this ahead?
A: Absolutely! In fact, I recommend making it a day ahead. This allows the flavors to meld together and the cake to soften slightly, resulting in a more delicious dessert.
Q: How do I know when it’s done?
A: The lush is ready when the layers are set and the flavors have melded together. This usually takes at least 2 hours in the refrigerator, but overnight is even better.
Q: What can I substitute for cream cheese?
A: If you’re looking for a lighter option, you can try using Greek yogurt or a dairy-free cream cheese alternative. Just keep in mind that the texture and flavor may be slightly different.
Q: How do I store leftovers?
A: Store any leftover Red Velvet Christmas Lush in the refrigerator, covered tightly with plastic wrap. It will keep for up to 3 days, but it’s best enjoyed within the first 2 days.
Q: Is this kid-friendly?
A: Yes! My kids absolutely love this dessert. The layers of cake, pudding, and whipped cream are a guaranteed hit with children of all ages.
Q: Can I use a different flavor of pudding?
A: Of course! Chocolate, cheesecake, or even butterscotch pudding would all be delicious in this lush. Feel free to experiment with your favorite flavors. But I recommend vanilla as a good starting point!
Q: My whipped topping is melting, what did I do wrong?
A: Make sure to thaw your whipped topping completely in the refrigerator. Beating softened cream cheese with powdered sugar also helps stabilize it and makes it more durable.
Serving Suggestions
This Red Velvet Christmas Lush is a showstopper on its own, but here are a few ideas to take it to the next level:
- Serve it chilled in individual parfait glasses for an elegant presentation.
- Garnish with fresh berries, chocolate shavings, or a sprinkle of cocoa powder.
- Pair it with a cup of coffee or hot chocolate for a cozy dessert experience.
This Red Velvet Christmas Lush is the perfect dessert for bringing a touch of holiday magic to your family gatherings. It’s easy to make, incredibly delicious, and always a crowd-pleaser. I’ve poured my heart and soul into perfecting this recipe, and I know you’ll love it as much as my family does. Remember, making memories in the kitchen is just as important as the food itself! So go ahead and gather your ingredients, put on some Christmas music, and get ready to create a dessert that everyone will be talking about.
Let me know how it turns out in the comments below! I love hearing from you and seeing your own creations. Don’t forget to subscribe to my newsletter and follow me on social media for more delicious family recipes. And if you loved this, try my Chocolate Peppermint Brownies!
Happy baking, y’all!
-Susan Lirden,
`
Red Velvet Christmas Lush
Red Velvet Christmas Lush guide Indulge in festive treats Explore Lushs luscious holiday collection Discover the best products gift ideas 149 chars
- Prep Time: 20 minutes
- Cook Time: 30 minutes
- Total Time: 50 minutes
- Yield: 12 servings
- Category: Dessert
- Cuisine: American
Ingredients
- 1 box (15.25 oz) Red Velvet Cake Mix, plus ingredients called for on the box
- 1 package (3.4 oz) instant vanilla pudding mix
- 3 cups milk
- 8 oz cream cheese, softened
- 1 cup powdered sugar
- 1 tsp vanilla extract
- 1 container (8 oz) frozen whipped topping, thawed
- Optional: Christmas sprinkles for garnish
Instructions
- Prepare the red velvet cake mix according to the package directions. Bake in a 9×13 inch pan. Let the cake cool completely.
- In a large bowl, whisk together the instant vanilla pudding mix and milk until well combined. Let it sit for about 5 minutes to thicken.
- In a separate bowl, beat the softened cream cheese and powdered sugar together until smooth and creamy. Add the vanilla extract and mix until combined.
- Once the cake is completely cool, crumble it into small pieces.
- In a trifle bowl or a large glass bowl, layer half of the crumbled cake, followed by half of the pudding, and then half of the cream cheese mixture. Repeat the layers with the remaining cake, pudding, and cream cheese mixture.
- Spread the thawed whipped topping evenly over the final layer. Garnish with Christmas sprinkles, if desired.
- Cover the bowl with plastic wrap and refrigerate for at least 2 hours, or preferably overnight, to allow the flavors to meld together. Serve cold and enjoy!
