
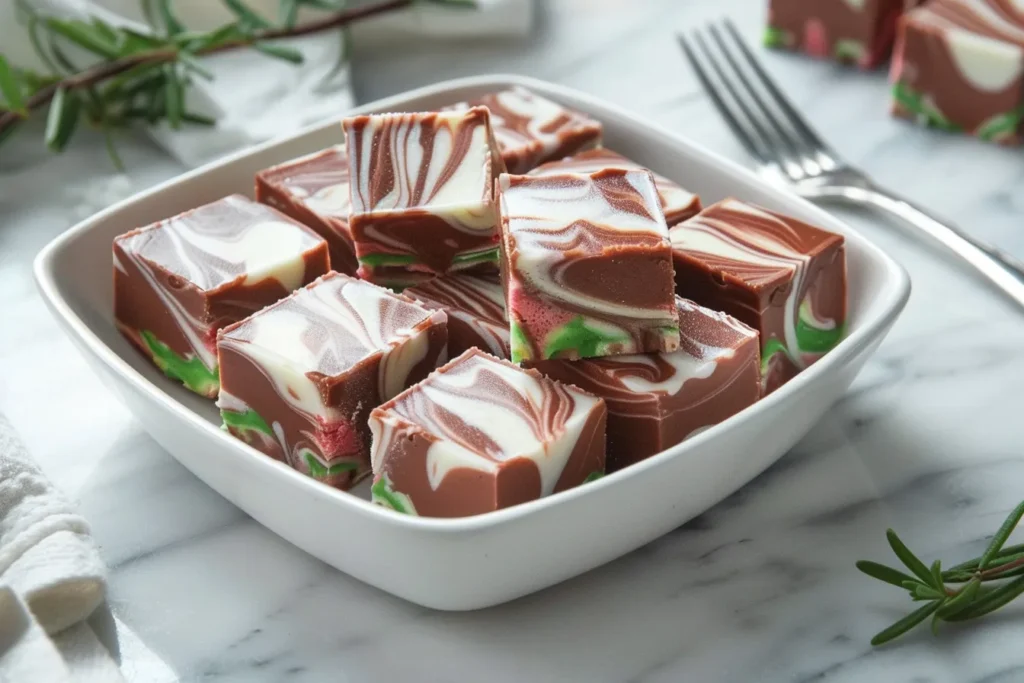
The kitchen counter is covered in a dusting of powdered sugar, and the scent of vanilla hangs heavy in the air – it can only mean one thing: Christmas fudge time! I’ve made this 3-Ingredient Christmas Swirl Fudge recipe more times than I can count, and every year it’s a hit. It’s so easy, even my five-year-old can “help” (which usually means sneaking chocolate chips). And let me tell you, during the holiday rush here in Texas, a simple recipe like this is a lifesaver. Trust me, you’ll learn how to whip up a batch of this decadent, festive fudge in minutes, even with a toddler clinging to your leg.
Why This Recipe Works
This 3-ingredient fudge isn’t just easy; it’s practically foolproof! It’s the perfect recipe for those busy holiday moments when you need a quick and delicious treat.
- Quick & Easy: It seriously takes less than 15 minutes to prepare, leaving you more time for, well, everything else!
- Kid-Friendly: My kids adore helping me make this (and eating it, of course!). It’s a great way to get them involved in the holiday baking.
- Make-Ahead Magic: You can make this fudge days in advance, which is a huge help when you’re juggling holiday parties and family gatherings.
Ingredients
Here’s what you’ll need for this magical 3-ingredient fudge:
- 1 (14 ounce) can sweetened condensed milk
- 2 (12 ounce) bags semi-sweet chocolate chips
- 1 (7 ounce) jar marshmallow creme
Ingredient Notes
- Sweetened Condensed Milk: This is the key to the fudge’s creamy texture. Don’t substitute with evaporated milk; it won’t work the same.
- Semi-Sweet Chocolate Chips: I prefer semi-sweet for a balance of sweetness, but you can use milk chocolate for a sweeter fudge or dark chocolate for a richer flavor.
- Marshmallow Creme: This adds a touch of fluffiness and sweetness. Make sure it’s fresh for the best results.
Step-by-Step Instructions
Here’s how to turn three simple ingredients into a holiday masterpiece:
- Prepare the Pan: Line an 8×8 inch square pan with parchment paper. This makes it super easy to lift the fudge out later. Trust me, this step is crucial!
- Melt the Chocolate: In a large, microwave-safe bowl, combine the sweetened condensed milk and chocolate chips. Microwave in 30-second intervals, stirring after each interval, until the chocolate is completely melted and smooth. I learned after the first time that patience is key here; don’t overheat it, or the chocolate will seize!
- Add Marshmallow Creme: Gently fold in the marshmallow creme until it’s just combined. Be careful not to overmix, or the fudge might become too dense.
- Create the Swirl: Pour half of the fudge mixture into the prepared pan. Drop spoonfuls of the remaining fudge mixture on top of the first layer. Use a knife or skewer to swirl the two mixtures together, creating a marbled effect. This is where you can get creative!
- Chill and Set: Cover the pan with plastic wrap and refrigerate for at least 2 hours, or until the fudge is firm. I usually let it sit overnight for the best results.
- Cut and Serve: Once the fudge is firm, lift it out of the pan using the parchment paper. Cut it into squares and get ready to enjoy!
Expert Tips from My Kitchen
After making this fudge more times than I care to admit (for “testing” purposes, of course!), here are a few tips I’ve picked up:
- Don’t Overheat the Chocolate: Microwaving in short intervals and stirring frequently will prevent the chocolate from burning.
- Use a Good Quality Chocolate: The better the chocolate, the better the fudge will taste! I like to splurge on a higher-end brand during the holidays.
- Get Creative with Swirls: Experiment with different swirling techniques for a unique look. Try using a toothpick or even a chopstick.
- Add Toppings: Sprinkle crushed peppermint candies, sprinkles, or chopped nuts on top of the fudge before it sets for extra festive flair.
- Make it Kid-Friendly: Let the kids help with the swirling and adding toppings. It’s a fun and easy way to get them involved in the kitchen.
- Line the Pan Properly: Make sure the parchment paper extends over the edges of the pan for easy removal.
- Chill Completely: Don’t rush the chilling process. The longer the fudge sits in the refrigerator, the firmer and easier to cut it will be.
Storage & Meal Prep
- Storage: Store the fudge in an airtight container in the refrigerator for up to 2 weeks.
- Freezing: You can also freeze the fudge for up to 2 months. Wrap it tightly in plastic wrap and then place it in a freezer-safe bag.
- Make-Ahead: This fudge is perfect for making ahead of time. Make it a few days before your holiday gathering to save time and stress.
- Reheating: No need to reheat! This fudge is best served cold or at room temperature.
Substitutions & Variations
- Dairy-Free: I haven’t personally tried it, but some readers have had success using dairy-free chocolate chips and sweetened condensed coconut milk.
- Peanut Butter Swirl: Swirl in some peanut butter for a Reese’s-inspired flavor.
- Peppermint Bark Fudge: Add peppermint extract and crushed peppermint candies for a festive peppermint bark version.
- White Chocolate Fudge: Use white chocolate chips instead of semi-sweet for a totally different flavor profile.
- Espresso Fudge: Add a teaspoon of instant espresso powder to the chocolate mixture for a coffee kick.
Frequently Asked Questions
Can I make this ahead?
Absolutely! This fudge is perfect for making ahead of time. It can be stored in the refrigerator for up to two weeks, so you can check it off your holiday to-do list well in advance.
How do I know when it’s done?
The fudge is done when it’s firm to the touch. It usually takes at least two hours in the refrigerator, but I recommend chilling it overnight for the best results.
What can I substitute for marshmallow creme?
If you don’t have marshmallow creme on hand, you can try using a cup of mini marshmallows. Melt them with the chocolate and sweetened condensed milk, stirring until smooth. The texture might be slightly different, but it will still be delicious.
How do I store leftovers?
Store leftover fudge in an airtight container in the refrigerator to keep it fresh.
Is this kid-friendly?
Yes, absolutely! This recipe is a hit with kids of all ages. My little ones love helping me make it, and they especially love eating it. Just be prepared for sticky fingers!
Conclusion & Call-to-Action
This 3-Ingredient Christmas Swirl Fudge is more than just a recipe; it’s a tradition in the making. It’s a simple, delicious treat that brings families together during the holidays. And as a busy momma here in Texas, I know how important those moments are.
So, ditch the complicated recipes and give this easy fudge a try. I promise you won’t be disappointed. Let me know how it turns out in the comments below! I love hearing your variations and tips. And if you loved this, try my [INTERNAL LINK: Easy Peanut Butter Fudge] recipe for another quick and delicious treat. You can also find more holiday inspiration on my Instagram page, @FamiliesRecipes. Happy baking, y’all!
Print3 Ingredient Christmas Swirl Fudge Recipe
Whip up easy 3Ingredient Christmas Swirl Fudge in a flash This simple familyapproved fudge recipe is tested in my Texas kitchen My kids love this Get the recipe
- Prep Time: 5 minutes
- Cook Time: 10 minutes
- Total Time: 15 minutes
- Yield: 64 squares
- Category: Dessert
- Cuisine: American
Ingredients
- 1 (14 ounce) can sweetened condensed milk
- 2 (12 ounce) bags semi-sweet chocolate chips
- 1 (7 ounce) jar marshmallow creme
Instructions
- Prepare the Pan: Line an 8×8 inch square pan with parchment paper. This makes it super easy to lift the fudge out later.
- Melt the Chocolate: In a large, microwave-safe bowl, combine the sweetened condensed milk and chocolate chips. Microwave in 30-second intervals, stirring after each interval, until the chocolate is completely melted and smooth.
- Add Marshmallow Creme: Gently fold in the marshmallow creme until it’s just combined. Be careful not to overmix.
- Create the Swirl: Pour half of the fudge mixture into the prepared pan. Drop spoonfuls of the remaining fudge mixture on top of the first layer. Use a knife or skewer to swirl the two mixtures together, creating a marbled effect.
- Chill and Set: Cover the pan with plastic wrap and refrigerate for at least 2 hours, or until the fudge is firm. I usually let it sit overnight for the best results.
- Cut and Serve: Once the fudge is firm, lift it out of the pan using the parchment paper. Cut it into squares and get ready to enjoy!
