
Y’all, I don’t know about you, but Christmas pudding was never really my thing. Too dense, too fruity, too… well, you know. But Christmas pudding ice cream? That’s a whole different ballgame! After a particularly warm Texas Christmas last year, I had this crazy idea. I’d been making my grandma’s famous vanilla ice cream (recipe coming soon, y’all!), and I thought, why not try to capture those warm Christmas flavors in a cool, creamy dessert? Several batches and a lot of taste-testing later (my kids were thrilled), I’ve finally nailed it! This Christmas pudding ice cream is packed with the spices and dried fruits we love, but in a refreshing, delightful package. Prepare for a new festive favorite, y’all! I promise this recipe will give you a taste of Christmas magic in every bite.

Why This Recipe Works
Let’s be honest, during the holidays, we’re all stretched thin. This Christmas pudding ice cream is a lifesaver because:
- It’s Surprisingly Simple: Don’t let the name fool you, this ice cream is incredibly easy to make, especially if you already have an ice cream maker.
- Make-Ahead Magic: The ice cream base can be made a day or two in advance, freeing up precious time when you’re juggling a million other things.
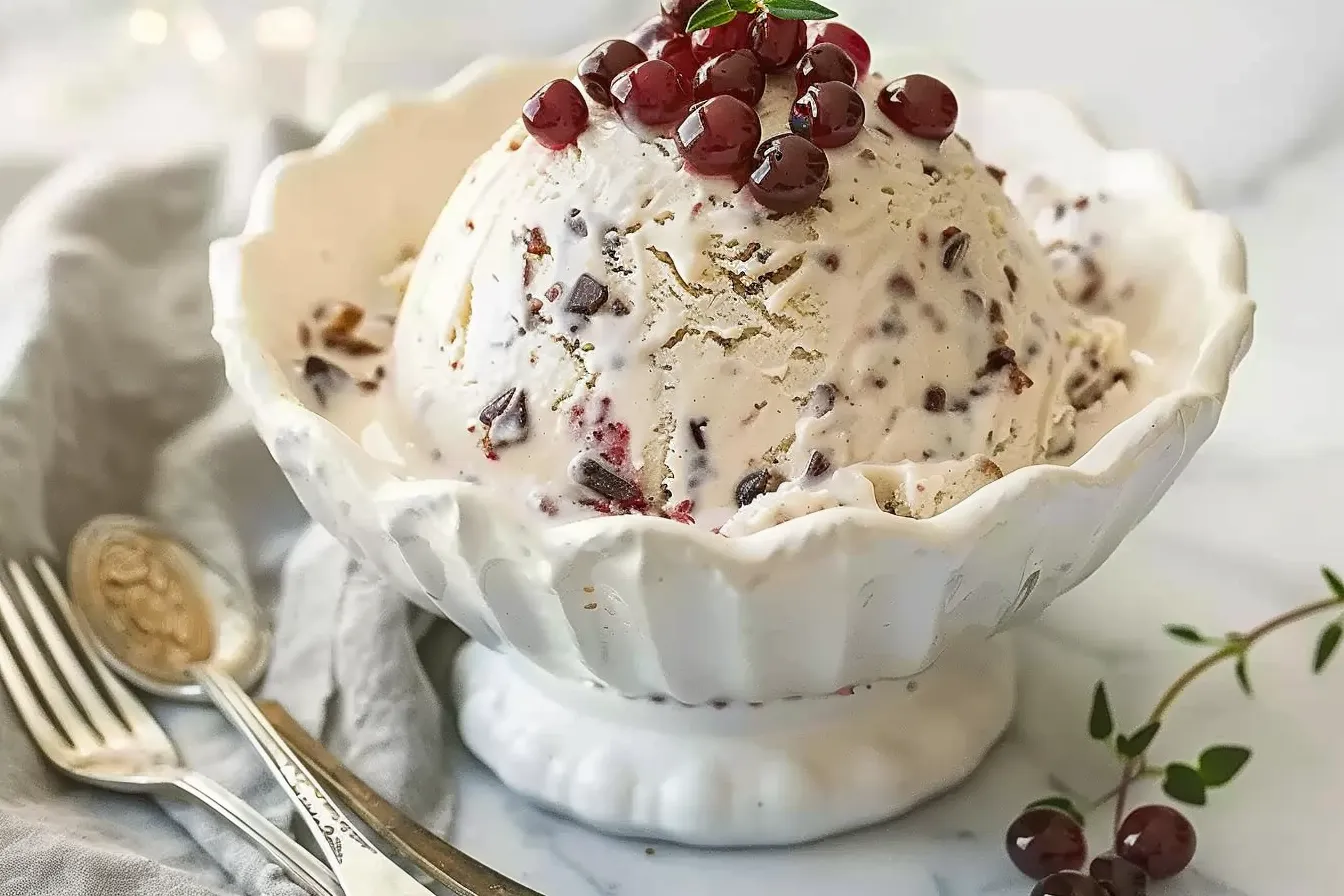
- Festive Flavor Explosion: This ice cream truly captures the essence of Christmas pudding, offering a unique and delicious alternative to the traditional dessert. My family loves it!
Ingredients
- 2 cups heavy cream
- 1 cup whole milk
- ¾ cup granulated sugar
- ¼ teaspoon salt
- 1 teaspoon vanilla extract
- ½ teaspoon ground cinnamon
- ¼ teaspoon ground nutmeg
- ¼ teaspoon ground cloves
- 1 cup mixed dried fruit (raisins, currants, cranberries, chopped dates), roughly chopped
- ¼ cup candied peel, finely chopped
- 2 tablespoons dark rum (optional, but highly recommended!)
Ingredient Notes
Mixed Dried Fruit: Using a good quality mixed dried fruit blend really elevates the flavor. I like to get mine from the local farmer’s market for the best taste and texture. Don’t skimp here!
Candied Peel: Candied peel adds a lovely citrusy note. If you’re not a fan, you can omit it, or substitute with a little bit of orange zest.
Dark Rum: The rum is optional, but it adds depth and warmth. If you’re making this for kids or prefer not to use alcohol, you can substitute it with 1 teaspoon of rum extract or leave it out altogether. I have found that the rum also keeps the ice cream a little softer in the freezer.
Step-by-Step Instructions
Step 1: Infuse the Cream. In a medium saucepan, combine the heavy cream, whole milk, sugar, and salt. Heat over medium heat, stirring constantly, until the sugar is dissolved and the mixture is steaming, but not boiling. You want the sugar fully dissolved and no longer grainy. This ensures a smooth texture.
Step 2: Spice it Up. Remove the saucepan from the heat and stir in the vanilla extract, cinnamon, nutmeg, and cloves. The aroma at this point is heavenly! Let the mixture cool slightly for about 10 minutes. This allows the spices to bloom and infuse the cream with their flavor. I’ve found that the longer the mixture sits, the stronger the spice flavor will be.
Step 3: Add the Fruit and Rum. Stir in the chopped mixed dried fruit, candied peel, and dark rum (if using). The rum will add a lovely warmth to the flavor profile. If you’re skipping the rum, don’t worry, it’ll still be delicious!
Step 4: Chill Out. Pour the mixture into a bowl, cover with plastic wrap, pressing it directly onto the surface to prevent a skin from forming. Refrigerate for at least 4 hours, or preferably overnight. This step is crucial for allowing the flavors to meld and for the ice cream to churn properly.
Step 5: Churn, Baby, Churn! Pour the chilled ice cream base into your ice cream maker and churn according to the manufacturer’s instructions. This usually takes about 20-25 minutes, or until the ice cream reaches a soft-serve consistency. Keep a close eye on it. After testing this several times, I learned that over-churning can lead to a grainy texture.
Step 6: Freeze for Firmness. Transfer the churned ice cream to an airtight container and freeze for at least 2 hours, or until firm enough to scoop. This final freezing period allows the ice cream to fully set and develop its final texture.
Expert Tips from My Kitchen
- Don’t Skip the Chilling Time: Chilling the ice cream base is absolutely essential for the best texture and flavor. Don’t try to rush this step!
- Toast the Spices: For an even more intense flavor, lightly toast the spices in a dry skillet over medium heat for a minute or two before adding them to the cream mixture. Watch them closely so they don’t burn!
- Soak the Fruit: If your dried fruit is particularly dry, soak it in a little bit of warm water or rum for about 30 minutes before adding it to the cream mixture. This will plump them up and make them softer in the ice cream.
- Taste Test, Taste Test, Taste Test! Adjust the spices and rum to your liking. Everyone has different preferences, so don’t be afraid to experiment!
- Soft Serve Secret: For a decadent treat, serve the ice cream straight from the ice cream maker for a soft-serve experience. It’s so good, y’all!
- Kid-Friendly Fun: Let the kids help with measuring and stirring! It’s a great way to get them involved in the kitchen and excited about trying new things.
- Avoid Ice Crystals: Press plastic wrap directly onto the surface of the ice cream before freezing to prevent ice crystals from forming. I learned this trick from my grandma, and it really works!

Storage & Meal Prep
Storage: Store your Christmas pudding ice cream in an airtight container in the freezer for up to 2 weeks. After that, the texture may start to deteriorate.
Meal Prep: The ice cream base can be made up to 2 days in advance and stored in the refrigerator until you’re ready to churn. This is a huge time-saver during the busy holiday season.
Reheating: Okay, you can’t exactly reheat ice cream! But if it gets too hard in the freezer, let it sit at room temperature for a few minutes before scooping.
Substitutions & Variations
Dairy-Free: Use coconut cream and almond milk instead of heavy cream and whole milk for a dairy-free version. I haven’t personally tested this, but I imagine it would be delicious!
Gluten-Free: This recipe is naturally gluten-free!
Spice It Up: Add a pinch of ground ginger or cardamom for an extra layer of warmth and complexity. I have found that ginger adds a particularly nice touch.
Nutty Delight: Stir in some chopped toasted pecans or walnuts for added texture and flavor. Be sure they are cooled to avoid them melting the ice cream.

Frequently Asked Questions
Can I make this ahead of time?
Yes, absolutely! The ice cream base can be made up to 2 days in advance and stored in the refrigerator. This is a lifesaver during the holidays.
How do I know when the ice cream is done churning?
The ice cream should be thick and creamy, with a soft-serve consistency. It will continue to firm up in the freezer.
Can I use different types of dried fruit?
Of course! Feel free to experiment with your favorite dried fruits. Apricots, figs, and cherries would all be delicious additions.
What if I don’t have an ice cream maker?
While an ice cream maker is ideal, you can still make a no-churn version. Pour the ice cream base into a freezer-safe container and freeze for 3-4 hours, stirring every 30 minutes to prevent ice crystals from forming.
Is this ice cream kid-friendly?
Yes! My kids absolutely love this ice cream. The warm spices and sweet dried fruit are a hit with little ones.
How do I store leftover ice cream?
Store leftover ice cream in an airtight container in the freezer. Press plastic wrap directly onto the surface of the ice cream to prevent ice crystals from forming.
Can I add nuts to this recipe?
Absolutely! Chopped toasted pecans or walnuts would be a delicious addition. Add them in during the last few minutes of churning.
Serving Suggestions
This Christmas pudding ice cream is delicious on its own, but it’s also wonderful served with:
- Warm gingerbread cookies
- A drizzle of caramel sauce
- A sprinkle of chopped nuts
- A dollop of whipped cream
For an elegant presentation, scoop the ice cream into stemmed glasses and garnish with a sprig of fresh mint.
Well, there you have it, folks! My take on a classic Christmas treat turned into something cool and refreshing. This Christmas pudding ice cream is a guaranteed crowd-pleaser and is easy enough for even the busiest of families. I hope you’ll give it a try this holiday season and make some sweet memories. Don’t forget to leave a comment and let me know how it turns out! And while you’re at it, sign up for my newsletter for more family-friendly recipes delivered straight to your inbox. Happy Holidays, y’all!
`
Easy Christmas Pudding Ice Cream Recipe NoChurn

Whip up delicious Christmas Pudding Ice Cream with this easy nochurn recipe Tested in my Texas kitchen its familyapproved comfort food Get the recipe
- Prep Time: 20 minutes
- Cook Time: 25 minutes
- Total Time: 45 minutes
- Yield: 6 servings
- Category: Dessert
- Cuisine: American
