
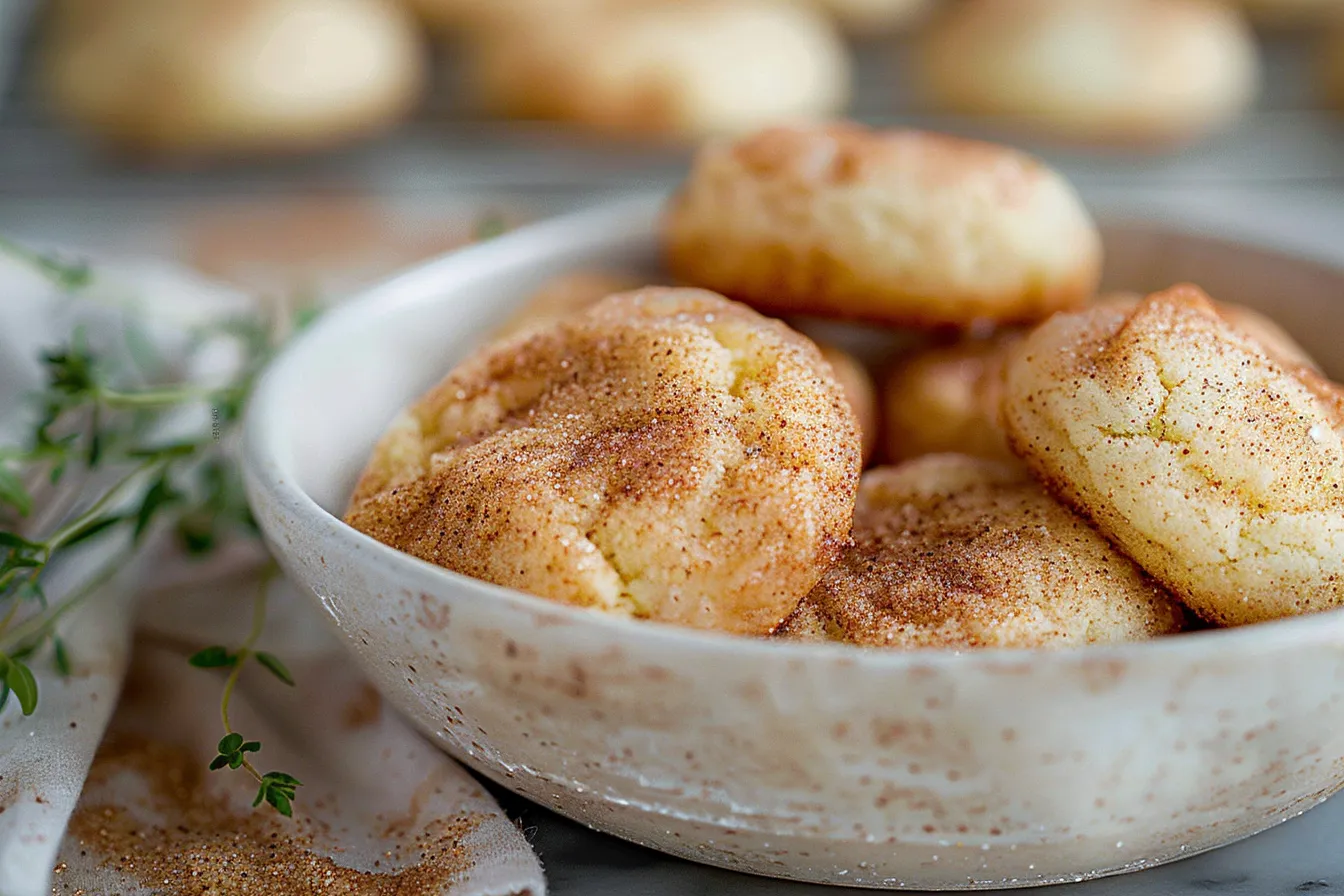
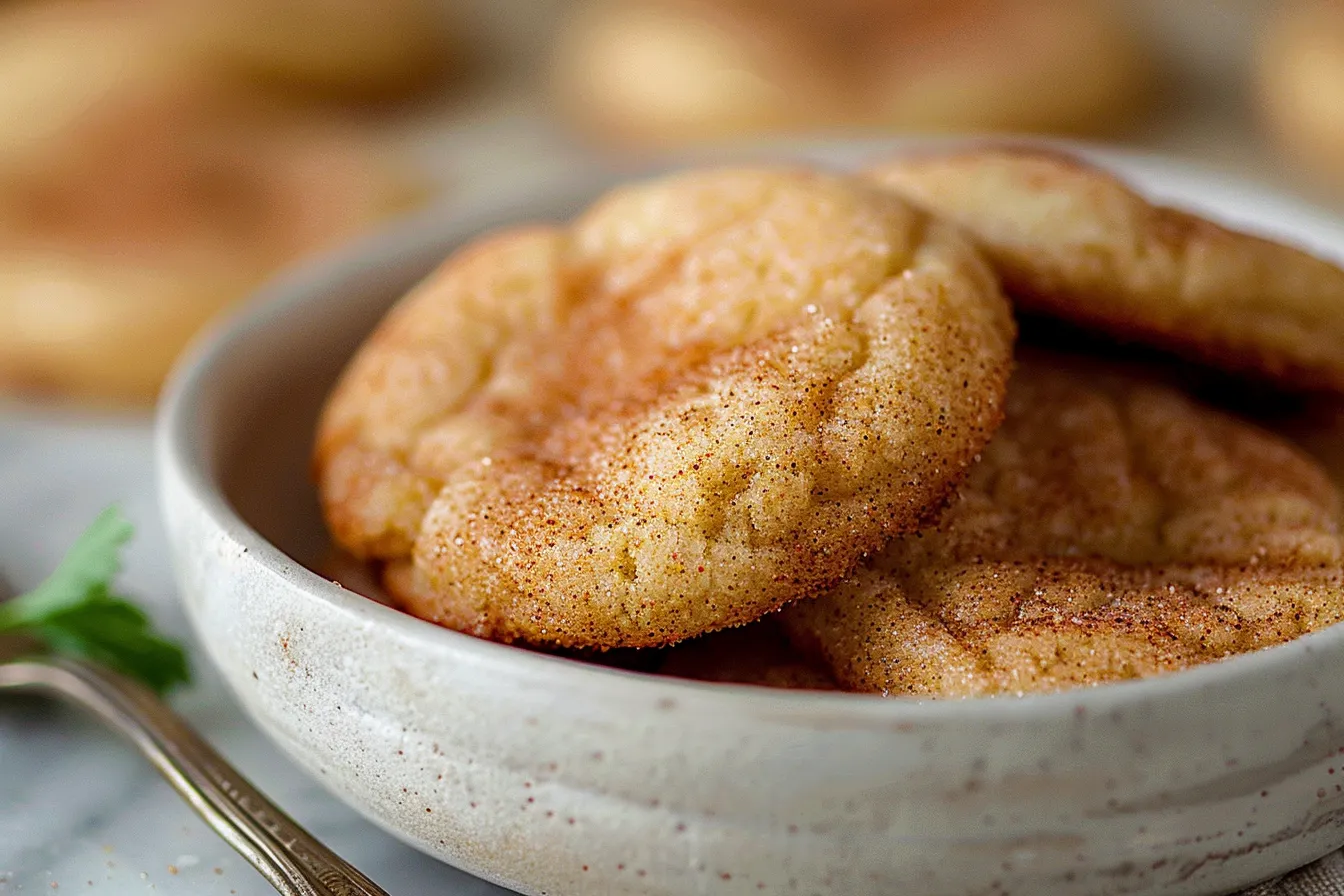
The scent of cinnamon sugar swirling through the air always takes me back to my grandmother’s kitchen in Waco. She made the best snickerdoodles, those soft, chewy cookies with the perfect tang. I’ve spent years perfecting her recipe, tweaking it just so to get that melt-in-your-mouth texture and unforgettable flavor. This snickerdoodle recipe is truly special, and I’ve made it dozens of times in my own Texas kitchen. I promise you, this will be your go-to recipe for the best snickerdoodles you’ve ever tasted. Get ready for smiles all around!
Why This Recipe Works
As a busy mom of two, I need recipes that are quick, easy, and always a hit. This snickerdoodle recipe ticks all the boxes! I’ve meticulously tested every aspect to create a simple recipe that yields perfectly soft and chewy cookies every time. Here’s what makes it work:
- Quick to make: From start to finish, you can have a batch of warm snickerdoodles in under 30 minutes.
- Kid-approved: My kids devour these cookies. The cinnamon sugar coating is irresistible!
- Make-ahead option: You can easily make the dough ahead of time and bake the cookies whenever you’re ready.
- Simple ingredients: You probably already have most of the ingredients in your pantry.
Ingredients
- 1/2 cup (1 stick) unsalted butter, softened
- 3/4 cup granulated sugar
- 1/4 cup packed light brown sugar
- 1 large egg
- 1 teaspoon vanilla extract
- 1 1/2 cups all-purpose flour
- 1/2 teaspoon baking soda
- 1/4 teaspoon salt
- 2 tablespoons granulated sugar, for coating
- 2 teaspoons ground cinnamon, for coating
Ingredient Notes
Butter: Using softened butter is crucial for achieving the right texture. Make sure it’s not melted, just soft enough to cream with the sugars. I’ve found that using a good quality butter really enhances the overall flavor of the cookies.
Cream of Tartar: This is what gives snickerdoodles their signature tang and chewy texture. Don’t skip it! I get mine at the local grocery store but you can also buy it online
All-purpose flour: I use regular all-purpose flour for this recipe. If you want to use cake flour, reduce the amount by two tablespoons to prevent them from being too cakey.
Cinnamon: I like to use a good quality cinnamon like Saigon or Ceylon for the best flavor. But any ground cinnamon will work.
Step-by-Step Instructions
Step 1: Cream butter and sugars. In a large bowl, cream together the softened butter, granulated sugar, and brown sugar until light and fluffy, about 2-3 minutes. Using an electric mixer makes this process much easier, but you can definitely do it by hand.
Step 2: Add egg and vanilla. Beat in the egg and vanilla extract until well combined. Make sure to scrape down the sides of the bowl to ensure everything is mixed evenly.
Step 3: Combine dry ingredients. In a separate bowl, whisk together the flour, baking soda, cream of tartar, and salt.
Step 4: Gradually add dry ingredients to wet ingredients. Gradually add the dry ingredients to the wet ingredients, mixing until just combined. Be careful not to overmix, as this can result in tough cookies. The dough will be soft.
Step 5: Chill the dough. Cover the dough and chill in the refrigerator for at least 30 minutes. This step is important because it prevents the cookies from spreading too much during baking. I’ve found that chilling for longer, even overnight, makes the cookies even better!
Step 6: Preheat oven and prepare baking sheet. Preheat your oven to 375°F (190°C). Line a baking sheet with parchment paper.
Step 7: Mix cinnamon sugar coating. In a small bowl, combine the 2 tablespoons of granulated sugar and the ground cinnamon.
Step 8: Roll dough into balls. Roll the chilled dough into 1-inch balls. I use a cookie scoop to make sure they are all the same size.
Step 9: Coat in cinnamon sugar. Roll each ball in the cinnamon sugar mixture, coating it evenly. Place the coated balls on the prepared baking sheet, leaving about 2 inches between each cookie.
Step 10: Bake. Bake for 8-10 minutes, or until the edges are lightly golden and the centers are set. The cookies will look slightly puffy when you take them out of the oven. They flatten as they cool.
Step 11: Cool. Let the cookies cool on the baking sheet for a few minutes before transferring them to a wire rack to cool completely.
Expert Tips from My Kitchen
- Don’t overmix the dough: Overmixing develops the gluten in the flour, resulting in tough cookies. Mix until just combined.
- Chill the dough: Chilling the dough is essential for preventing the cookies from spreading too much during baking. Don’t skip this step!
- Use room temperature ingredients: Using room temperature butter and egg helps the ingredients emulsify properly, resulting in a smoother dough.
- Even coating: Make sure the cookies are evenly coated in the cinnamon sugar mixture for the best flavor and texture.
- Baking time: Keep a close eye on the cookies while they’re baking. They should be lightly golden around the edges and set in the center.
- Soft cookies: For softer cookies, slightly underbake them. They will continue to bake as they cool.
- Add a pinch of nutmeg: For a twist, add a pinch of ground nutmeg to the cinnamon sugar mixture.
Storage & Meal Prep
Storage: Store the cooled cookies in an airtight container at room temperature for up to 3 days. They are best enjoyed within the first 24 hours.
Freezing: You can freeze the baked cookies for up to 2 months. Let them thaw at room temperature before serving. I prefer to freeze the dough balls before baking.
Make-ahead: The dough can be made ahead of time and stored in the refrigerator for up to 2 days. Let it sit at room temperature for about 15 minutes before rolling into balls.
Meal Prep: You can measure out all of the dry ingredients and store them in a jar or container. When you’re ready to bake, simply add the wet ingredients. This is a great way to save time on busy weeknights. My kids love helping with this step!
Substitutions & Variations
Gluten-free: Substitute the all-purpose flour with a gluten-free all-purpose flour blend. I recommend using a blend that contains xanthan gum for the best texture. I’ve tested this with Bob’s Red Mill Gluten Free 1-to-1 Baking Flour with good results.
Dairy-free: Use a dairy-free butter substitute in place of the butter. Make sure to use a brand that is designed for baking, as some dairy-free butter substitutes can be quite oily.
Less Sugar: Reduce the amount of sugar in the dough and coating by 1/4 cup each. This will still be sweet enough.
Lemon Snickerdoodles: Add 1 tablespoon of lemon zest to the dough for a citrusy twist. I haven’t personally tried this variation, but I think it would be delicious!
Chocolate Chip Snickerdoodles: Add 1/2 cup of chocolate chips to the dough for a chocolatey treat.
Frequently Asked Questions
Can I use shortening instead of butter?
While I personally prefer the flavor of butter, you can substitute shortening for butter in this recipe. The texture of the cookies will be slightly different they may be a bit more cakey and less chewy. Make sure to use a good quality shortening.
Why are my snickerdoodles flat?
Flat snickerdoodles can be caused by several factors, including using melted butter instead of softened butter, not chilling the dough long enough, or overmixing the dough. Make sure to follow the recipe carefully and avoid these common mistakes.
Can I freeze the snickerdoodle dough?
Yes, you can freeze the snickerdoodle dough. Roll the dough into balls, coat them in the cinnamon sugar mixture, and place them on a baking sheet lined with parchment paper. Freeze for about 2 hours, or until solid. Then, transfer the frozen dough balls to a freezer bag or airtight container. They can be stored in the freezer for up to 2 months. When you’re ready to bake, simply bake the frozen dough balls for a few minutes longer than the recipe calls for.
How do I keep my snickerdoodles soft?
To keep your snickerdoodles soft, store them in an airtight container at room temperature. You can also add a slice of bread to the container to help absorb moisture. Avoid storing them in the refrigerator, as this can dry them out.
Can kids help make this recipe?
Absolutely! This recipe is perfect for getting kids involved in the kitchen. They can help measure ingredients, mix the dough, roll the dough into balls, and coat them in the cinnamon sugar mixture. It’s a fun and delicious way to spend time together as a family.
How do I know when the snickerdoodles are done?
The snickerdoodles are done when the edges are lightly golden and the centers are set. They will look slightly puffy when you take them out of the oven, but they will flatten as they cool. If you’re unsure, you can insert a toothpick into the center of a cookie. If it comes out clean, the cookies are done.
Serving Suggestions
Serve these warm snickerdoodles with a glass of cold milk or a scoop of vanilla ice cream. They are also delicious with a cup of coffee or tea. For a fun presentation, dust the cookies with a little extra cinnamon sugar before serving. These are great for parties, potlucks, or just a simple treat for the family.
And there you have it my family’s favorite snickerdoodle recipe, straight from my Texas kitchen to yours! I hope this recipe brings as much joy to your family as it has to mine. Snickerdoodles are more than just cookies; they’re a warm hug in every bite, a sweet memory in the making. I encourage you to try this recipe and share your results in the comments below. I’d love to hear how they turned out! For more family-friendly recipes and baking tips, be sure to visit FamiliesRecipes.com and sign up for our newsletter. Happy baking, y’all!
PrintThe BEST Snickerdoodle Recipe

Bake The BEST Snickerdoodle Recipe ever Soft chewy and familyapproved tested in my Texas kitchen My kids love this homemade comfort food Get the recipe
- Prep Time: 15 minutes
- Cook Time: 10 minutes
- Total Time: 25 minutes
- Yield: About 24 cookies
- Category: Cookie
- Cuisine: American
Ingredients
- 1/2 cup (1 stick) unsalted butter, softened
- 3/4 cup granulated sugar
- 1/4 cup packed light brown sugar
- 1 large egg
- 1 teaspoon vanilla extract
- 1 1/2 cups all-purpose flour
- 1/2 teaspoon baking soda
- 1/4 teaspoon salt
- 2 tablespoons granulated sugar, for coating
- 2 teaspoons ground cinnamon, for coating
Instructions
- Cream butter and sugars. In a large bowl, cream together the softened butter, granulated sugar, and brown sugar until light and fluffy, about 2-3 minutes.
- Add egg and vanilla. Beat in the egg and vanilla extract until well combined.
- Combine dry ingredients. In a separate bowl, whisk together the flour, baking soda, cream of tartar, and salt.
- Gradually add dry ingredients to wet ingredients. Gradually add the dry ingredients to the wet ingredients, mixing until just combined. Be careful not to overmix.
- Chill the dough. Cover the dough and chill in the refrigerator for at least 30 minutes.
- Preheat oven and prepare baking sheet. Preheat your oven to 375°F (190°C). Line a baking sheet with parchment paper.
- Mix cinnamon sugar coating. In a small bowl, combine the 2 tablespoons of granulated sugar and the ground cinnamon.
- Roll dough into balls. Roll the chilled dough into 1-inch balls.
- Coat in cinnamon sugar. Roll each ball in the cinnamon sugar mixture, coating it evenly. Place the coated balls on the prepared baking sheet, leaving about 2 inches between each cookie.
- Bake. Bake for 8-10 minutes, or until the edges are lightly golden and the centers are set.
- Cool. Let the cookies cool on the baking sheet for a few minutes before transferring them to a wire rack to cool completely.
Notes
This snickerdoodle recipe is truly special, with a melt-in-your-mouth texture and unforgettable flavor. Quick, easy, and kid-approved, these cookies are perfect for any occasion.
