
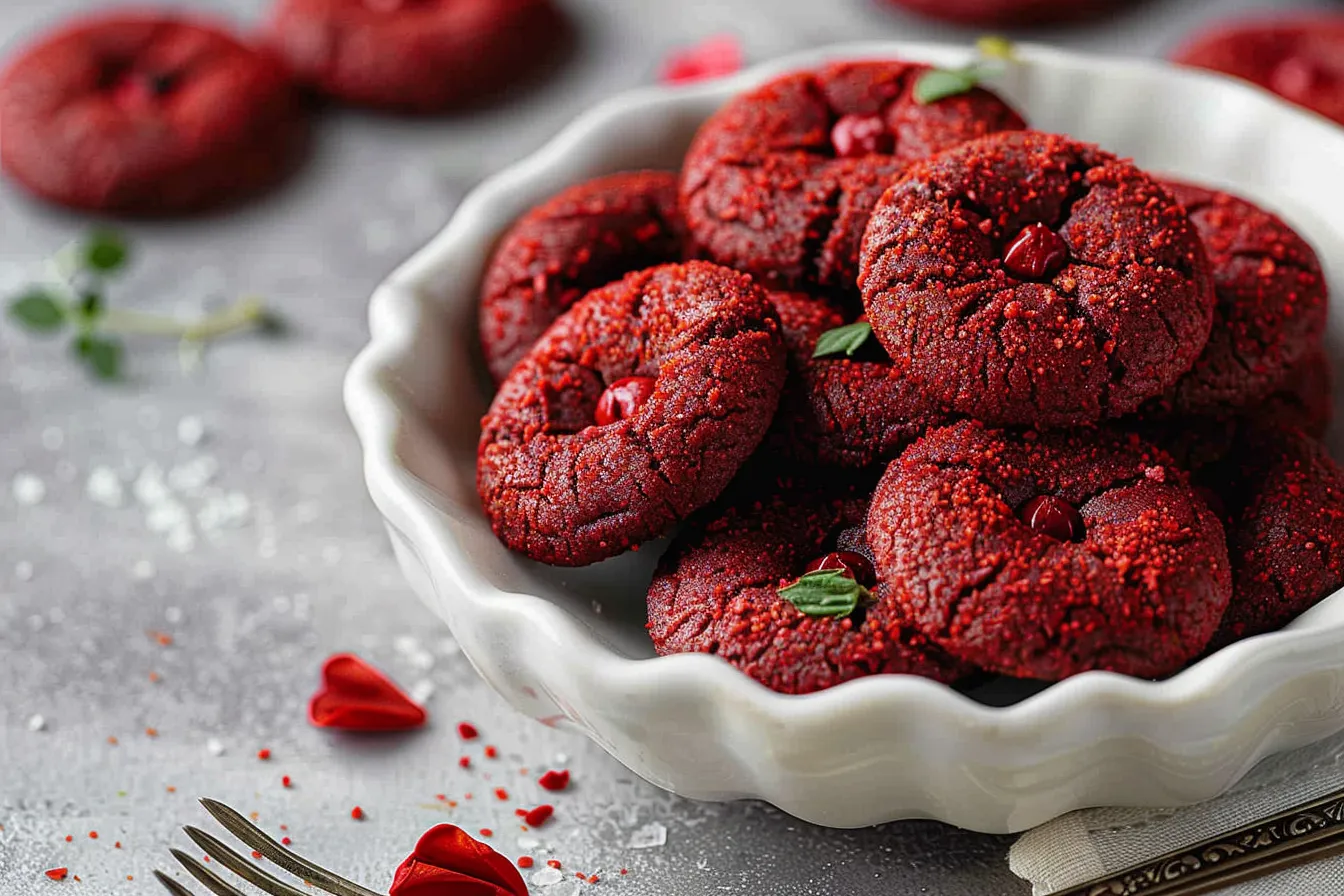
The first time I saw these Red Velvet Blossoms Cookies, it was at Sarah’s church bake sale last Christmas. The bright red cookie, the soft, pillowy texture, and that Hershey’s Kiss nestled right in the center – it was pure holiday magic! I knew I had to recreate them. Since then, I’ve made these beauties at least a dozen times in my Texas kitchen, tweaking the recipe until it’s just right. These red velvet cookies are the perfect blend of chewy, sweet, and slightly tangy, and they’re always a hit with my family. Trust me, if you’re looking for a festive and delicious cookie that’s sure to impress, you’ve come to the right place!
Why This Recipe Works
Let’s be honest, as a busy mom, I don’t have time for complicated recipes. That’s why I love these Red Velvet Blossoms Cookies – they’re surprisingly easy to make, even with little helpers in the kitchen! Here’s what makes them a winner:
- Quick and Easy: These cookies come together in under an hour, from start to finish.
- Kid-Approved: My kids adore helping me unwrap the Hershey’s Kisses and press them into the warm cookies. It’s a fun family activity.
- Make-Ahead Friendly: You can easily make the dough ahead of time and bake the cookies later. Perfect for busy weeknights or holiday gatherings.
Ingredients
- 2 ½ cups all-purpose flour
- 1 teaspoon baking soda
- ½ teaspoon salt
- ½ cup (1 stick) unsalted butter, softened
- ¾ cup granulated sugar
- ¾ cup packed light brown sugar
- 2 large eggs
- 1 teaspoon vanilla extract
- 1 ounce (2 tablespoons) red food coloring
- 1 tablespoon unsweetened cocoa powder
- 1 cup buttermilk
- About 48 Hershey’s Kisses, unwrapped
Ingredient Notes
Let’s talk ingredients! A few key things here can really impact your Red Velvet Blossoms Cookies:
- Red Food Coloring: Gel food coloring will give you the most vibrant red color. I prefer using a gel-based coloring as it doesn’t thin out the batter like liquid coloring can.
- Buttermilk: Don’t skip the buttermilk! It adds that signature tang that defines red velvet flavor. If you don’t have buttermilk on hand, you can make a quick substitute by adding 1 tablespoon of white vinegar or lemon juice to a measuring cup and then filling it with milk to equal 1 cup. Let it sit for 5 minutes before using.
- Hershey’s Kisses: While classic milk chocolate Kisses are my go-to, feel free to get creative! Try dark chocolate, caramel-filled, or even candy cane Kisses for a festive twist.
Step-by-Step Instructions
Okay, y’all, let’s get baking! These instructions are straightforward, I promise. Just follow along, and you’ll have a batch of beautiful Red Velvet Blossoms Cookies in no time.
- Step 1: Preheat and Prep. Preheat your oven to 375°F (190°C). Line baking sheets with parchment paper. This prevents sticking and makes cleanup a breeze.
- Step 2: Whisk Dry Ingredients. In a medium bowl, whisk together the flour, baking soda, and salt. Set aside.
- Step 3: Cream Butter and Sugars. In a large bowl, cream together the softened butter, granulated sugar, and brown sugar until light and fluffy. This usually takes about 3-5 minutes with an electric mixer.
- Step 4: Add Eggs and Vanilla. Beat in the eggs one at a time, then stir in the vanilla extract. Make sure everything is well combined.
- Step 5: Mix in Red Food Coloring and Cocoa Powder. Add the red food coloring and cocoa powder to the butter mixture and beat until evenly colored.
- Step 6: Alternate Adding Dry and Wet Ingredients. Gradually add the dry ingredients to the wet ingredients, alternating with the buttermilk, beginning and ending with the dry ingredients. Mix until just combined. Be careful not to overmix!
- Step 7: Chill the Dough (Important!). Cover the dough and chill in the refrigerator for at least 30 minutes. This step is crucial! Chilling the dough prevents the cookies from spreading too thin while baking. I sometimes chill it for up to an hour for even better results.
- Step 8: Shape the Cookies. Roll the chilled dough into 1-inch balls. Place them on the prepared baking sheets, leaving about 2 inches between each cookie.
- Step 9: Bake. Bake for 8-10 minutes, or until the edges are set but the centers are still slightly soft. After testing this several times, I learned that 9 minutes is the sweet spot in my oven!
- Step 10: Add the Kisses. Remove the cookies from the oven and immediately press a Hershey’s Kiss into the center of each cookie. Don’t wait too long, or the cookies will start to harden.
- Step 11: Cool. Let the cookies cool on the baking sheets for a few minutes before transferring them to a wire rack to cool completely.
Expert Tips from My Kitchen
Here are a few tips and tricks I’ve learned along the way to help you bake the perfect Red Velvet Blossoms Cookies every time:
- Don’t Overmix the Dough: Overmixing develops the gluten in the flour, resulting in tough cookies. Mix until just combined.
- Chill the Dough: I can’t stress this enough! Chilling the dough is essential for preventing the cookies from spreading too thin.
- Use Parchment Paper: Parchment paper makes cleanup a breeze and prevents the cookies from sticking to the baking sheets.
- Don’t Overbake: Overbaked cookies will be dry and crumbly. Bake until the edges are set but the centers are still slightly soft.
- Press the Kisses in Immediately: Press the Hershey’s Kisses into the cookies as soon as they come out of the oven. If you wait too long, the cookies will harden, and the Kisses won’t adhere properly.
- Kid-Friendly Fun: Let your kids help unwrap the Hershey’s Kisses and press them into the cookies. It’s a fun and easy way to get them involved in the baking process.
- For extra fudgy cookies: Use melted butter instead of softened butter!
Storage & Meal Prep
These Red Velvet Blossoms Cookies are best enjoyed fresh, but they can also be stored for later. Here’s how:
- Storage: Store the cookies in an airtight container at room temperature for up to 3 days.
- Freezing: For longer storage, you can freeze the cookies in an airtight container for up to 2 months. Let them thaw at room temperature before serving.
- Make-Ahead: You can make the cookie dough ahead of time and store it in the refrigerator for up to 2 days. Just be sure to bring it to room temperature slightly before rolling and baking.
Substitutions & Variations
Want to switch things up a bit? Here are a few substitutions and variations you can try:
- Gluten-Free: Use a gluten-free all-purpose flour blend in place of the regular flour. I’ve had good results with Bob’s Red Mill Gluten-Free 1-to-1 Baking Flour.
- Dairy-Free: Use a dairy-free butter substitute and dairy-free buttermilk (made with almond milk or soy milk) in place of the regular butter and buttermilk.
- Chocolate Chips: Instead of Hershey’s Kisses, try using chocolate chips. Milk chocolate, dark chocolate, or even white chocolate chips would be delicious.
- Seasonal Flavors: For a festive twist, add a pinch of cinnamon or nutmeg to the dough. You could also use peppermint extract instead of vanilla extract for a holiday flavor.
Frequently Asked Questions
Can I make this dough ahead of time?
Absolutely! In fact, I often recommend it. You can prepare the dough, wrap it tightly in plastic wrap, and refrigerate it for up to 48 hours. This actually helps the flavors meld together even more! Just let it sit at room temperature for about 15-20 minutes before rolling into balls.
How do I know when the cookies are done?
The cookies are done when the edges are set and the centers are still slightly soft. They will continue to set up as they cool. Be careful not to overbake them, or they will be dry and crumbly.
Can I use a different type of chocolate kiss?
Of course! Get creative with your Hershey’s Kisses. Dark chocolate, caramel-filled, or even the seasonal varieties like candy cane or pumpkin spice would all be delicious. It’s a fun way to customize the recipe!
What if I don’t have buttermilk?
No problem! You can easily make a buttermilk substitute by adding 1 tablespoon of white vinegar or lemon juice to a measuring cup and then filling it with milk to equal 1 cup. Let it sit for 5 minutes before using. This will give you the same tangy flavor as buttermilk.
Are these cookies kid-friendly?
Definitely! My kids love these cookies, and they enjoy helping me make them. Unwrapping the Hershey’s Kisses and pressing them into the cookies is a fun activity for little hands.
Can I freeze these cookies?
Yes, you can! Once the cookies are completely cooled, place them in a freezer-safe bag or container. They can be frozen for up to 2 months. When you’re ready to enjoy them, thaw them at room temperature.
Why did my cookies spread too thin?
This is usually because the dough wasn’t chilled long enough, or the oven temperature was too low. Make sure to chill the dough for at least 30 minutes (or even longer!) and ensure your oven is properly preheated before baking.
Serving Suggestions
These Red Velvet Blossoms Cookies are delicious on their own, but here are a few ideas for serving them:
- Serve them with a glass of cold milk or a cup of hot cocoa.
- Package them up in a cute box or bag for a homemade gift.
- Add them to a holiday cookie platter.
- Crumble them over ice cream or yogurt.
I hope y’all give these Red Velvet Blossoms Cookies a try! They’re the perfect treat for holidays, bake sales, or just a cozy afternoon with the family. They truly are a taste of Texas comfort, made with love (and a little bit of red food coloring!). Don’t forget to snap a photo and share your creations with me in the comments below. And while you’re here, be sure to check out some of my other family-favorite cookie recipes on FamiliesRecipes.com! Happy baking!
`
Easy Red Velvet Blossoms Cookies

Bake easy Red Velvet Blossoms Cookies a perfect familyapproved treat from my Texas kitchen These festive kidapproved cookies are so simple Get the recipe
- Prep Time: 20 minutes
- Cook Time: 10 minutes
- Total Time: 50 minutes
- Yield: 4 dozen
- Category: Cookie
- Cuisine: American
Ingredients
- 2 ½ cups all-purpose flour
- 1 teaspoon baking soda
- ½ teaspoon salt
- ½ cup (1 stick) unsalted butter, softened
- ¾ cup granulated sugar
- ¾ cup packed light brown sugar
- 2 large eggs
- 1 teaspoon vanilla extract
- 1 ounce (2 tablespoons) red food coloring
- 1 tablespoon unsweetened cocoa powder
- 1 cup buttermilk
- About 48 Hershey’s Kisses, unwrapped
Instructions
- Preheat your oven to 375°F (190°C). Line baking sheets with parchment paper.
- In a medium bowl, whisk together the flour, baking soda, and salt. Set aside.
- In a large bowl, cream together the softened butter, granulated sugar, and brown sugar until light and fluffy.
- Beat in the eggs one at a time, then stir in the vanilla extract. Make sure everything is well combined.
- Add the red food coloring and cocoa powder to the butter mixture and beat until evenly colored.
- Gradually add the dry ingredients to the wet ingredients, alternating with the buttermilk, beginning and ending with the dry ingredients. Mix until just combined. Be careful not to overmix!
- Cover the dough and chill in the refrigerator for at least 30 minutes.
- Roll the chilled dough into 1-inch balls. Place them on the prepared baking sheets, leaving about 2 inches between each cookie.
- Bake for 8-10 minutes, or until the edges are set but the centers are still slightly soft.
- Remove the cookies from the oven and immediately press a Hershey’s Kiss into the center of each cookie.
- Let the cookies cool on the baking sheets for a few minutes before transferring them to a wire rack to cool completely.
Notes
Festive and delicious Red Velvet Blossoms Cookies with a Hershey’s Kiss in the center. Perfect for holidays, bake sales, or a cozy afternoon with the family!
