
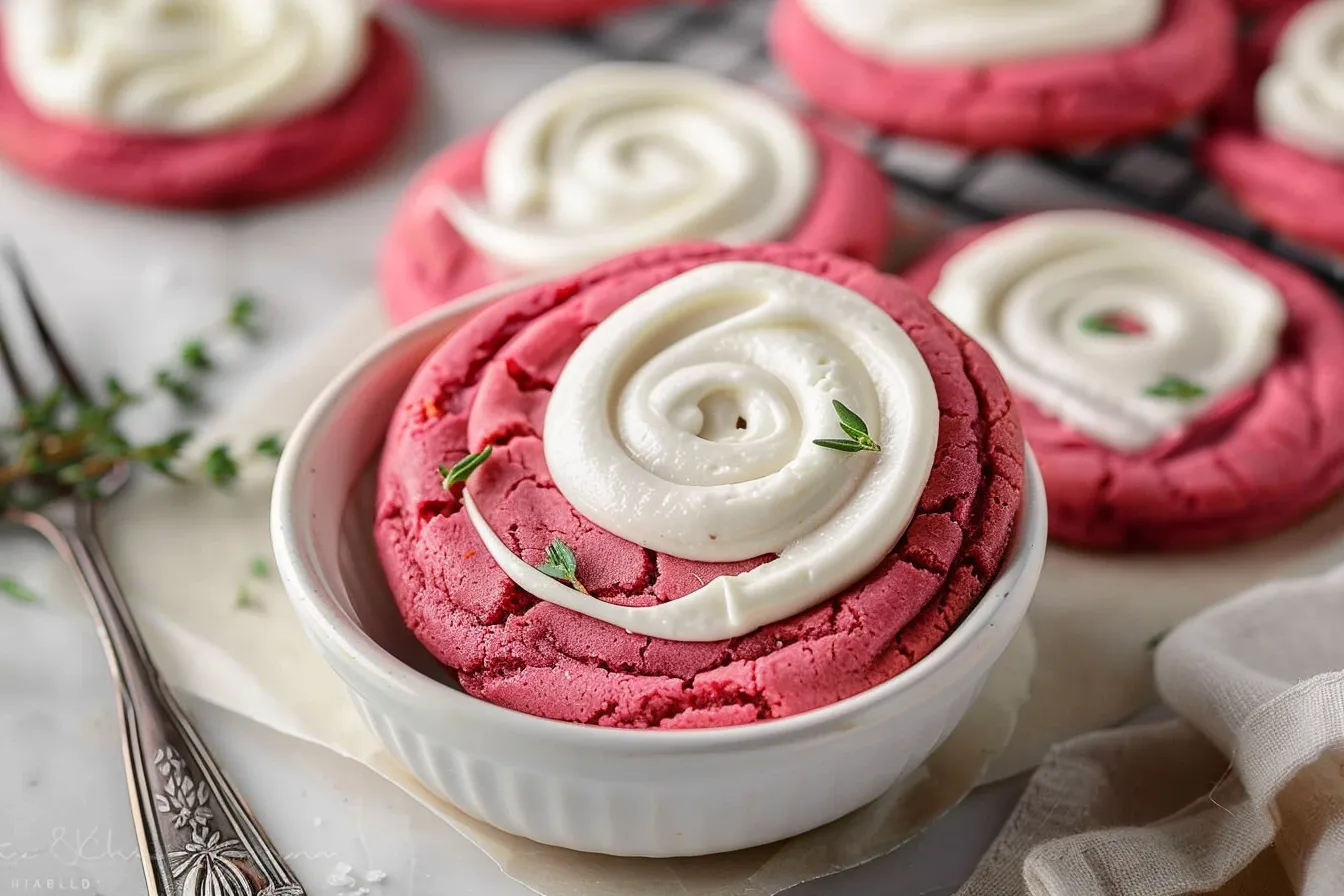
Y’all, there’s just something about a soft, chewy cookie with a tangy cream cheese frosting that screams comfort food, isn’t there? These Crumbl-inspired pink velvet cookies have been a huge hit in my kitchen. My little ones, bless their hearts, go absolutely bonkers for the bright color and that creamy frosting. I’ve probably baked these about a half dozen times in the last month alone, tweaking the recipe each time to get it just right. I promise, this recipe will give you bakery-worthy cookies without any fuss. Get ready for a simple, step-by-step guide to delicious, homemade happiness!
Why This Recipe Works
As a busy mom, I need recipes that are quick, easy, and reliable. This pink velvet cookie recipe ticks all those boxes! Here’s why it’s a winner:
- Simple Ingredients: No fancy stuff here. You probably already have most of these ingredients in your pantry.
- Kid-Approved: The vibrant pink color and sweet frosting make these cookies irresistible to kids (and adults!).
- Make-Ahead Friendly: You can prepare the dough in advance and bake them fresh when you need a treat. The frosting also holds up well in the fridge.
Ingredients
- 1 ½ cups all-purpose flour
- ½ teaspoon baking soda
- ½ teaspoon salt
- ½ cup (1 stick) unsalted butter, softened
- ¾ cup granulated sugar
- ¼ cup packed light brown sugar
- 1 large egg
- 1 teaspoon vanilla extract
- 1 tablespoon buttermilk
- 2 tablespoons red food coloring
Ingredient Notes
Let’s talk ingredients! Here are a few things to keep in mind:
- Butter: Make sure your butter is softened, but not melted. It should be soft enough to easily cream with the sugars.
- Buttermilk: Buttermilk adds a lovely tang and helps to create a tender cookie. If you don’t have buttermilk on hand, you can make a quick substitute by adding 1 teaspoon of lemon juice or white vinegar to a liquid measuring cup, then filling it with milk to reach 1 tablespoon. Let it sit for a few minutes to curdle before using.
- Red Food Coloring: Gel food coloring will give you the most vibrant color without thinning the batter too much. Liquid food coloring works too, but you might need to use a little more.
Step-by-Step Instructions
Let’s get baking! Follow these simple steps for perfect pink velvet cookies every time.
- Step 1: Preheat and Prep. Preheat your oven to 350°F (175°C). Line a baking sheet with parchment paper or a silicone baking mat. This will prevent the cookies from sticking and make cleanup a breeze.
- Step 2: Combine Dry Ingredients. In a medium bowl, whisk together the flour, baking soda, and salt. Whisking ensures everything is evenly distributed, which is important for proper leavening. Set aside.
- Step 3: Cream Butter and Sugars. In a large bowl, cream together the softened butter, granulated sugar, and brown sugar until light and fluffy. This usually takes about 3-5 minutes with an electric mixer. The mixture should be pale and airy.
- Step 4: Add Wet Ingredients. Beat in the egg and vanilla extract until well combined. Then, add the buttermilk and red food coloring. Mix until everything is evenly colored. Don’t worry if the batter looks a little curdled at this point; it will come together when you add the dry ingredients.
- Step 5: Combine Wet and Dry. Gradually add the dry ingredients to the wet ingredients, mixing on low speed until just combined. Be careful not to overmix! Overmixing can lead to tough cookies.
- Step 6: Scoop and Bake. Drop rounded tablespoons of dough onto the prepared baking sheet, leaving about 2 inches between each cookie. Bake for 9-11 minutes, or until the edges are set and the centers are still slightly soft.
- Step 7: Cool and Frost. Let the cookies cool on the baking sheet for a few minutes before transferring them to a wire rack to cool completely. While the cookies are cooling, prepare the cream cheese frosting.
Cream Cheese Frosting
- 4 ounces cream cheese, softened
- ½ cup (1 stick) unsalted butter, softened
- 3 cups powdered sugar
- 1 teaspoon vanilla extract
- 1-2 tablespoons milk or heavy cream
- Step 8: Make the Frosting. In a large bowl, beat together the softened cream cheese and butter until smooth and creamy. Gradually add the powdered sugar, mixing on low speed until combined. Beat in the vanilla extract. Add milk or heavy cream, one tablespoon at a time, until the frosting reaches your desired consistency.
- Step 9: Frost the Cookies. Once the cookies are completely cool, frost them generously with the cream cheese frosting. You can use a knife, a spatula, or a piping bag for a fancier look.
- Step 10: Enjoy! These cookies are best enjoyed fresh, but they can also be stored in an airtight container in the refrigerator for up to 3 days.
Expert Tips from My Kitchen
Over the years of making these, I have learned a few things to help you get the best result.
- Don’t Overbake: These cookies are best when they’re soft and chewy, so be careful not to overbake them. The centers should still be slightly soft when you take them out of the oven.
- Chill the Dough: If you have time, chilling the dough for 30 minutes before baking can help prevent the cookies from spreading too much.
- Room Temperature Cream Cheese: Make sure your cream cheese is completely softened before making the frosting to avoid lumps.
- Add Sprinkles: For extra fun, add sprinkles to the frosting before it sets.
- Adjust Sweetness: If you prefer a less sweet frosting, you can reduce the amount of powdered sugar.
- Don’t Skip the Parchment Paper: Seriously, it makes cleanup so much easier, and the cookies slide right off.
- Cool Completely: Frosting warm cookies is a recipe for melty disaster. Be patient!
Storage & Meal Prep
These cookies are fantastic for meal prepping or simply enjoying throughout the week.
- Storage: Store frosted cookies in an airtight container in the refrigerator for up to 3 days. Unfrosted cookies can be stored at room temperature for up to 2 days.
- Freezing: You can freeze the baked cookies (frosted or unfrosted) for up to 2 months. Thaw in the refrigerator before serving. You can also freeze the dough. Scoop the dough into balls, place them on a baking sheet, and freeze until solid. Then, transfer the frozen dough balls to a freezer bag. When ready to bake, simply bake from frozen, adding a few extra minutes to the baking time.
- Make-Ahead: The dough can be made up to 2 days in advance and stored in the refrigerator. The frosting can also be made a day in advance and stored in the refrigerator. Let the frosting come to room temperature before using.
Substitutions & Variations
Want to switch things up or need to accommodate dietary restrictions? Here are a few ideas:
- Gluten-Free: I haven’t personally tested this, but you can try using a gluten-free all-purpose flour blend. Be sure to choose a blend that contains xanthan gum for best results.
- Dairy-Free: Use a dairy-free butter substitute and dairy-free cream cheese for a dairy-free version. Almond milk can replace the buttermilk.
- Chocolate Chips: Add 1/2 cup of white chocolate chips or semi-sweet chocolate chips to the dough for a chocolatey twist.
- Almond Extract: Substitute ½ teaspoon of the vanilla extract with almond extract for a unique flavor.
Frequently Asked Questions
Can I make this ahead of time?
Absolutely! The cookie dough can be made up to 2 days in advance and stored in the refrigerator. Just be sure to bring it to room temperature slightly before scooping and baking. The frosting can also be made a day ahead and stored in the fridge.
How do I know when the cookies are done?
The cookies are done when the edges are set and the centers are still slightly soft. They will continue to set up as they cool on the baking sheet.
Can I use a different type of food coloring?
Yes, you can use any type of food coloring you like. Gel food coloring will give you the most vibrant color, but liquid food coloring will also work. Keep in mind that natural food coloring might not give you the same bright pink color.
Can I freeze these cookies?
Yes! You can freeze the baked cookies (frosted or unfrosted) for up to 2 months. Just make sure to store them in an airtight container to prevent freezer burn. Thaw in the refrigerator before serving.
Are these cookies kid-friendly?
Definitely! The bright pink color and sweet frosting make these cookies a hit with kids. You can even get them involved in the baking process by letting them help with scooping the dough or adding sprinkles to the frosting.
What if my frosting is too thick?
If your frosting is too thick, add a tablespoon of milk or heavy cream at a time until it reaches your desired consistency.
What if my cookies are spreading too thin?
If your cookies are spreading too thin, try chilling the dough for 30 minutes before baking. You can also try adding a tablespoon or two of flour to the dough.
Serving Suggestions (Optional)
These pink velvet cookies are perfect on their own, but here are a few ideas to make them extra special:
- Serve with a glass of cold milk or a scoop of vanilla ice cream.
- Arrange them on a pretty platter for a party or gathering.
- Package them in a cute box or bag for a homemade gift.
- Add a sprinkle of edible glitter for a touch of sparkle.
Well, friends, I truly hope you give these pink velvet cookies a try. They’re not just a dessert; they’re a little slice of happiness, perfect for sharing with your loved ones. Don’t be shy about leaving a comment below – I’d love to hear how they turned out for you! And if you’re looking for more easy and delicious family recipes, be sure to sign up for my newsletter over at FamiliesRecipes.com. Happy baking, y’all!
PrintBest Crumbl Pink Velvet Cookies
Bake Crumbl Pink Velvet Cookies with Cream Cheese Frosting This familyapproved dessert is so easy to make and my kids love this Get the recipe
- Prep Time: 20 minutes
- Cook Time: 10 minutes
- Total Time: 30 minutes
- Yield: About 24 cookies
- Category: Dessert
- Cuisine: American
Ingredients
- 1 ½ cups all-purpose flour
- ½ teaspoon baking soda
- ½ teaspoon salt
- ½ cup (1 stick) unsalted butter, softened
- ¾ cup granulated sugar
- ¼ cup packed light brown sugar
- 1 large egg
- 1 teaspoon vanilla extract
- 1 tablespoon buttermilk
- 2 tablespoons red food coloring
- 4 ounces cream cheese, softened
- ½ cup (1 stick) unsalted butter, softened
- 3 cups powdered sugar
- 1 teaspoon vanilla extract
- 1–2 tablespoons milk or heavy cream
Instructions
- Preheat your oven to 350°F (175°C). Line a baking sheet with parchment paper or a silicone baking mat.
- In a medium bowl, whisk together the flour, baking soda, and salt. Set aside.
- In a large bowl, cream together the softened butter, granulated sugar, and brown sugar until light and fluffy.
- Beat in the egg and vanilla extract until well combined. Then, add the buttermilk and red food coloring. Mix until everything is evenly colored.
- Gradually add the dry ingredients to the wet ingredients, mixing on low speed until just combined. Be careful not to overmix!
- Drop rounded tablespoons of dough onto the prepared baking sheet, leaving about 2 inches between each cookie. Bake for 9-11 minutes, or until the edges are set and the centers are still slightly soft.
- Let the cookies cool on the baking sheet for a few minutes before transferring them to a wire rack to cool completely. While the cookies are cooling, prepare the cream cheese frosting.
- In a large bowl, beat together the softened cream cheese and butter until smooth and creamy. Gradually add the powdered sugar, mixing on low speed until combined. Beat in the vanilla extract. Add milk or heavy cream, one tablespoon at a time, until the frosting reaches your desired consistency.
- Once the cookies are completely cool, frost them generously with the cream cheese frosting. You can use a knife, a spatula, or a piping bag for a fancier look.
- Enjoy! These cookies are best enjoyed fresh, but they can also be stored in an airtight container in the refrigerator for up to 3 days.
Notes
Soft, chewy, and irresistibly pink velvet cookies topped with tangy cream cheese frosting. This Crumbl-inspired recipe is easy to make and a guaranteed hit with kids and adults!
