
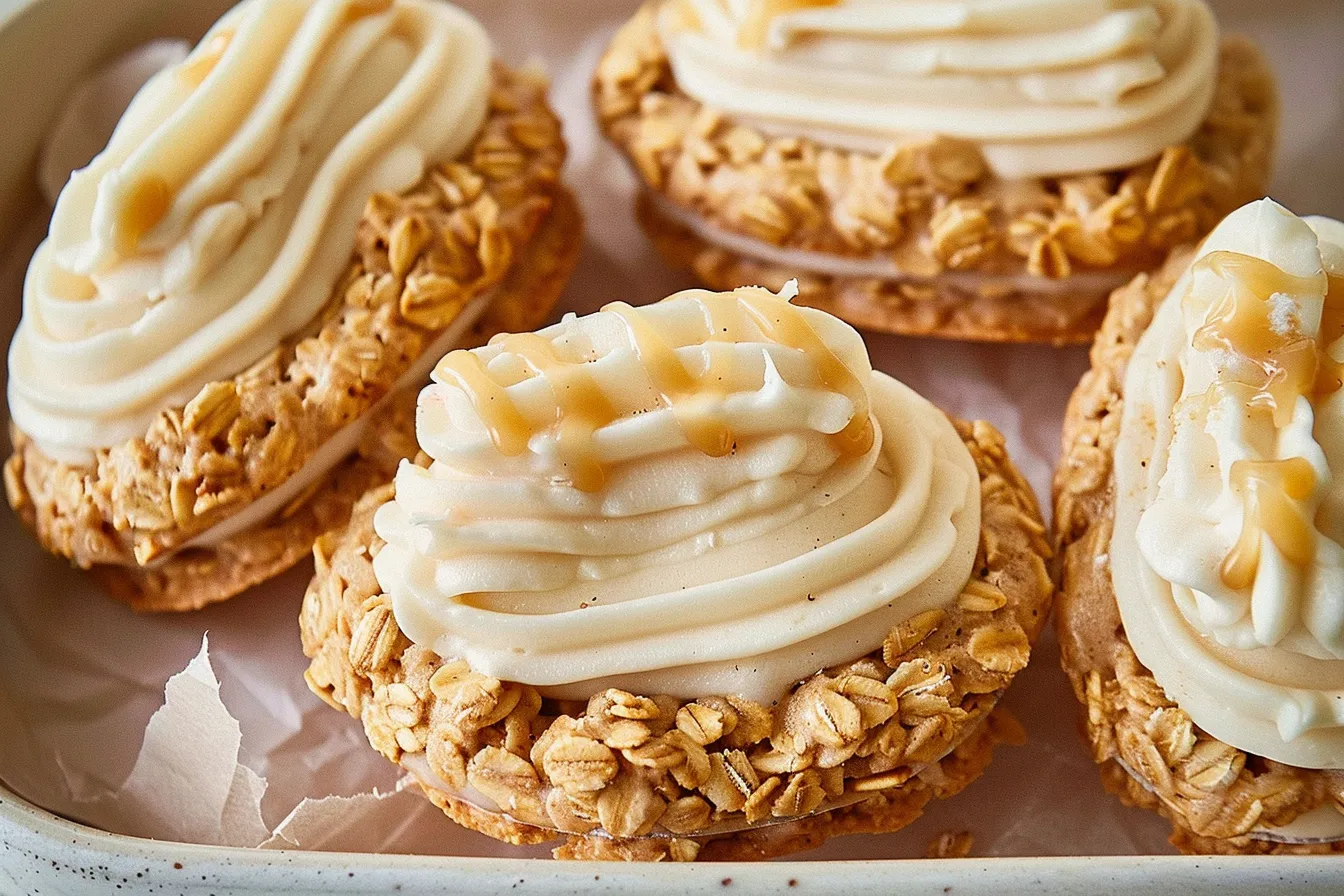
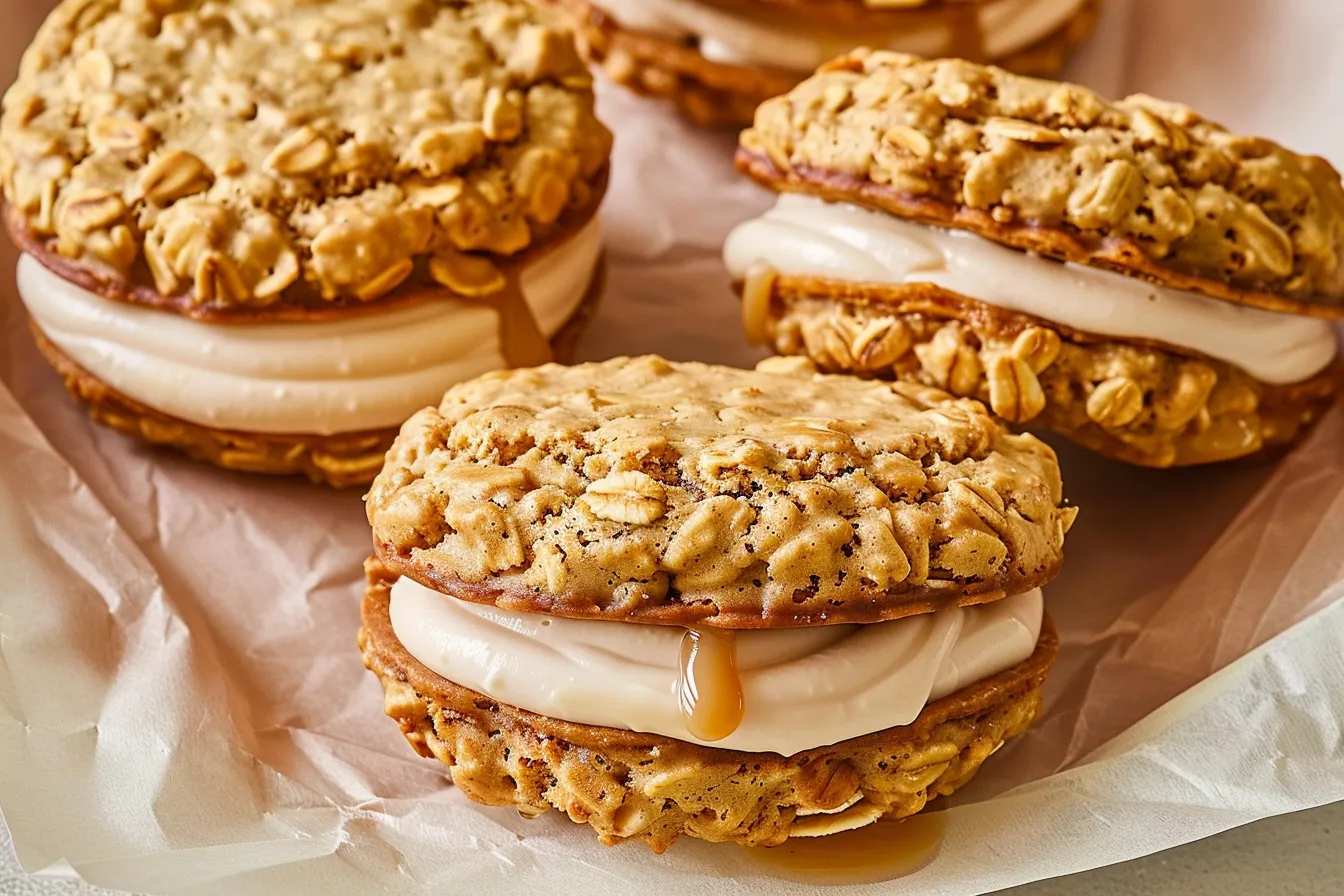
The aroma of caramel simmering on the stove always takes me back to my grandma’s kitchen in Waco. She made the best caramel candies, and these Oatmeal-Caramel Cream Pies are my little tribute to her. Picture this: a chewy oatmeal cookie crust, a luscious layer of caramel, and a cloud of whipped cream. It’s pure Texas comfort food, y’all! I’ve made these little beauties at least a dozen times in my own kitchen, tweaking and perfecting them for the easiest and most delicious results. And I promise you, these Oatmeal-Caramel Cream Pies will be a hit with your family, bringing a little bit of that Southern sweetness to your table.
Why This Recipe Works
Let’s be honest, sometimes we need a dessert that feels fancy but doesn’t require a culinary degree. These Oatmeal-Caramel Cream Pies are just that! Here’s why they’ll become a family favorite:
- Quick & Easy: From start to finish, these pies come together in under an hour. Perfect for busy weeknights or last-minute gatherings.
- Kid-Approved: My little ones practically inhale these. The chewy crust and sweet caramel are irresistible.
- Make-Ahead Friendly: You can bake the crusts and make the caramel sauce a day in advance, leaving you with only the whipped cream to assemble before serving.
Ingredients
- For the Oatmeal Cookie Crust:
- 1 cup all-purpose flour
- 1 cup rolled oats
- 1/2 cup packed brown sugar
- 1/2 teaspoon baking soda
- 1/4 teaspoon salt
- 1/2 cup (1 stick) unsalted butter, cold and cut into cubes
- 1/4 cup milk
- For the Caramel Filling:
- 1 cup granulated sugar
- 1/4 cup (1/2 stick) unsalted butter
- 1/2 cup heavy cream
- 1/4 teaspoon salt
- For the Whipped Cream:
- 1 cup heavy cream
- 2 tablespoons powdered sugar
- 1/2 teaspoon vanilla extract
Ingredient Notes
- Rolled Oats: Use old-fashioned rolled oats, not instant oats. They give the crust its signature chewy texture.
- Brown Sugar: Light or dark brown sugar works, but dark brown sugar will give the crust a richer, molasses-like flavor.
- Heavy Cream: Don’t substitute milk or half-and-half for the heavy cream in the caramel. It’s essential for that creamy, decadent texture.
- Salt: A little salt in both the crust and the caramel balances the sweetness and enhances the other flavors.
Step-by-Step Instructions
- Step 1: Make the Oatmeal Cookie Crust: Preheat your oven to 350°F (175°C). In a large bowl, whisk together the flour, rolled oats, brown sugar, baking soda, and salt.
- Step 2: Cut in the Butter: Add the cold, cubed butter to the dry ingredients. Use a pastry blender or your fingers to cut the butter into the flour mixture until it resembles coarse crumbs.
- Step 3: Add the Milk: Stir in the milk until the dough just comes together. It should be slightly crumbly but hold its shape when pressed.
- Step 4: Press into Pie Plates: Divide the dough evenly among six mini pie plates or tart pans. Press the dough firmly into the bottom and up the sides of each plate.
- Step 5: Bake the Crusts: Bake for 12-15 minutes, or until the crusts are golden brown and set. Let cool completely on a wire rack.
- Step 6: Make the Caramel Filling: While the crusts are cooling, make the caramel. In a medium saucepan, melt the granulated sugar over medium heat, stirring constantly with a wooden spoon or heat-resistant spatula.
- Step 7: Cook the Caramel: Continue to cook the sugar, stirring constantly, until it melts into a golden amber color. Be patient, it takes a few minutes, and watch closely to prevent burning.
- Step 8: Add the Butter: Remove the saucepan from the heat and immediately stir in the butter until it’s completely melted and smooth.
- Step 9: Add the Heavy Cream: Slowly pour in the heavy cream, stirring constantly. Be careful, as the mixture will bubble up vigorously.
- Step 10: Stir and Simmer: Return the saucepan to medium heat and cook, stirring constantly, until the caramel is smooth and thickened, about 2-3 minutes. Stir in the salt.
- Step 11: Fill the Crusts: Pour the caramel filling evenly into the cooled oatmeal cookie crusts.
- Step 12: Chill the Pies: Refrigerate the pies for at least 30 minutes to allow the caramel to set.
- Step 13: Make the Whipped Cream: While the pies are chilling, make the whipped cream. In a chilled bowl, beat the heavy cream with an electric mixer until soft peaks form.
- Step 14: Add Sugar and Vanilla: Add the powdered sugar and vanilla extract and continue to beat until stiff peaks form. Be careful not to overwhip.
- Step 15: Top and Serve: Spoon or pipe the whipped cream onto the chilled caramel pies. Serve immediately or chill for later.
Expert Tips from My Kitchen
- Preventing Soggy Crusts: To avoid soggy crusts, make sure the crusts are completely cool before adding the caramel filling. You can also brush the baked crusts with a thin layer of melted chocolate or butterscotch chips before filling to create a moisture barrier.
- Caramel Consistency: If your caramel is too thick, add a tablespoon of heavy cream at a time until it reaches your desired consistency. If it’s too thin, simmer it for a few more minutes, stirring constantly.
- Salted Caramel Variation: For a salted caramel variation, add a pinch of flaky sea salt on top of the caramel filling before chilling.
- Kid-Friendly Tip: Let the kids help press the dough into the pie plates. It’s a fun and easy way to get them involved in the baking process.
- Make-Ahead Tip: You can bake the crusts and make the caramel sauce up to 2 days in advance. Store them separately and assemble the pies just before serving.
- Whipped Cream Stability: To stabilize the whipped cream and prevent it from weeping, add a teaspoon of cornstarch or gelatin powder to the cream before beating.
Storage & Meal Prep
These Oatmeal-Caramel Cream Pies are best stored in the refrigerator. Cover them loosely with plastic wrap or place them in an airtight container. They will keep for up to 3 days. The crust may soften slightly over time, but they will still be delicious!
For meal prep, you can bake the crusts and make the caramel sauce up to 2 days in advance. Store them separately in airtight containers. Assemble the pies with the whipped cream just before serving to prevent the crust from getting soggy.
Substitutions & Variations
Want to put your own spin on these pies? Here are a few ideas:
- Gluten-Free: Use a gluten-free all-purpose flour blend in the crust. I recommend one that contains xanthan gum for the best texture.
- Dairy-Free: Substitute coconut oil for the butter in the crust and coconut cream for the heavy cream in the caramel and whipped cream.
- Chocolate Caramel: Add 2 tablespoons of unsweetened cocoa powder to the caramel sauce for a chocolatey twist.
- Nutty Caramel: Stir in 1/2 cup of chopped pecans or walnuts into the caramel sauce for added flavor and texture.
Frequently Asked Questions
Can I make this ahead?
Absolutely! The crusts and caramel can be made up to two days in advance. Store them separately and assemble with the whipped cream just before serving to keep the crust crisp.
How do I know when the caramel is done?
The caramel is done when it turns a golden amber color and reaches a temperature of 245°F (118°C) on a candy thermometer. If you don’t have a candy thermometer, look for a rich, deep golden color and a slightly thickened consistency.
Can I use store-bought caramel sauce?
While homemade caramel is best, you can use store-bought caramel sauce in a pinch. Choose a high-quality caramel sauce for the best flavor. You might want to simmer it briefly to thicken it up a bit before filling the crusts.
My caramel is grainy. What did I do wrong?
Grainy caramel is usually caused by undissolved sugar crystals. Make sure to stir the sugar constantly while it’s melting and avoid splashing sugar crystals onto the sides of the pan. Adding a tablespoon of lemon juice or corn syrup to the sugar can also help prevent crystallization.
Are these pies kid-friendly?
Yes! My kids love these pies. The chewy crust and sweet caramel are a winning combination. Just be mindful of the hot caramel when making them with little ones.
How do I prevent the whipped cream from deflating?
Make sure your bowl and beaters are chilled before whipping the cream. You can also add a teaspoon of cornstarch or gelatin powder to the cream before beating to stabilize it. Avoid overwhipping the cream, as this can cause it to become grainy and deflate.
Can I freeze these pies?
While you can freeze these pies, the texture of the crust and whipped cream may change slightly upon thawing. If you do freeze them, wrap them tightly in plastic wrap and then in foil. Thaw them in the refrigerator overnight.
Serving Suggestions
These Oatmeal-Caramel Cream Pies are delicious on their own, but here are a few serving suggestions to take them to the next level:
- Garnish: Sprinkle the pies with chopped pecans, a drizzle of caramel sauce, or a dusting of cocoa powder.
- Ice Cream: Serve with a scoop of vanilla ice cream or salted caramel gelato.
- Coffee: Pair them with a cup of hot coffee or a latte for a cozy treat.
- Portion Control: These mini pies are the perfect size for individual servings. They’re also great for potlucks and parties.
Oatmeal Caramel Cream Pies
Bake delightful OatmealCaramel Cream Pies with this easy familyapproved recipe from my Texas kitchen My kids love this homemade treat Get the recipe
- Prep Time: 20 minutes
- Cook Time: 25 minutes
- Total Time: 45 minutes
- Yield: 6 mini pies
- Category: Dessert
- Cuisine: American
Ingredients
- 1 cup all-purpose flour
- 1 cup rolled oats
- 1/2 cup packed brown sugar
- 1/2 teaspoon baking soda
- 1/4 teaspoon salt
- 1/2 cup (1 stick) unsalted butter, cold and cut into cubes
- 1/4 cup milk
- 1 cup granulated sugar
- 1/4 cup (1/2 stick) unsalted butter
- 1/2 cup heavy cream
- 1/4 teaspoon salt
- 1 cup heavy cream
- 2 tablespoons powdered sugar
- 1/2 teaspoon vanilla extract
Instructions
- Preheat your oven to 350°F (175°C). In a large bowl, whisk together the flour, rolled oats, brown sugar, baking soda, and salt.
- Add the cold, cubed butter to the dry ingredients. Use a pastry blender or your fingers to cut the butter into the flour mixture until it resembles coarse crumbs.
- Stir in the milk until the dough just comes together. It should be slightly crumbly but hold its shape when pressed.
- Divide the dough evenly among six mini pie plates or tart pans. Press the dough firmly into the bottom and up the sides of each plate.
- Bake for 12-15 minutes, or until the crusts are golden brown and set. Let cool completely on a wire rack.
- While the crusts are cooling, make the caramel. In a medium saucepan, melt the granulated sugar over medium heat, stirring constantly with a wooden spoon or heat-resistant spatula.
- Continue to cook the sugar, stirring constantly, until it melts into a golden amber color. Be patient, it takes a few minutes, and watch closely to prevent burning.
- Remove the saucepan from the heat and immediately stir in the butter until it’s completely melted and smooth.
- Slowly pour in the heavy cream, stirring constantly. Be careful, as the mixture will bubble up vigorously.
- Return the saucepan to medium heat and cook, stirring constantly, until the caramel is smooth and thickened, about 2-3 minutes. Stir in the salt.
- Pour the caramel filling evenly into the cooled oatmeal cookie crusts.
- Refrigerate the pies for at least 30 minutes to allow the caramel to set.
- While the pies are chilling, make the whipped cream. In a chilled bowl, beat the heavy cream with an electric mixer until soft peaks form.
- Add the powdered sugar and vanilla extract and continue to beat until stiff peaks form. Be careful not to overwhip.
- Spoon or pipe the whipped cream onto the chilled caramel pies. Serve immediately or chill for later.
Notes
Chewy oatmeal cookie crusts filled with luscious caramel and topped with a cloud of whipped cream. A taste of Texas comfort food!
