
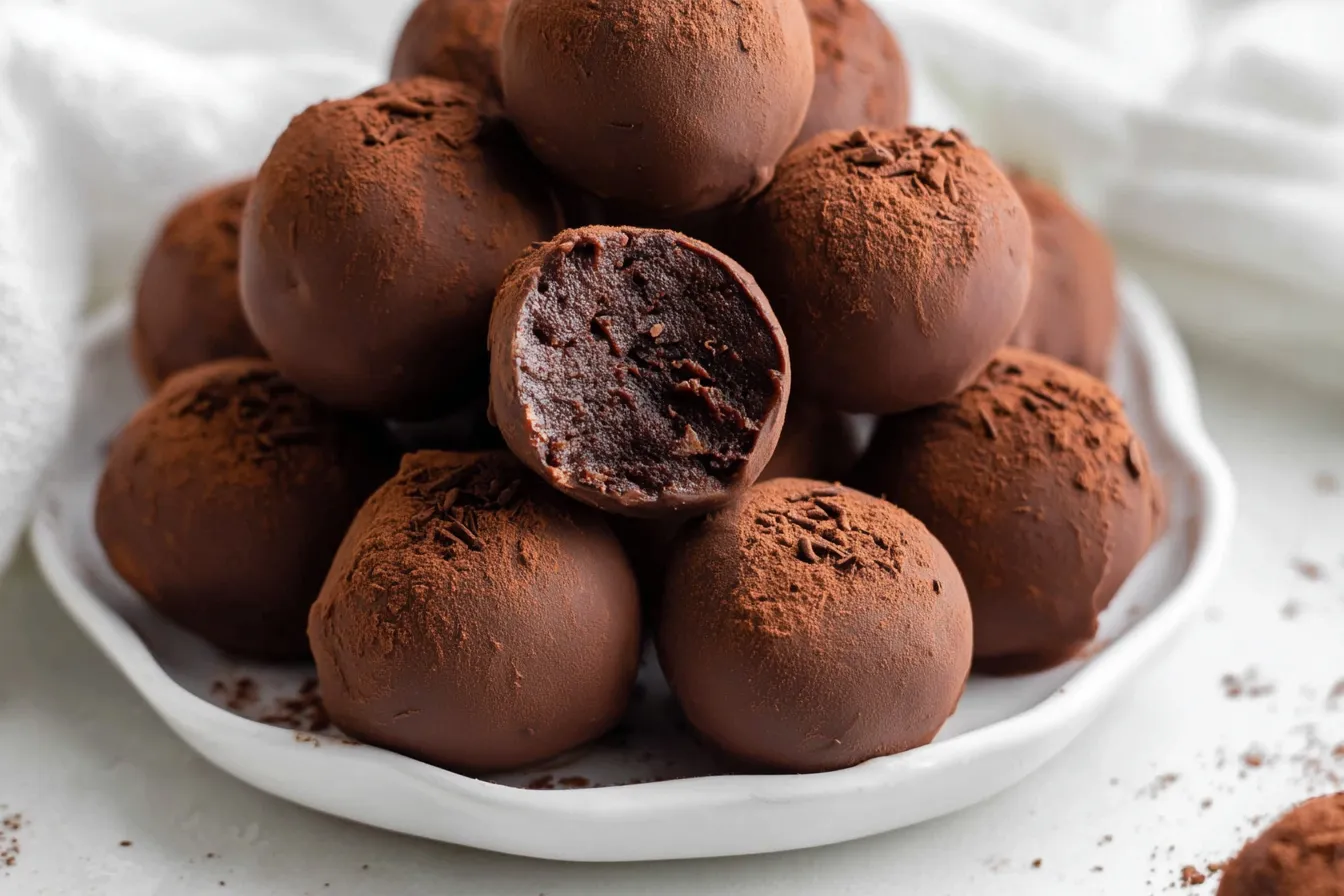
Imagine sinking your teeth into a rich, fudgy brownie truffle that melts in your mouth, leaving a trail of chocolate bliss. With fall in full swing, the craving for the comfort of chocolate desserts rises like the autumn temperatures. These brownie truffles not only satisfy that sweet tooth; they also capture the essence of the season. Picture yourself curled up on the couch, a cozy blanket draped over your legs, enjoying the warm, sweet aroma filling your kitchen as you craft these delightful treats. It’s not just about the dessert; it’s about creating a moment, sharing joy with loved ones, and indulging in simplicity.
My first encounter with brownie truffles was at a friend’s gathering, and from that moment, I was hooked. There’s something magical about combining the beloved brownie texture with the daintiness of a truffle. After countless kitchen experiments, I’ve mastered the delicate balance between rich chocolate and a melt-in-your-mouth texture. The rise of bite-sized desserts has made these truffles a trending favorite, perfectly suited for holiday gatherings, parties, or even just a quiet night in. Join me on this journey to create brownie truffles that blend sophistication with comfort.
Brownie Truffle Ingredients
- Butter: Adding moisture and richness, butter enhances the truffle’s fudgy texture. Opt for unsalted for better control over sweetness.
- Granulated sugar: This not only sweetens but also contributes to the crispy exterior.
- Brown sugar: The moisture content aids in creating a chewy, rich flavor profile.
- Cocoa powder: Essential for that deep chocolate flavor, cocoa gives the truffles their intense color.
- Eggs: Binding agents that provide a tender texture. You can use flaxseed meal for a vegan alternative.
- All-purpose flour: Just a bit is needed to stabilize the mixture without sacrificing the decadent feel.
- Chocolate chips or chunks: Melting chocolate adds that luxurious depth. Dark chocolate is preferable for a more intense taste.
- Optional toppings: Think crushed nuts, shredded coconut, or melted chocolate for that extra flair.
For dietary adaptations, you can swap ingredients like using almond flour for gluten-free alternatives or maple syrup for a lower glycemic index sweetener. No need to sacrifice flavor for health!
Step-by-Step Instructions
Creating brownie truffles is easier than you might think. Start by preheating your oven to 350°F (175°C). This sets the stage for perfectly baked brownies.
In a mixing bowl, cream together the butter and sugars until light and fluffy. The transformation in color and texture will act as a reminder that good things take time.
Next, add the eggs one at a time, mixing well after each addition. The batter should become glossy and smooth, creating a beautiful base for your truffles. Stir in cocoa powder and flour until just combined—overmixing can make the brownies tough, and nobody wants that!
Now incorporate the chocolate chips, folding them into the batter gently. This ensures you’ll get ooey-gooey pockets of melted chocolate in every truffle.
Pour the mixture into a greased baking pan, and bake for about 25-30 minutes. You’ll know they’re done when a toothpick inserted in the center comes out with moist crumbs attached. Allow the brownies to cool completely before moving on.
Once cooled, scoop out small portions and roll them into balls, about one inch in diameter. Each bite should be irresistible! If desired, roll the truffles in cocoa powder, nuts, or sprinkles for that festive touch.
Expert Tips
For a richer experience, consider browning your butter before adding it to the sugar. This step enhances the nutty flavor that will elevate your truffles beyond the ordinary.
Keep your brownies from overbaking for that perfect fudgy texture. If you’re unsure, remember that they’ll continue to cook slightly after being removed from the oven. It’s a balancing act!
If your mixture is too crumbly when rolling into balls, add a splash of milk or cream to bind it together. Conversely, if it’s too wet, sprinkle in a bit more flour until you reach the desired consistency.
Using a cookie scoop can help create uniformly sized truffles, ensuring even coating and presentation. It makes the process quicker too!
Storage & Substitutions
Store your brownie truffles in an airtight container in the fridge for up to a week. If you’re looking to prolong their life, freezing them is an excellent option. Just place them in a freezer-safe container, separating layers with parchment paper. Thaw in the fridge before enjoying, and they’ll taste freshly made.
For a last-minute dessert, feel free to use store-bought brownie mix as a shortcut. While homemade is always best, convenience doesn’t have to compromise taste!
How do I make this recipe ahead?
You can prepare the brownie base one or two days in advance. Just keep it tightly wrapped to maintain freshness. Form truffles just before serving for the best taste and texture!
Can I use different types of chocolate?
Absolutely! Feel free to experiment with milk chocolate for a sweeter flavor or go for dark chocolate for a more intense chocolate experience. You can also mix different types for a complex taste.
What’s the best way to melt chocolate for dipping?
The best method involves a double boiler where you place a heatproof bowl over simmering water, stirring frequently. This gentle heat prevents scorching and gives you silky smooth results.
Can I add flavors to these truffles?
Yes! Consider incorporating flavors like peppermint extract for a festive touch or espresso powder for a more robust chocolate experience. A dash of sea salt can enhance the sweetness beautifully too.
What types of toppings work best?
Crushed nuts, sprinkles, or a drizzle of white chocolate add not just flavor but also a visually appealing touch. Get creative—use what you have on hand!
How can I make these truffles healthier?
Use whole grain or almond flour in place of all-purpose flour and maple syrup instead of granulated sugar. You can also substitute avocado for some of the fat content—it adds creaminess without the extra calories!
These brownie truffles are a delightful treat that brings a bit of joy to any occasion, from holiday gatherings to every fall night in between. I invite you to share your experience with this recipe and let me know what variations you’ve tried. Your comments mean the world, and don’t forget to save this recipe for future indulgence. After all, everyone deserves a little comfort! Happy baking!
PrintBrownie Truffles Recipe
Indulge in irresistible Brownie Truffles with this easy familytested recipe from my Texas kitchen Kidapproved and delightfully deliciousget the recipe
- Prep Time: 15 minutes
- Cook Time: 30 minutes
- Total Time: 45 minutes
- Yield: 20 truffles
- Category: Dessert
- Cuisine: American
Ingredients
- 1/2 cup (113 grams) of unsalted butter
- 1/2 cup (100 grams) of granulated sugar
- 1/2 cup (100 grams) of brown sugar
- 1/2 cup (50 grams) of cocoa powder
- 2 large eggs
- 1/4 cup (30 grams) of all-purpose flour
- 1 cup (175 grams) of chocolate chips or chunks
- Optional toppings: crushed nuts, shredded coconut, or melted chocolate
Instructions
- Preheat your oven to 350°F (175°C).
- In a mixing bowl, cream together the butter and sugars until light and fluffy.
- Add the eggs one at a time, mixing well after each addition.
- Stir in cocoa powder and flour until just combined.
- Fold in the chocolate chips gently.
- Pour the mixture into a greased baking pan and bake for 25-30 minutes.
- Allow the brownies to cool completely before moving on.
- Scoop out small portions and roll them into balls, about one inch in diameter.
- If desired, roll the truffles in cocoa powder, nuts, or sprinkles.
Notes
Brownie truffles that are rich, fudgy, and melt in your mouth, perfect for sharing joy with loved ones during the fall season.
