There’s just something magical about a treat that brings you back to childhood, isn’t there? For me, that’s what Homemade Peanut Butter Balls (Buckeye Balls) do. I remember my grandma making these every holiday season, and the smell of peanut butter and chocolate always meant something special was coming. Now, whenever I whip up a batch, I feel that same cozy, happy feeling. They’re simple, they’re classic, and they’re always a hit!
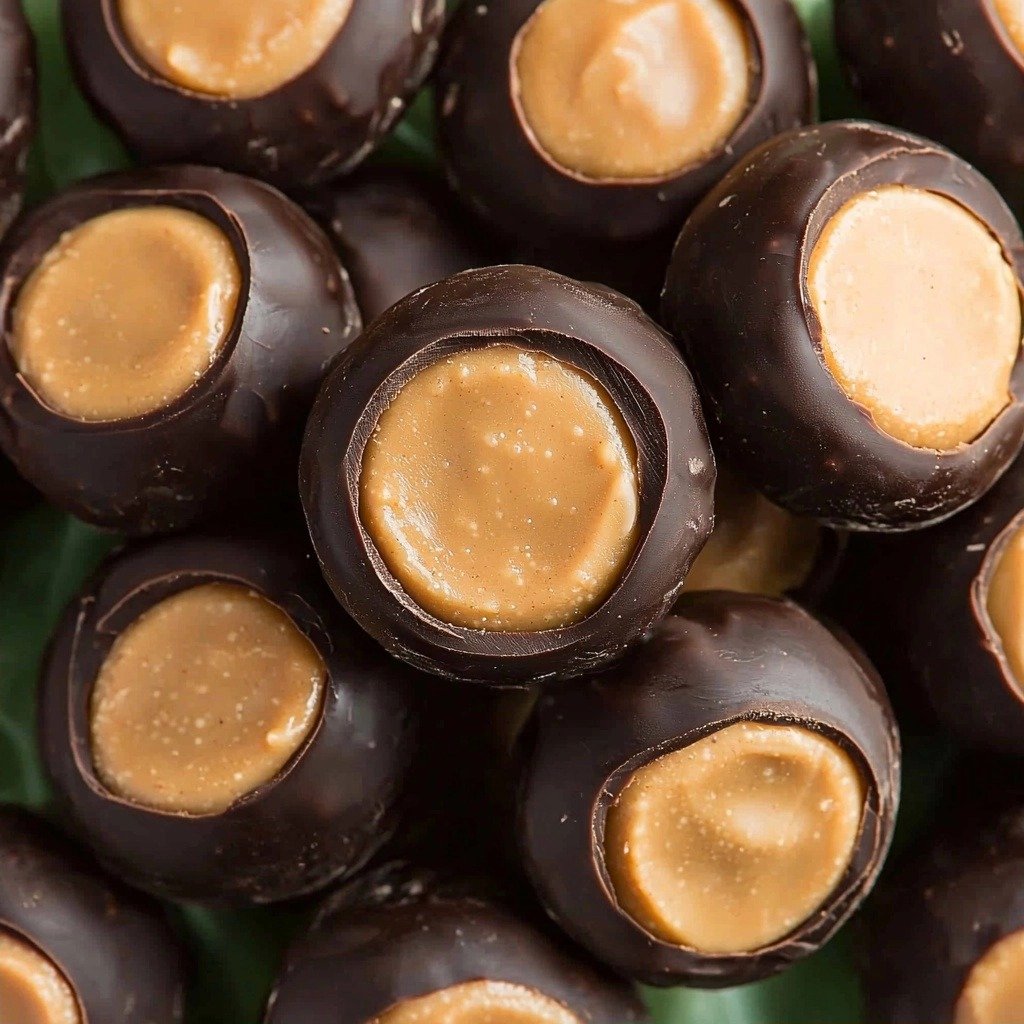
Why You’ll Love This Homemade Peanut Butter Balls (Buckeye Balls)
- They’re incredibly easy to make, even for beginners. No baking required!
- The texture is divine – a rich, creamy peanut butter center coated in smooth chocolate.
- That classic peanut butter and chocolate combo is always a winner. It’s truly irresistible.
- Perfect for holidays, parties, or just a sweet treat any day of the week.
Ingredients You’ll Need
- Unsalted Butter: Make sure it’s softened to room temperature. This helps it cream smoothly with the peanut butter. Don’t use cold butter!
- Creamy Peanut Butter: Use a good quality creamy peanut butter, like Jif or Skippy, for the best texture and flavor. Natural peanut butter can sometimes be too oily for this recipe.
- Vanilla Extract: This really enhances the flavor of the peanut butter. Don’t skip it!
- Powdered Sugar: Also known as confectioners’ sugar. It gives the balls their smooth texture and sweetness.
- Semi-Sweet Chocolate Chips: These melt beautifully for the coating. You can use milk chocolate if you prefer a sweeter coating.
- Shortening or Coconut Oil: A little bit of either of these helps the chocolate melt smoothly and makes it easier to dip the balls, giving you a nice, glossy finish.
How to Make Homemade Peanut Butter Balls (Buckeye Balls) Step by Step
First things first, grab a large mixing bowl. You’ll want to combine your softened butter and creamy peanut butter in there. Use an electric mixer to beat them together until they’re super smooth and well combined. This is where the creamy base of your buckeye balls really comes to life!
Next, add in your vanilla extract and all that powdered sugar. Start beating on low speed. The mixture will look crumbly at first, but keep going until it all comes together into a thick dough. Don’t worry if it gets really thick – that’s exactly what you want! You might even find it easier to switch to kneading it with your hands for the last bit to get it perfectly mixed.
Now for the fun part: shaping! Grab a cookie dough scoop or a tablespoon. Each ball will be about two tablespoons of dough. Roll the mixture between your hands to form nice, round balls. If your hands start to get sticky, just rub a tiny bit of butter on them – it works wonders! Place your perfectly formed balls onto a baking sheet lined with parchment paper or a silicone mat. This is a crucial step: pop that baking sheet into the fridge for at least an hour, or the freezer for 20 minutes. Don’t skip the chilling; it helps them hold their shape when you dip them.
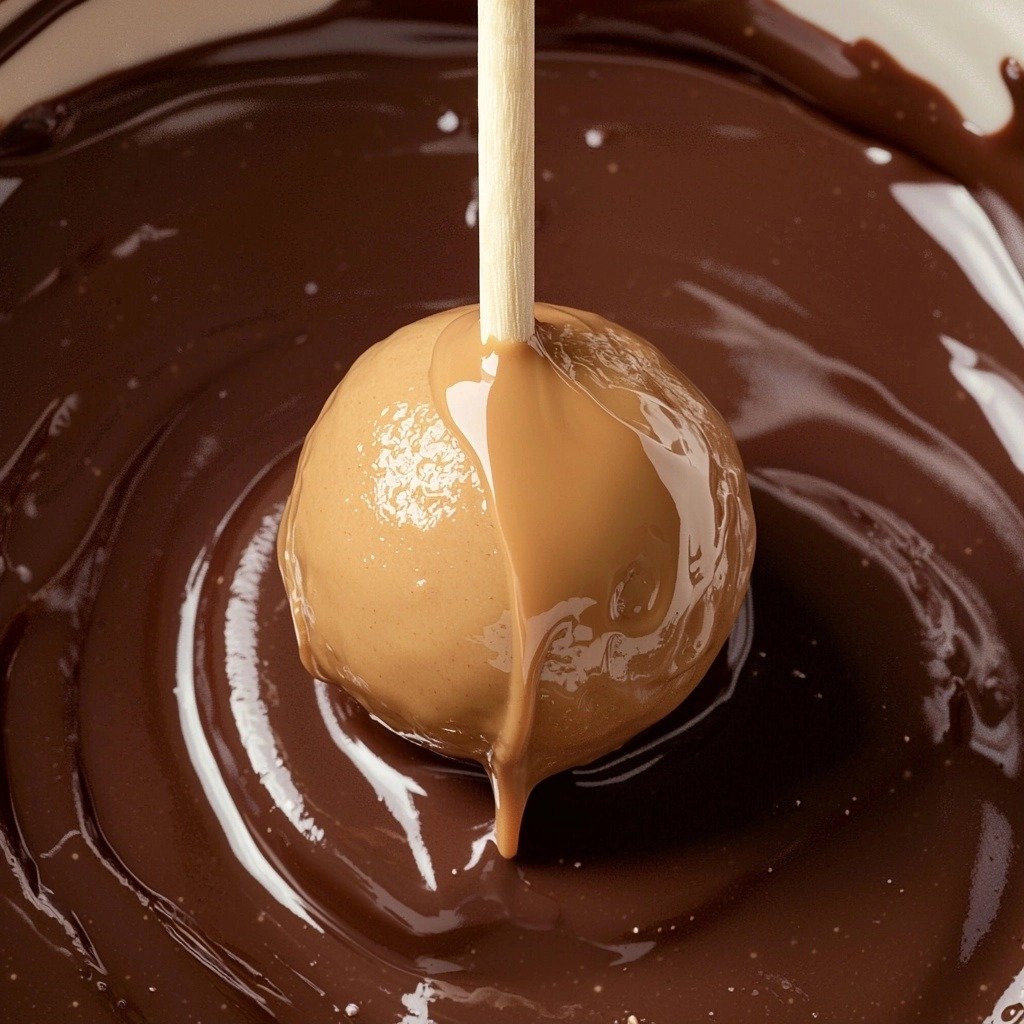
Once your peanut butter balls are nice and firm, it’s chocolate time! In a small pot, gently melt your semi-sweet chocolate chips and shortening (or coconut oil) over low heat on the stove. Stir occasionally until everything is smooth and glossy. This might take about 10 minutes, so be patient and keep that heat low to prevent burning. When dipping, I always take out just 5 balls at a time from the fridge or freezer. This keeps the others cold and firm, making dipping much easier. Stick a toothpick halfway into a ball, dip it into the melted chocolate, leaving a little peanut butter “eye” exposed at the top like traditional buckeyes. Scrape off any excess chocolate on the edge of the pot, then place it on your lined baking sheet. Use a second toothpick to gently push the first toothpick out. Once all your delicious balls are dipped, back into the fridge they go for another 30 minutes to let that chocolate set up beautifully.
My Top Tips for Success
- I always make sure my butter is truly softened, not melted. This gives the best texture to the peanut butter mixture.
- In my experience, using a good quality, creamy peanut butter that isn’t natural (like Jif or Skippy) works best here. Natural peanut butter can be too oily.
- Trust me on this one: don’t skip the chilling step! It’s essential for the balls to hold their shape when dipping.
- When melting the chocolate, do it slowly over low heat. High heat can seize the chocolate, and we don’t want that!
- I find it easiest to work with just a few chilled peanut butter balls at a time while dipping, keeping the rest cold.
- For a smooth chocolate coating, make sure to gently tap off any excess chocolate before placing the ball down.
Common Mistakes to Avoid
- Not chilling the peanut butter balls enough: If your balls are too soft, they’ll fall apart in the warm chocolate. This happens because the butter in the peanut butter mixture softens too much. Always chill them for the full time in the fridge or freezer.
- Melting the chocolate too quickly or at too high a heat: This can cause the chocolate to seize or burn, becoming thick and unworkable. To fix this, you might be able to stir in a tiny bit more shortening or coconut oil, or even a teaspoon of neutral oil, but it’s best to melt slowly over low heat.
- Using natural peanut butter: Natural peanut butter often separates and is too oily, which can make the mixture greasy and difficult to form into balls. Stick with conventional creamy peanut butter for this recipe.
- Dipping all the balls at once: If you take all the peanut butter balls out of the fridge at once, they’ll warm up before you can dip them all. This leads to soft, messy balls. Dip in small batches to keep the rest cold.
How to Store Homemade Peanut Butter Balls (Buckeye Balls)
- Refrigerator: Store in an airtight container for up to 2 weeks.
- Freezer: Store in an airtight container for up to 3 months. Thaw in the refrigerator before serving.
Frequently Asked Questions
H3: Why are they called Buckeye Balls?
They’re named after the nut of the Ohio buckeye tree, which has a dark brown color with a lighter tan spot. The chocolate-dipped peanut butter balls resemble these nuts. It’s a classic Ohio treat!
H3: Can I use crunchy peanut butter?
While you technically could, crunchy peanut butter will give you a very different texture. The recipe is designed for creamy peanut butter to achieve that smooth, melt-in-your-mouth center. I recommend sticking to creamy for the best results.
H3: My chocolate is too thick for dipping, what should I do?
If your chocolate seems too thick, it might be a bit too cool or not have enough shortening. Reheat it gently over very low heat or a double boiler, stirring constantly. You can also add another half teaspoon of shortening or coconut oil to help thin it out.
H3: Can I make these ahead of time?
Absolutely! These are a fantastic make-ahead treat. You can store them in the refrigerator for up to two weeks, or even freeze them for up to three months. They’re perfect for holiday platters or special occasions.
I genuinely hope you love making these Homemade Peanut Butter Balls (Buckeye Balls) as much as I do! They’re such a simple joy, and that classic peanut butter and chocolate combo never gets old. Give them a try, and let me know how they turn out – I can’t wait to hear!
PrintHomemade Peanut Butter Balls (Buckeye Balls)

Easy, no-bake peanut butter balls with a rich, creamy center and a smooth chocolate coating.
- Prep Time: 20
- Cook Time: 10
- Total Time: 100
- Yield: about 30 balls
- Category: Dessert
- Method: No-Bake
- Cuisine: American
- Diet: Vegetarian
Ingredients
- ½ cup (113g) unsalted butter, softened
- 1 ½ cups (405g) creamy peanut butter
- 1 tsp vanilla extract
- 3 cups (339g) powdered sugar
- 1 ½ cups (255g) semi-sweet chocolate chips
- 1 Tbsp shortening or coconut oil
Instructions
- In a large mixing bowl, beat the softened butter and creamy peanut butter with an electric mixer.
- Beat until the mixture is combined and smooth.
- Add the vanilla extract to the bowl.
- Add the powdered sugar to the bowl.
- Beat on low speed until the mixture comes together.
- Continue beating until the mixture forms a thick dough.
- Alternatively, knead the mixture by hand if it becomes too thick for the mixer.
- Use a cookie dough scoop or tablespoon to measure out approximately 2 tablespoons of dough for each ball.
- Roll the mixture between your hands to form smooth balls.
- If the mixture becomes sticky, rub a small amount of butter between your hands.
- Place the formed balls on a baking sheet lined with a silicone mat or parchment paper.
- Place the baking sheet in the refrigerator for 1 hour.
- Alternatively, place the baking sheet in the freezer for 20 minutes.
- After chilling, melt the semi-sweet chocolate chips and shortening (or coconut oil) in a small pot over low heat on the stove.
- Stir occasionally until the chocolate and shortening are fully melted and smooth.
- This melting process may take up to 10 minutes.
- Remove 5 peanut butter balls from the fridge or freezer at a time for dipping, keeping the rest cold.
- Stick a toothpick halfway into a peanut butter ball.
- Lower the ball into the melted chocolate, swirling as needed to coat most of the ball.
- Leave a small portion of the peanut butter visible at the top, like a traditional buckeye.
- Gently scrape the bottom of the dipped ball on the edge of the pot to remove excess chocolate.
- Place the dipped ball onto a silicone baking mat or parchment paper.
- Use a second toothpick to gently push out the toothpick inserted into the ball.
- Repeat for the remaining peanut butter balls, working in small batches.
- Once all the balls are dipped, return them to the refrigerator.
- Chill for 30 minutes to allow the chocolate to set completely.
Notes
Ensure butter is softened, not melted, for the best dough consistency.
Use creamy peanut butter (like Jif or Skippy) for optimal texture.
Do not skip the initial chilling step; it’s crucial for shaping and dipping.
Melt chocolate slowly over low heat to prevent burning or seizing.
Dip balls in small batches to keep them firm and cold.