
Y’all, let me tell you, these Garlic Parmesan Cheeseburger Bombs are a game-changer! I remember one particularly hectic Tuesday when I was scrambling to get dinner on the table after soccer practice. The kids were hangry, and I needed something quick, easy, and satisfying. That’s when I whipped up these little gems. The smell of garlic and Parmesan filled the kitchen, and even my picky eater, little Timmy, couldn’t resist. Since then, I’ve made this recipe more times than I can count in my Texas kitchen, and it’s always a hit. I promise you, this recipe will give you juicy cheeseburgers in a fun, hand-held form that your family will absolutely devour.
Why This Recipe Works
As a busy mom myself, I know how precious time is. That’s why I love this recipe – it’s designed to be simple and family-friendly. Here’s why these cheeseburger bombs are a winner:
- Quick & Easy: Ready in under 30 minutes – perfect for those crazy weeknights.
- Kid-Approved: My kids adore these! The fun shape and cheesy flavor make them irresistible.
- Make-Ahead Friendly: You can assemble them ahead of time and bake them when you’re ready.
- Customizable: Easily adapt the fillings to suit your family’s preferences.
Ingredients
- 1 pound ground beef
- 1/2 cup grated Parmesan cheese
- 2 cloves garlic, minced
- 1 teaspoon Italian seasoning
- 1/2 teaspoon salt
- 1/4 teaspoon black pepper
- 1 (10 ounce) can refrigerated pizza dough
- 8 ounces cheddar cheese, cut into small cubes
- 2 tablespoons butter, melted
- 1 tablespoon chopped fresh parsley (optional, for garnish)
Ingredient Notes
Ground Beef: I usually use 80/20 ground beef for the best flavor and moisture, but you can substitute with ground turkey or chicken for a leaner option.
Parmesan Cheese: Freshly grated Parmesan is always best for flavor, but the pre-grated kind works in a pinch. Make sure to check the expiration date!
Pizza Dough: Refrigerated pizza dough is a lifesaver for busy weeknights. You can find it in the refrigerated section of most grocery stores. If you’re feeling ambitious, you can also use homemade pizza dough.
Cheddar Cheese: I like cheddar for its sharp flavor, but feel free to use your favorite cheese, such as mozzarella, Monterey Jack, or provolone. Cut them into small cubes about 1/2 inch for easy filling.
Step-by-Step Instructions
Step 1: Prepare the Beef Mixture. In a large bowl, combine the ground beef, Parmesan cheese, minced garlic, Italian seasoning, salt, and pepper. Mix well with your hands until everything is evenly distributed. Don’t overmix, or the beef will become tough.
Step 2: Divide the Dough. Preheat your oven to 375°F (190°C). Lightly grease a baking sheet. On a lightly floured surface, unroll the pizza dough and cut it into 12 equal squares. I like to use a pizza cutter for this, but a sharp knife works too.
Step 3: Assemble the Bombs. Flatten each dough square slightly. Place a small amount of the beef mixture (about 1-2 tablespoons) in the center of each square. Top with a few cubes of cheddar cheese. After testing this several times, I learned that not overfilling the dough is key to preventing the bombs from bursting in the oven.
Step 4: Seal the Dough. Bring the corners of the dough up and pinch them together to seal, forming a ball. Make sure the seams are tightly sealed to prevent the cheese from leaking out during baking.
Step 5: Bake. Place the assembled bombs on the prepared baking sheet, seam-side down. Brush the tops with melted butter. The butter adds a lovely golden color and a rich flavor.
Step 6: Bake. Bake for 15-20 minutes, or until the bombs are golden brown and the dough is cooked through. Let them cool for a few minutes before serving. The aroma of garlic and cheese baking in the oven is simply irresistible!
Storage & Meal Prep
Storage: Store leftover Garlic Parmesan Cheeseburger Bombs in an airtight container in the refrigerator for up to 3 days.
Reheating: Reheat in the microwave for 30-60 seconds, or in the oven at 350°F (175°C) for 10-15 minutes, until heated through. I recommend reheating in the oven for the best texture – it helps to crisp up the dough again.
Make-Ahead: Assemble the bombs ahead of time and store them in the refrigerator for up to 24 hours. Bake as directed when ready to serve. I often do this on busy weeknights to save time.
Batch Prep: Double or triple the recipe and freeze the assembled bombs for a quick and easy meal anytime. To freeze, place the unbaked bombs on a baking sheet lined with parchment paper and freeze until solid. Then, transfer them to a freezer bag. Bake from frozen, adding a few extra minutes to the baking time.
Substitutions & Variations
Gluten-Free: Use gluten-free pizza dough to make these gluten-free. I haven’t personally tested this, but I’ve heard good things about some of the gluten-free dough options available in stores.
Dairy-Free: Use dairy-free cheese and butter alternatives. You can even use a dairy-free pesto in place of the Parmesan cheese.
Vegetarian: Substitute the ground beef with cooked lentils or crumbled veggie burgers. Add some chopped vegetables like bell peppers and onions for extra flavor and texture.
Spicy: Add a pinch of red pepper flakes to the beef mixture for a little heat. Or, use pepper jack cheese instead of cheddar.
Italian Sausage: Substitute the ground beef with ground Italian sausage for a richer, spicier flavor. You can even use a combination of beef and sausage.

Frequently Asked Questions
Can I make these ahead of time?
Yes, you can assemble the bombs ahead of time and store them in the refrigerator for up to 24 hours. This is a great time-saver for busy weeknights.
How do I know when they are done?
The bombs are done when they are golden brown and the dough is cooked through. The internal temperature of the beef should reach 160°F (71°C).
Can I use a different type of cheese?
Absolutely! Feel free to use your favorite cheese, such as mozzarella, Monterey Jack, or provolone. Just make sure to cut it into small cubes for easy filling.
How do I store leftovers?
Store leftover Garlic Parmesan Cheeseburger Bombs in an airtight container in the refrigerator for up to 3 days.
Are these kid-friendly?
Yes, these are a hit with kids! The fun shape and cheesy flavor make them irresistible. You can even involve your kids in the assembly process.
Can I freeze these?
Yes, you can freeze the assembled bombs for a quick and easy meal anytime. Place the unbaked bombs on a baking sheet lined with parchment paper and freeze until solid. Then, transfer them to a freezer bag. Bake from frozen, adding a few extra minutes to the baking time.
Can I use ground turkey instead of ground beef?
Yes, ground turkey is a great substitute for ground beef if you’re looking for a leaner option. The cooking time will remain the same.
Serving Suggestions
These Garlic Parmesan Cheeseburger Bombs are delicious on their own, but here are a few serving suggestions to complete your meal:
- Serve with a side of marinara sauce for dipping.
- Pair them with a simple green salad or coleslaw.
- Add a side of roasted vegetables, such as broccoli or carrots.
- For a heartier meal, serve them with french fries or sweet potato fries.
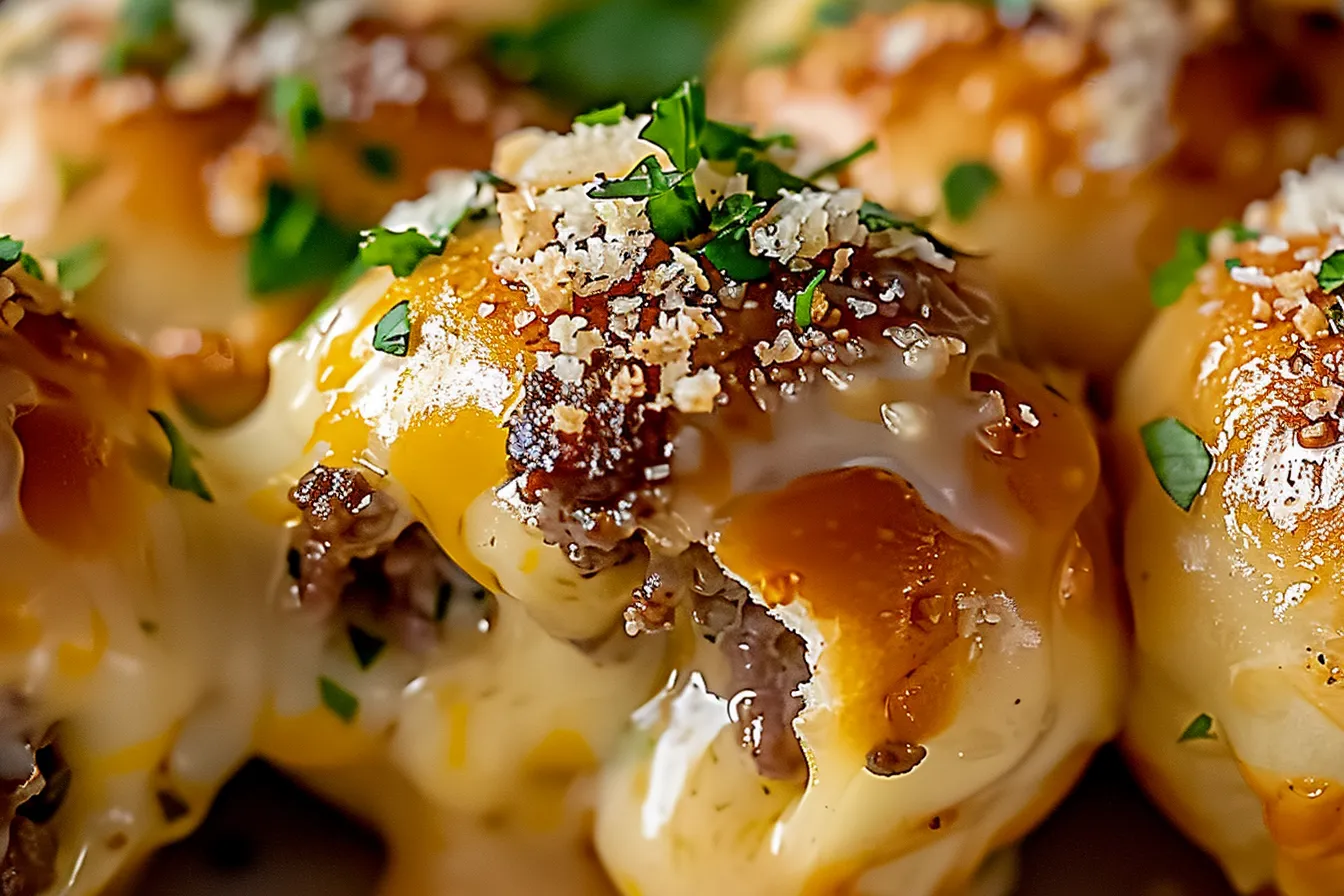
To plate, arrange the bombs on a platter and garnish with fresh parsley or a sprinkle of Parmesan cheese. Portion sizes will vary depending on your family’s appetite, but 2-3 bombs per person is a good starting point.
These Garlic Parmesan Cheeseburger Bombs are more than just a recipe; they’re a way to bring your family together around the table, even on the busiest of nights. They’re simple to make, satisfying to eat, and always a crowd-pleaser. I encourage you to give this recipe a try and see for yourself just how much your family will love them. And when you do, please share your creations with me in the comments below! I love seeing your family’s unique twists on my recipes. Don’t forget to explore the other family-friendly recipes on FamiliesRecipes.com, and sign up for our newsletter to get delicious recipes delivered straight to your inbox!
PrintGarlic Parmesan Cheeseburger Bombs Recipe

Bake craveable Garlic Parmesan Cheeseburger Bombs These are easy familyapproved and tested in my Texas kitchen My kids love this comfort food Get the recipe
- Prep Time: 10 minutes
- Cook Time: 20 minutes
- Total Time: 30 minutes
- Yield: 12 servings
- Category: Main Course
- Cuisine: American
Ingredients
- 1 pound ground beef
- 1/2 cup grated Parmesan cheese
- 2 cloves garlic, minced
- 1 teaspoon Italian seasoning
- 1/2 teaspoon salt
- 1/4 teaspoon black pepper
- 1 (10 ounce) can refrigerated pizza dough
- 8 ounces cheddar cheese, cut into small cubes
- 2 tablespoons butter, melted
- 1 tablespoon chopped fresh parsley (optional, for garnish)
Instructions
- Prepare the Beef Mixture. In a large bowl, combine the ground beef, Parmesan cheese, minced garlic, Italian seasoning, salt, and pepper. Mix well with your hands until everything is evenly distributed. Don’t overmix, or the beef will become tough.
- Divide the Dough. Preheat your oven to 375°F (190°C). Lightly grease a baking sheet. On a lightly floured surface, unroll the pizza dough and cut it into 12 equal squares.
- Assemble the Bombs. Flatten each dough square slightly. Place a small amount of the beef mixture (about 1-2 tablespoons) in the center of each square. Top with a few cubes of cheddar cheese.
- Seal the Dough. Bring the corners of the dough up and pinch them together to seal, forming a ball. Make sure the seams are tightly sealed to prevent the cheese from leaking out during baking.
- Bake. Place the assembled bombs on the prepared baking sheet, seam-side down. Brush the tops with melted butter.
- Bake for 15-20 minutes, or until the bombs are golden brown and the dough is cooked through. Let them cool for a few minutes before serving.
Notes
Juicy cheeseburgers in a fun, hand-held form! These Garlic Parmesan Cheeseburger Bombs are quick, easy, kid-approved, and perfect for busy weeknights. Ready in under 30 minutes!
