
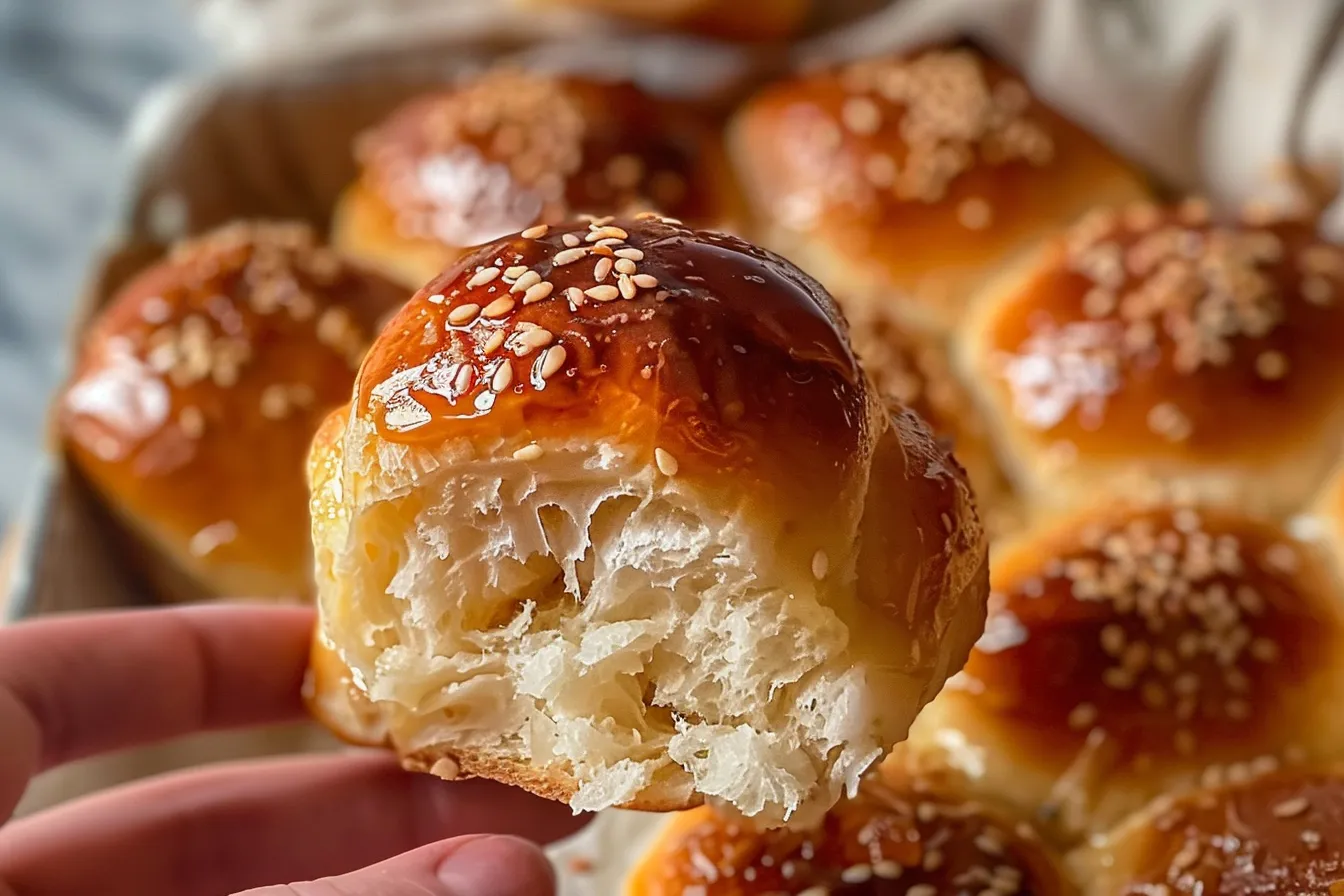
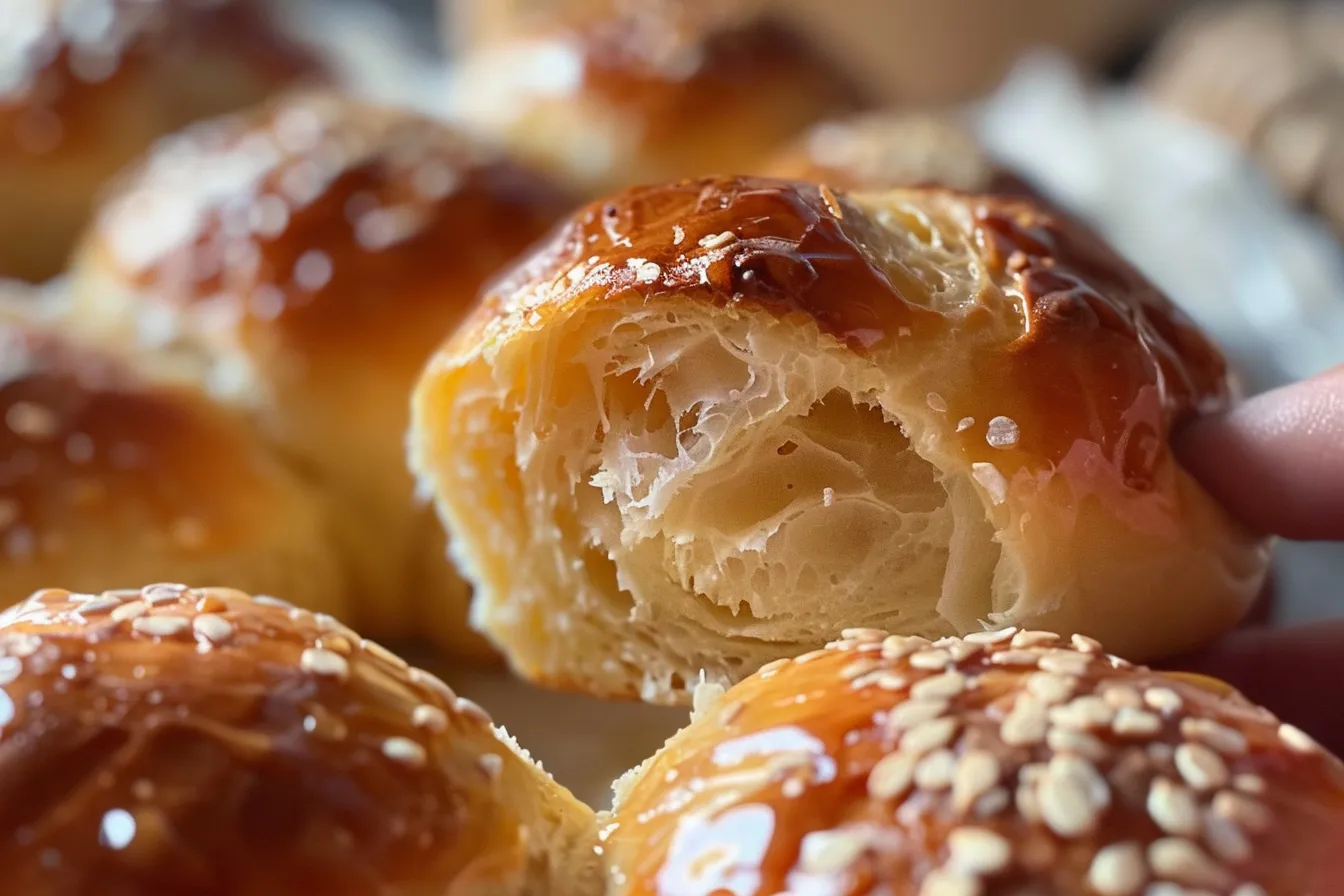
There’s just something about a warm, homemade roll, isn’t there? The kind that fills the kitchen with a sweet, yeasty aroma and makes everyone gather around the table. And when that roll is a light-as-a-cloud, gluten-free milk honey roll… well, let me tell you, it’s pure magic! I’ve made this recipe countless times in my Texas kitchen, tweaking it until it’s absolutely perfect for even the pickiest eaters in my family (that’s my two kiddos, bless their hearts). These rolls are soft, slightly sweet, and perfect with a pat of butter or alongside your favorite comfort food. I promise you’ll be amazed at how easy it is to create these delightful treats, even if you’re new to gluten-free baking.
Why This Recipe Works
As a busy mom, I need recipes that are reliable, delicious, and don’t take all day. These gluten-free milk honey rolls fit the bill perfectly. Here’s why they work so well for families like mine:
- Kid-Approved: The subtle sweetness and soft texture make them a hit with kids (and adults!).
- Relatively Quick: While yeast breads take time, this recipe has streamlined steps to minimize the active time needed.
- Freezer-Friendly: Make a big batch and freeze some for later! These rolls reheat beautifully.
Ingredients
- 1 cup milk, warmed (about 110°F)
- 2 ¼ teaspoons (1 packet) active dry yeast
- ¼ cup honey, plus 1 tablespoon for brushing
- 4 tablespoons unsalted butter, melted, plus more for greasing
- 1 teaspoon salt
- 2 large eggs
- 3 cups gluten-free all-purpose flour blend (with xanthan gum)
- ¼ cup tapioca starch
Ingredient Notes
Gluten-Free Flour Blend: It’s crucial to use a high-quality gluten-free all-purpose flour blend that contains xanthan gum. Xanthan gum acts as a binder in gluten-free baking, providing structure and preventing the rolls from being crumbly. I personally prefer Bob’s Red Mill Gluten-Free 1-to-1 Baking Flour.
Tapioca Starch: This helps create a light and airy texture. If you don’t have tapioca starch, you can substitute it with cornstarch, but the texture may be slightly different.
Honey: I love the flavor of honey in these rolls, but you can substitute it with maple syrup or agave nectar if you prefer.
Step-by-Step Instructions
Step 1: Activate the Yeast. In a large bowl, combine the warm milk, yeast, and 1 tablespoon of honey. Give it a gentle stir and let it sit for 5-10 minutes, or until foamy. This step ensures that your yeast is active and ready to help your rolls rise.
Step 2: Combine Wet Ingredients. Add the melted butter, salt, eggs, and remaining ¼ cup of honey to the yeast mixture. Whisk everything together until well combined.
Step 3: Add Dry Ingredients. In a separate bowl, whisk together the gluten-free flour blend and tapioca starch. Gradually add the dry ingredients to the wet ingredients, mixing on low speed with an electric mixer or by hand until a dough forms. The dough will be sticky, and that’s okay! That’s what creates those soft, fluffy rolls.
Step 4: First Rise. Lightly grease a large bowl with butter. Place the dough in the bowl, turning to coat. Cover the bowl with plastic wrap and let it rise in a warm place for 1-1.5 hours, or until doubled in size. I often put mine in the oven with just the light on.
Step 5: Shape the Rolls. Gently punch down the dough to release the air. On a lightly floured surface (using gluten-free flour), turn out the dough. Divide the dough into 12 equal pieces. Roll each piece into a smooth ball.
Step 6: Second Rise. Place the rolls in a greased 9×13 inch baking dish. Cover with plastic wrap and let them rise again for 30-45 minutes, or until puffy.
Step 7: Bake. Preheat your oven to 350°F (175°C). Bake the rolls for 20-25 minutes, or until golden brown on top. After testing this several times, I learned that covering the rolls loosely with foil during the last 10 minutes of baking prevents them from getting too dark.
Step 8: Brush with Honey Butter. While the rolls are still warm, brush them with melted butter mixed with a tablespoon of honey. This adds a lovely shine and extra sweetness.
Expert Tips from My Kitchen
- Don’t Overmix the Dough: Overmixing gluten-free dough can result in tough rolls. Mix just until the ingredients are combined.
- Warm Milk is Key: The milk should be warm to activate the yeast, but not too hot, or it will kill the yeast. Aim for around 110°F.
- Patience is a Virtue: Gluten-free dough often takes longer to rise than traditional dough. Be patient and let it rise fully for the best results.
- Use a Good Quality Gluten-Free Flour: Not all gluten-free flour blends are created equal. Using a blend specifically designed for baking will make a big difference.
- Adjust Baking Time as Needed: Ovens vary, so keep an eye on the rolls and adjust the baking time as needed. They should be golden brown and cooked through.
- For Extra Flavor: Add a pinch of cinnamon or nutmeg to the dough for a warm, spiced flavor.
- Kid-Friendly Tip: Let the kids help shape the rolls! It’s a fun and easy way to get them involved in the kitchen.
Storage & Meal Prep
Storage: Store the cooled rolls in an airtight container at room temperature for up to 2 days or in the refrigerator for up to 5 days.
Freezing: These rolls freeze beautifully. Wrap them individually in plastic wrap and then place them in a freezer bag. They can be frozen for up to 2 months. To thaw, simply let them sit at room temperature for a few hours or overnight.
Reheating: To reheat, wrap the rolls in foil and bake at 350°F (175°C) for 10-15 minutes, or until warmed through. You can also microwave them for a few seconds, but be careful not to overcook them.
Make-Ahead: You can prepare the dough ahead of time and let it rise in the refrigerator overnight. In the morning, shape the rolls and let them rise again before baking.
Frequently Asked Questions
Can I use a different type of milk?
Yes, you can substitute the milk with almond milk, soy milk, or any other non-dairy milk. Just make sure it’s warmed before adding the yeast.
What if my dough doesn’t rise?
Make sure your yeast is active. If the milk was too hot, it could have killed the yeast. Also, ensure the room is warm enough for the dough to rise properly. Sometimes, gluten-free dough rises slower than regular dough, so be patient.
Can I make this recipe without eggs?
I haven’t personally tested it, but you could try using flax eggs as a substitute. Mix 1 tablespoon of ground flaxseed meal with 3 tablespoons of water and let it sit for 5 minutes to thicken before adding it to the recipe.
How do I know when the rolls are done?
The rolls are done when they are golden brown on top and sound hollow when tapped. You can also insert a toothpick into the center; it should come out clean.
Are these rolls suitable for toddlers?
Yes, these rolls are soft and easy for toddlers to eat. Just make sure to cut them into smaller pieces to prevent choking.
Can I add different flavors to the rolls?
Absolutely! Try adding a sprinkle of cinnamon sugar on top before baking or mixing in some dried cranberries or raisins to the dough for added flavor and texture.
PrintFluffy Gluten Free Milk Honey Rolls Recipe

Bake irresistible Fluffy GlutenFree Milk Honey Rolls Recipe So easy and familyapproved tested in my Texas kitchen My kids love this Get the recipe
- Prep Time: 20 minutes
- Cook Time: 25 minutes
- Total Time: 2 hours 10 minutes
- Yield: 12 rolls
- Category: Bread
- Cuisine: American
Ingredients
- 1 cup milk, warmed (about 110°F)
- 2 ¼ teaspoons active dry yeast
- ¼ cup honey
- 1 tablespoon honey
- 4 tablespoons unsalted butter, melted
- 1 teaspoon salt
- 2 large eggs
- 3 cups gluten-free all-purpose flour blend (with xanthan gum)
- ¼ cup tapioca starch
Instructions
- Activate the Yeast. In a large bowl, combine the warm milk, yeast, and 1 tablespoon of honey. Give it a gentle stir and let it sit for 5-10 minutes, or until foamy.
- Combine Wet Ingredients. Add the melted butter, salt, eggs, and remaining ¼ cup of honey to the yeast mixture. Whisk everything together until well combined.
- Add Dry Ingredients. In a separate bowl, whisk together the gluten-free flour blend and tapioca starch. Gradually add the dry ingredients to the wet ingredients, mixing on low speed with an electric mixer or by hand until a dough forms.
- First Rise. Lightly grease a large bowl with butter. Place the dough in the bowl, turning to coat. Cover the bowl with plastic wrap and let it rise in a warm place for 1-1.5 hours, or until doubled in size.
- Shape the Rolls. Gently punch down the dough to release the air. On a lightly floured surface (using gluten-free flour), turn out the dough. Divide the dough into 12 equal pieces. Roll each piece into a smooth ball.
- Second Rise. Place the rolls in a greased 9×13 inch baking dish. Cover with plastic wrap and let them rise again for 30-45 minutes, or until puffy.
- Bake. Preheat your oven to 350°F (175°C). Bake the rolls for 20-25 minutes, or until golden brown on top. Cover the rolls loosely with foil during the last 10 minutes of baking prevents them from getting too dark.
- Brush with Honey Butter. While the rolls are still warm, brush them with melted butter mixed with a tablespoon of honey.
Notes
Soft, slightly sweet, and perfect gluten-free milk honey rolls that are kid-approved and easy to make. A delicious treat for the whole family!
