
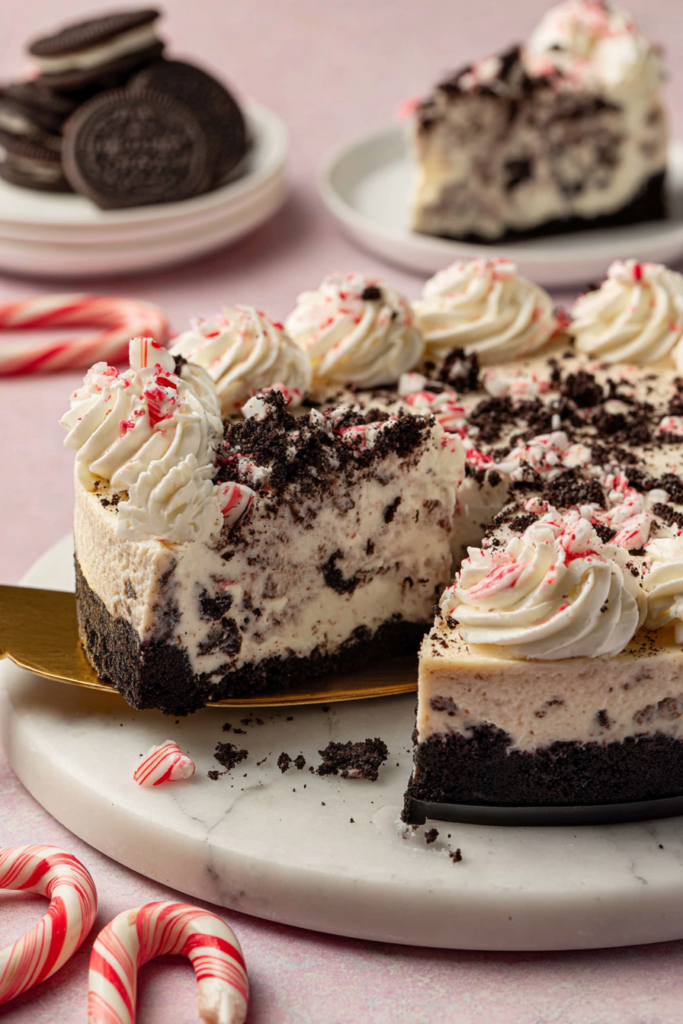
Imagine a dessert that combines the deep, cocoa richness of a classic Oreo cookie with the cooling, nostalgic tingle of peppermint. Now, imagine you can achieve that gourmet flavor without ever turning on your oven. This No-Bake Peppermint Oreo Cheesecake is exactly that—a show-stopping holiday masterpiece that looks like it came from a high-end bakery but is simple enough for a novice to master. As you slide a spatula under a thick, buttery Oreo crust and lift a velvet-smooth minty slice, you’ll see the gorgeous speckles of candy canes and cookie chunks. It’s the ultimate crowd-pleaser for Christmas parties, winter potlucks, or a cozy weekend treat.
Why You’ll Love This Recipe
There are three main reasons this recipe consistently earns a permanent spot in holiday dessert rotations. First, the texture is unparalleled; by folding in homemade whipped cream, we achieve a mousse-like lightness that heavy baked cheesecakes often lack. Second, the balance of flavors is perfect. The slight tang of sour cream cuts through the sweetness of the white chocolate-adjacent peppermint filling. Finally, it is stress-free. Because it’s no-bake, you don’t have to worry about the dreaded “cheesecake crack” or managing oven temperatures during a busy holiday cooking schedule. It’s reliable, festive, and undeniably delicious.
What Is No-Bake Peppermint Oreo Cheesecake?
This dessert is a modern twist on the classic American no-bake cheesecake. Unlike traditional cheesecakes that rely on eggs and a water bath to set, this version uses the stability of high-fat cream cheese combined with whipped heavy cream. The “Peppermint Oreo” variation incorporates two holiday staples: crushed peppermint candy canes and the world’s most famous sandwich cookie. It’s characterized by a dark chocolate base, a pale pink or white minty filling, and a playful crunch from the added cookie pieces. It’s essentially a giant, sliceable version of peppermint bark and cookies-and-cream ice cream combined.
Ingredients You Will Need
To achieve the best results, every ingredient in this recipe serves a specific structural or flavor purpose.
- Oreos: You will need a full 19.1 oz package. The dark cocoa of the Oreo provides the perfect bitter-sweet contrast to the mint.
- Full-Fat Cream Cheese: Use the block style, not the tub spread. The fat content is vital for the cheesecake to set firm enough to slice.
- Sour Cream: This is the “secret” ingredient. It adds a subtle tang that mimics the flavor of a baked New York cheesecake and helps soften the texture.
- Peppermint Extract: A little goes a long way. This provides the “cool” sensation that defines the dish.
- Heavy Whipping Cream: Must be very cold to whip properly. This provides the lift and airy volume.
- Candy Canes: These provide both flavor and a beautiful festive color.
- Melted Butter and Sugar: These act as the “glue” for the Oreo crust, ensuring it doesn’t crumble when you lift the slice.
Ingredient Substitutions & Tips
- Gluten-Free: Use Gluten-Free Oreos; they work perfectly in the crust and filling with the exact same ratios.
- Mint Variations: If you don’t have candy canes, you can use crushed peppermint hard candies or even Andes mints for a different flavor profile.
- Dairy-Free: While more challenging, you can substitute with high-quality plant-based cream cheese and a stabilized coconut whipped cream, though the set will be softer.
- Extracts: If you aren’t a fan of strong mint, reduce the peppermint extract to 1 teaspoon and increase the vanilla extract to 1 teaspoon for a more subtle “cream” flavor.
Step-by-Step Instructions
1. Construct the Oreo Foundation
Start by processing 30 Oreos into a fine, sand-like dust. If you don’t have a food processor, place them in a heavy-duty freezer bag and use a rolling pin. Mix the crumbs with 5 tablespoons of melted butter and 1 tablespoon of sugar. Press this mixture VERY FIRMLY into the bottom of a 9×9 pan lined with parchment paper. Use the bottom of a flat measuring cup to pack it down—this prevents the crust from falling apart later. Freeze for 15 minutes.
2. Create the Creamy Base
In a large bowl, beat the 16 oz of softened cream cheese and 3/4 cup sugar until the mixture is light, fluffy, and completely free of lumps. This is the most important step for a smooth mouthfeel. Once smooth, beat in the sour cream, vanilla, and peppermint extract.
3. The Aeration Stage
In a separate chilled bowl, beat the heavy whipping cream and powdered sugar. Start on low speed and gradually increase to high until stiff peaks form (the cream should stand straight up when you lift the beaters).
4. Folding and Assembly
Gently fold the whipped cream into the cream cheese mixture using a spatula. Do not use the electric mixer here, or you will deflate the air you just whipped in. Gently stir in the finely crushed candy canes and the 12 coarsely crushed Oreos.
5. The Long Chill
Transfer the filling to the chilled crust and smooth the top with an offset spatula. Cover and refrigerate for at least 8 hours. This patience is what allows the fats to solidify, creating a sliceable, stable dessert.
Expert Baking Tips
- Temperature Matters: Your cream cheese and sour cream MUST be at room temperature to prevent a lumpy cheesecake. However, your heavy cream MUST be ice-cold to whip into stiff peaks.
- Crush Size: For the candy canes, aim for a “crystal” consistency. Large chunks can become chewy or sticky after sitting in the cream filling, whereas a fine dust incorporates the flavor more evenly.
- The “Clean Cut” Secret: To get those magazine-perfect slices, place the cheesecake in the freezer for the final 30 minutes of its chilling time. Use a sharp chef’s knife dipped in hot water and wiped dry between every single cut.
Holiday Entertaining & Make-Ahead
The beauty of a no-bake cheesecake is its longevity. You can easily make this dessert 24 to 48 hours before your event, which frees up your oven and your time on the day of the party. If you are serving this for a Christmas gathering, wait to add the final garnish of crushed candy canes until just before serving. The moisture in the cheesecake can cause the red dye in the candy canes to bleed over time, creating a “melted” look. By adding them fresh, you ensure a vibrant, crisp presentation that will wow your guests.
Serving Suggestions
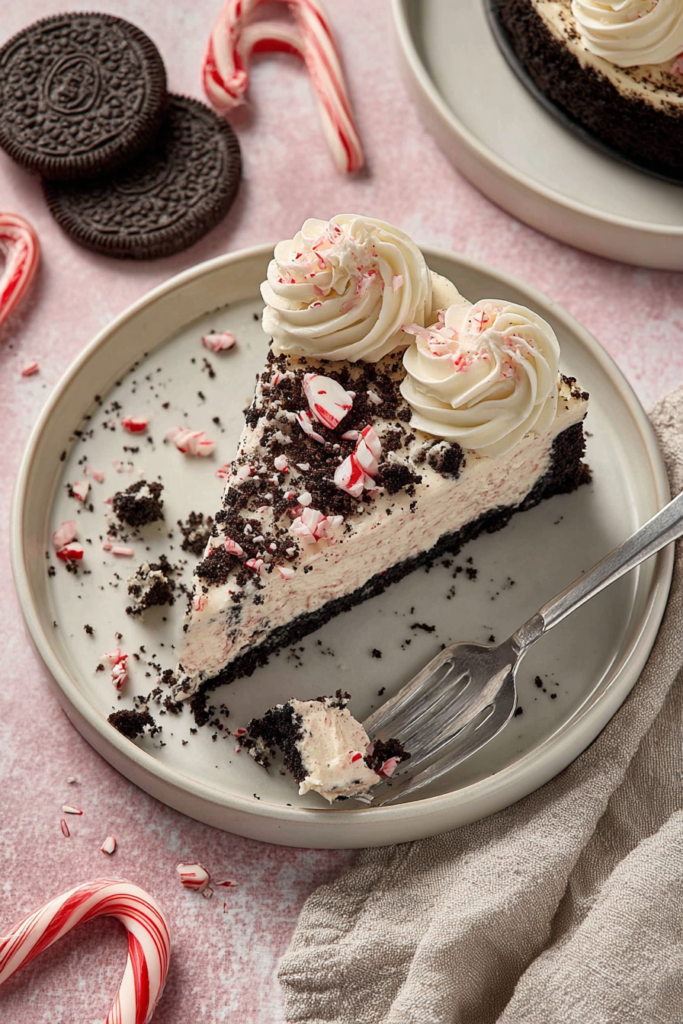
Serve each slice with a generous dollop of homemade whipped cream and a whole Oreo tucked into the side. For an extra touch of elegance, drizzle a little dark chocolate ganache or chocolate syrup over the top. If you’re feeling extra festive, a sprig of fresh mint on the plate adds a pop of green that beautifully complements the red candy cane bits.
Storage & Make-Ahead Tips
- Refrigerator: Store in an airtight container for 3–4 days. The crust may soften slightly by day four, but it will still taste delicious.
- Freezer: This cheesecake freezes exceptionally well. Wrap the entire pan (or individual slices) tightly in plastic wrap and then foil. It will stay fresh for up to 2 months. Thaw in the refrigerator for 2-3 hours before serving.
FAQs
1. Why didn’t my no-bake cheesecake set?
This usually happens if the cream cheese wasn’t full-fat or if the whipped cream wasn’t beaten to stiff peaks before folding. Also, ensure you chilled it for the full 8 hours; shortcuts here will result in a “pudding” texture.
2. Can I use Mint Oreos instead of regular ones?
Absolutely! Using Mint Oreos will double down on the peppermint flavor and give the crust a slightly different aromatic profile.
3. My candy canes melted into the filling. What happened?
Sugar dissolves in moisture. If the candy canes are crushed too early or the cheesecake sits for several days, the candy will naturally liquefy. For the best “crunch,” serve within 24 hours.
4. Can I make this in a springform pan?
Yes, a 9-inch springform pan works perfectly. Just ensure you grease the sides lightly or use a piece of acetate film for a professional, smooth-edged look.
5. Is the peppermint flavor very strong?
The 1.5 teaspoons of extract provide a clear peppermint presence without being “toothpaste” strong. It balances well with the heavy cream and chocolate.
This No-Bake Peppermint Oreo Cheesecake is the quintessential winter dessert. It’s a harmonious blend of textures—from the crunchy, chocolatey base to the cloud-like mint filling. Whether you’re looking to impress at a holiday party or simply want a festive treat to enjoy by the fire, this recipe delivers maximum flavor with minimal effort. Give it a try this season, and it might just become your new favorite holiday tradition!
PrintNo-Bake Peppermint Oreo Cheesecake
A velvety, refreshing no-bake cheesecake with a thick Oreo crust, peppermint cream filling, and chunks of chocolatey cookies.
- Prep Time: 30 minutes
- Cook Time: 0 minutes
- Total Time: 8 hours 30 minutes
- Yield: 12 slices
- Cuisine: American
Ingredients
Oreos (for crust) – 30 cookies
Unsalted butter (melted) – 5 tbsp
Granulated sugar (for crust) – 1 tbsp
Full-fat cream cheese (softened) – 16 oz
Granulated sugar (for filling) – 3/4 cup
Sour cream (room temperature) – 1/2 cup
Vanilla extract – 1/2 tsp
Peppermint extract – 1 1/2 tsp
Heavy whipping cream (cold) – 1 1/4 cups
Powdered sugar – 1/2 cup
Candy canes (finely crushed) – 1/4 cup
Oreos (coarsely crushed for filling) – 12 cookies
Extra Oreos & candy canes – for topping
Instructions
Pulse 30 Oreos in a food processor until they reach a fine crumb consistency.
Combine crumbs with melted butter and 1 tablespoon sugar. Press firmly into a lined 9×9 inch pan and freeze for 15 minutes.
Beat the softened cream cheese and 3/4 cup sugar until completely smooth and aerated.
Mix in the sour cream, vanilla, and peppermint extract until well combined.
In a chilled bowl, whip heavy cream and powdered sugar until stiff peaks form.
Gently fold the whipped cream and finely crushed candy canes into the cream cheese base.
Fold in the 12 coarsely crushed Oreos.
Spread the mixture over the chilled crust and smooth the top.
Refrigerate for at least 8 hours (or overnight) to allow the cheesecake to set.
Garnish with extra crushed Oreos and candy canes before slicing with a hot knife.
Notes
• Ensure the cream cheese is truly room temperature to avoid lumps in your cheesecake filling.
• For the cleanest slices, freeze the cheesecake for 30 minutes before cutting.
• Use a hot, clean knife to slice, wiping the blade between every single cut.
• Crush the candy canes very finely for the filling to ensure a smooth mouthfeel without hard “crunch” surprises.
