
Y’all, there’s just somethin’ about the smell of peppermint that screams “Christmas in Texas!” It reminds me of drivin’ around lookin’ at lights with the kiddos, the crisp (well, as crisp as it gets here!) air, and the excitement in their eyes. These peppermint swirl cookies are a new tradition I started last year, and let me tell you, they were a HUGE hit. I’ve made this recipe at least five times in my own kitchen, tweaking it until it was just right – perfectly soft, with that delightful peppermint kick. These cookies are not just for Christmas, make it all year round! I promise this recipe will deliver that perfect balance of flavor and ease, bringing a little bit of holiday magic (or just a really good cookie!) to your family.
Why This Recipe Works
As a busy mama, I need recipes that are quick, relatively easy, and that the whole family will enjoy. These peppermint swirl cookies check all the boxes! They’re:
- Kid-Approved: My kids are obsessed with the swirling colors and the refreshing peppermint flavor.
- Relatively Quick: From start to finish, you’re lookin’ at under an hour, perfect for a weeknight baking session.
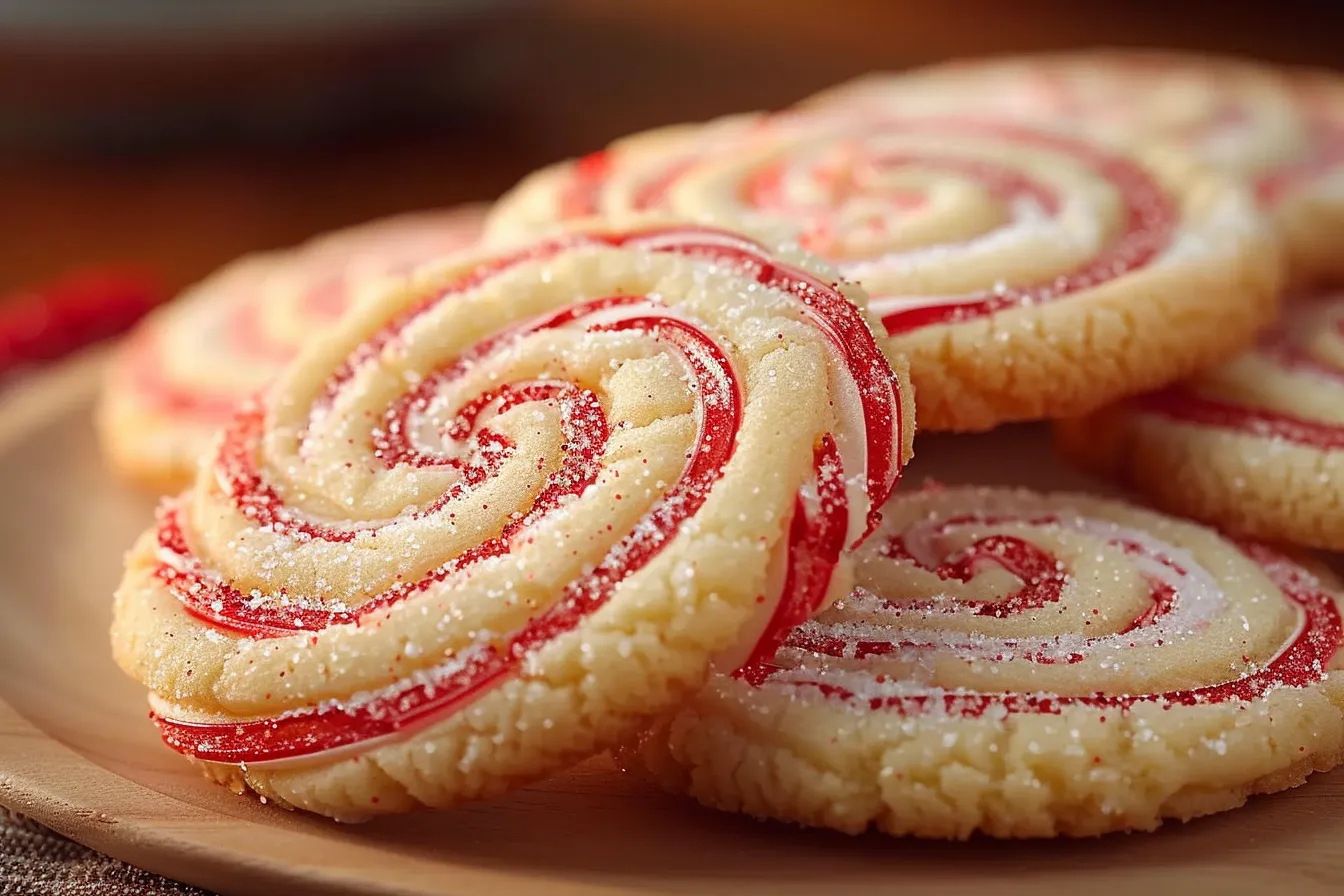
- Festive & Fun: They look beautiful on a cookie platter and make great gifts.
- Easy to Customize: You can easily adjust the amount of peppermint extract to suit your taste.
Ingredients
- 1 cup (2 sticks) unsalted butter, softened
- 1 ½ cups granulated sugar
- 2 large eggs
- 1 teaspoon vanilla extract
- ½ teaspoon peppermint extract
- 2 ¾ cups all-purpose flour
- 1 teaspoon baking soda
- ½ teaspoon salt
- Red food coloring (gel is preferred)
- ½ cup crushed peppermint candies, for topping (optional)
Ingredient Notes
Unsalted Butter: Using unsalted butter allows you to control the amount of salt in the recipe. Make sure it’s properly softened, but not melted, for the best texture. If you only have salted butter, omit the ½ teaspoon of salt in the recipe.
Peppermint Extract: A little goes a long way! Start with ½ teaspoon and add more to taste. Too much can make the cookies taste medicinal.
Red Food Coloring: Gel food coloring will give you the most vibrant color. Liquid food coloring will also work, but you might need to use more to achieve the desired shade of red.
Crushed Peppermint Candies: These are optional, but they add a festive touch and extra peppermint flavor. You can find them at most grocery stores during the holidays, or you can simply crush regular peppermint candies yourself.
Step-by-Step Instructions
Step 1: Cream Butter and Sugar. In a large bowl, cream together the softened butter and granulated sugar until light and fluffy. This usually takes about 3-5 minutes with an electric mixer. Make sure to scrape down the sides of the bowl occasionally to ensure everything is evenly mixed.
Step 2: Add Eggs and Extracts. Beat in the eggs one at a time, then stir in the vanilla extract and peppermint extract. Don’t overmix at this stage – just combine until everything is incorporated. You’ll notice the delicious peppermint aroma start to fill your kitchen!
Step 3: Combine Dry Ingredients. In a separate bowl, whisk together the flour, baking soda, and salt. This ensures that the baking soda and salt are evenly distributed throughout the flour.
Step 4: Gradually Add Dry Ingredients to Wet Ingredients. Gradually add the dry ingredients to the wet ingredients, mixing on low speed until just combined. Be careful not to overmix, as this can result in tough cookies.
Step 5: Divide and Color the Dough. Divide the dough in half. In one half, gently knead in the red food coloring until evenly distributed. I’ve found that using gloves at this stage prevents staining your hands. The other half remains plain.
Step 6: Create the Swirl. Roll each half of the dough into a log about 12 inches long. Place the logs side by side and gently twist them together. Slightly flatten the twisted log with your hands. Wrap the log in plastic wrap and chill in the refrigerator for at least 30 minutes. This helps to prevent the cookies from spreading too much during baking.
Step 7: Slice and Bake. Preheat oven to 375°F (190°C). Line baking sheets with parchment paper. Slice the chilled dough log into ¼-inch thick rounds. Place the rounds on the prepared baking sheets, leaving about 2 inches between each cookie. After testing this several times, I learned that chilling is a must, as well as placing them far apart. It really makes a difference!
Step 8: Bake. Bake for 8-10 minutes, or until the edges are lightly golden brown. The cookies will still be soft in the center, but they will firm up as they cool.
Step 9: Cool and Decorate. Let the cookies cool on the baking sheets for a few minutes before transferring them to a wire rack to cool completely. If desired, sprinkle with crushed peppermint candies while they are still slightly warm.
Expert Tips from My Kitchen
- Don’t Overmix the Dough: Overmixing develops the gluten in the flour, resulting in tough cookies. Mix until just combined.
- Chill the Dough: Chilling the dough is crucial for preventing the cookies from spreading too much during baking.
- Use Parchment Paper: Parchment paper prevents the cookies from sticking to the baking sheets and makes cleanup a breeze.
- Adjust Peppermint Extract to Taste: If you prefer a stronger peppermint flavor, add a bit more peppermint extract. But be careful not to add too much, as it can be overpowering.
- Add Chocolate Chips: For a fun twist, add ½ cup of chocolate chips (milk, semi-sweet, or dark) to the dough.
- Make Ahead: The dough can be made ahead of time and stored in the refrigerator for up to 2 days. You can also freeze the dough for longer storage.
- Kid-Friendly: Let the kids help with swirling the dough or sprinkling the cookies with crushed peppermint candies.
Storage & Meal Prep
Storage: Store the cooled cookies in an airtight container at room temperature for up to 5 days.
Freezing: You can freeze the baked cookies for up to 2 months. Thaw them completely at room temperature before serving. You can also freeze the dough log before baking. Thaw overnight in the refrigerator before slicing and baking.
Make Ahead: The dough can be made up to 2 days in advance and stored in the refrigerator. Just be sure to wrap it well in plastic wrap to prevent it from drying out.
Substitutions & Variations
Gluten-Free: I haven’t personally tested this with gluten-free flour, but you could try substituting a gluten-free all-purpose flour blend. Look for one that contains xanthan gum for best results.
Dairy-Free: You can substitute the butter with a dairy-free butter alternative. Make sure to choose one that is designed for baking.
Flavor Variations: Try adding other extracts, such as almond or orange, to the dough. You can also add spices, such as cinnamon or nutmeg, for a warm and cozy flavor.
Frequently Asked Questions
Can I make these cookies ahead of time?
Absolutely! The dough can be made up to 2 days in advance and stored in the refrigerator. Just be sure to wrap it well in plastic wrap to prevent it from drying out. You can also bake the cookies ahead of time and store them in an airtight container.
How do I know when the cookies are done?
The cookies are done when the edges are lightly golden brown. The centers will still be soft, but they will firm up as they cool. Don’t overbake them, or they will be dry and crumbly.
Can I use a different type of food coloring?
Yes, you can use any type of food coloring you like. Gel food coloring will give you the most vibrant color, but liquid food coloring will also work. Just be aware that liquid food coloring might require a bit more to achieve the desired shade.
My cookies spread too much. What did I do wrong?
There are a few reasons why your cookies might have spread too much. First, make sure that your butter was properly softened, but not melted. Second, make sure that you chilled the dough for at least 30 minutes. And third, make sure that your oven temperature is accurate.
Are these cookies kid-friendly?
Yes, these cookies are definitely kid-friendly! My kids love the swirling colors and the refreshing peppermint flavor. They also enjoy helping to make them.
These peppermint swirl cookies are more than just a recipe; they’re a little piece of my heart, baked with love and shared with my family. They’re the perfect treat to bring a smile to your face, especially during the holiday season. I hope y’all give these cookies a try and share them with your loved ones. Don’t forget to snap a picture and tag me on social media – I can’t wait to see your creations! And if you loved this recipe, be sure to check out some of the other delicious recipes here at FamiliesRecipes.com. Happy baking, y’all!
PrintEasy Peppermint Swirl Cookies A Texas Family Favorite

Bake easy Peppermint Swirl Cookies tested in my Texas kitchen This kidapproved homemade recipe is so festive and fun My kids love this Get the recipe
- Prep Time: 20 minutes
- Cook Time: 10 minutes
- Total Time: 30 minutes
- Yield: 24 cookies
- Category: Cookie
- Cuisine: American
Ingredients
- 1 cup (2 sticks) unsalted butter, softened
- 1 ½ cups granulated sugar
- 2 large eggs
- 1 teaspoon vanilla extract
- ½ teaspoon peppermint extract
- 2 ¾ cups all-purpose flour
- 1 teaspoon baking soda
- ½ teaspoon salt
- Red food coloring (gel is preferred)
- ½ cup crushed peppermint candies, for topping (optional)
Instructions
- Cream Butter and Sugar. In a large bowl, cream together the softened butter and granulated sugar until light and fluffy. This usually takes about 3-5 minutes with an electric mixer. Make sure to scrape down the sides of the bowl occasionally to ensure everything is evenly mixed.
- Add Eggs and Extracts. Beat in the eggs one at a time, then stir in the vanilla extract and peppermint extract. Don’t overmix at this stage – just combine until everything is incorporated.
- Combine Dry Ingredients. In a separate bowl, whisk together the flour, baking soda, and salt. This ensures that the baking soda and salt are evenly distributed throughout the flour.
- Gradually Add Dry Ingredients to Wet Ingredients. Gradually add the dry ingredients to the wet ingredients, mixing on low speed until just combined. Be careful not to overmix, as this can result in tough cookies.
- Divide and Color the Dough. Divide the dough in half. In one half, gently knead in the red food coloring until evenly distributed.
- Create the Swirl. Roll each half of the dough into a log about 12 inches long. Place the logs side by side and gently twist them together. Slightly flatten the twisted log with your hands. Wrap the log in plastic wrap and chill in the refrigerator for at least 30 minutes.
- Slice and Bake. Preheat oven to 375°F (190°C). Line baking sheets with parchment paper. Slice the chilled dough log into ¼-inch thick rounds. Place the rounds on the prepared baking sheets, leaving about 2 inches between each cookie.
- Bake. Bake for 8-10 minutes, or until the edges are lightly golden brown. The cookies will still be soft in the center, but they will firm up as they cool.
- Cool and Decorate. Let the cookies cool on the baking sheets for a few minutes before transferring them to a wire rack to cool completely. If desired, sprinkle with crushed peppermint candies while they are still slightly warm.
Notes
Soft and festive peppermint swirl cookies that are perfect for the holidays (or any time of year!). This easy recipe delivers a delightful balance of flavor and ease, bringing a little bit of magic to your family.
