
Oh, you guys! There’s just something magical about a treat that feels fancy but is secretly super easy to make. For me, these Biscoff truffles (cookie balls) are exactly that. I remember the first time I tried Biscoff cookies – it was on a flight, and I was instantly hooked by that unique, caramelized spice flavor. I knew I had to find a way to bring that deliciousness into a no-bake dessert, and that’s how these little gems were born. They’re perfect for parties, gifts, or just a little indulgence for yourself!
Why You’ll Love This Biscoff truffles (cookie balls)
- They taste absolutely incredible – that unique Biscoff flavor really shines!
- So easy to make, no baking required, which is perfect for any skill level.
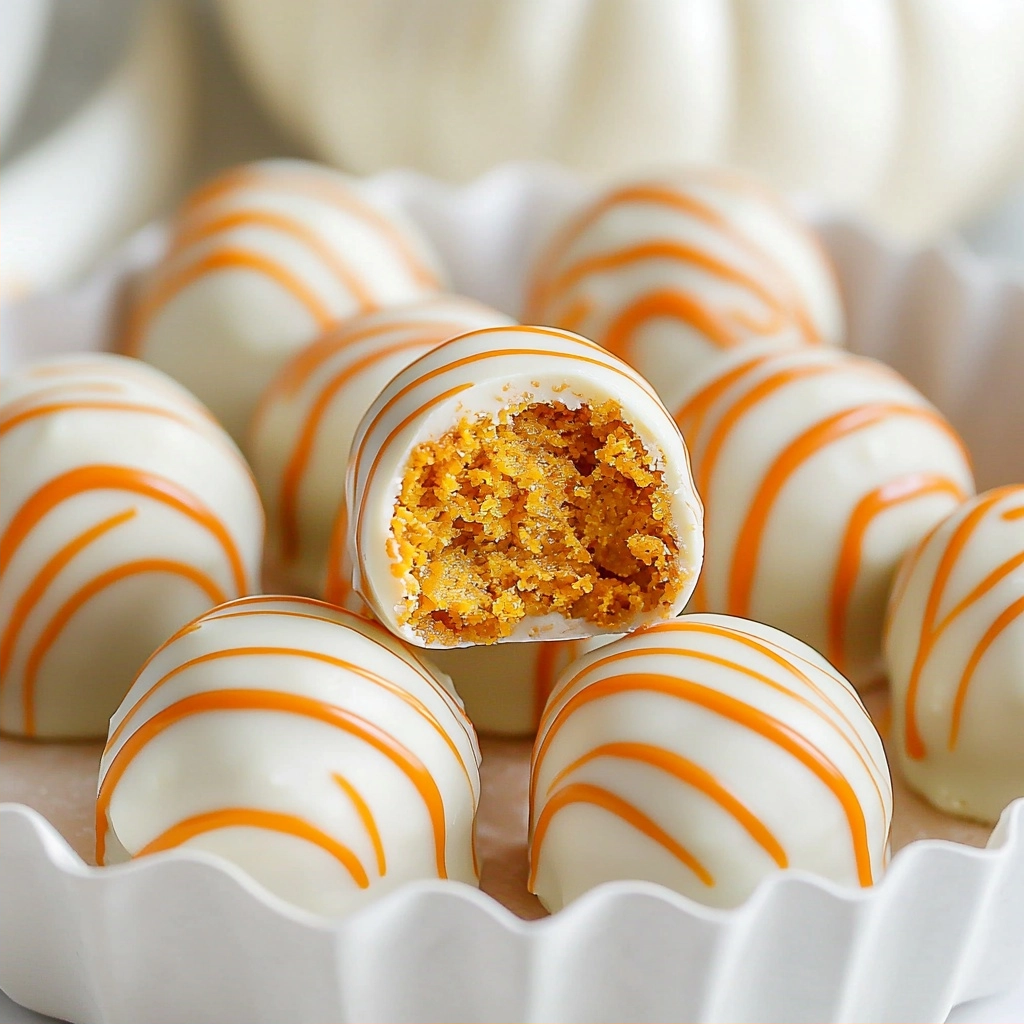
- The texture is wonderfully rich and smooth, with a delightful snap from the coating.
- They’re a showstopper for any occasion, from holiday gatherings to simple weeknight treats.
Ingredients You’ll Need
- Biscoff cookies: These are the star! Make sure you get the plain rectangle ones, not the cream-filled kind.
- Cream cheese: Softened cream cheese is key for a smooth, pliable truffle base. Don’t use low-fat; full-fat works best here.
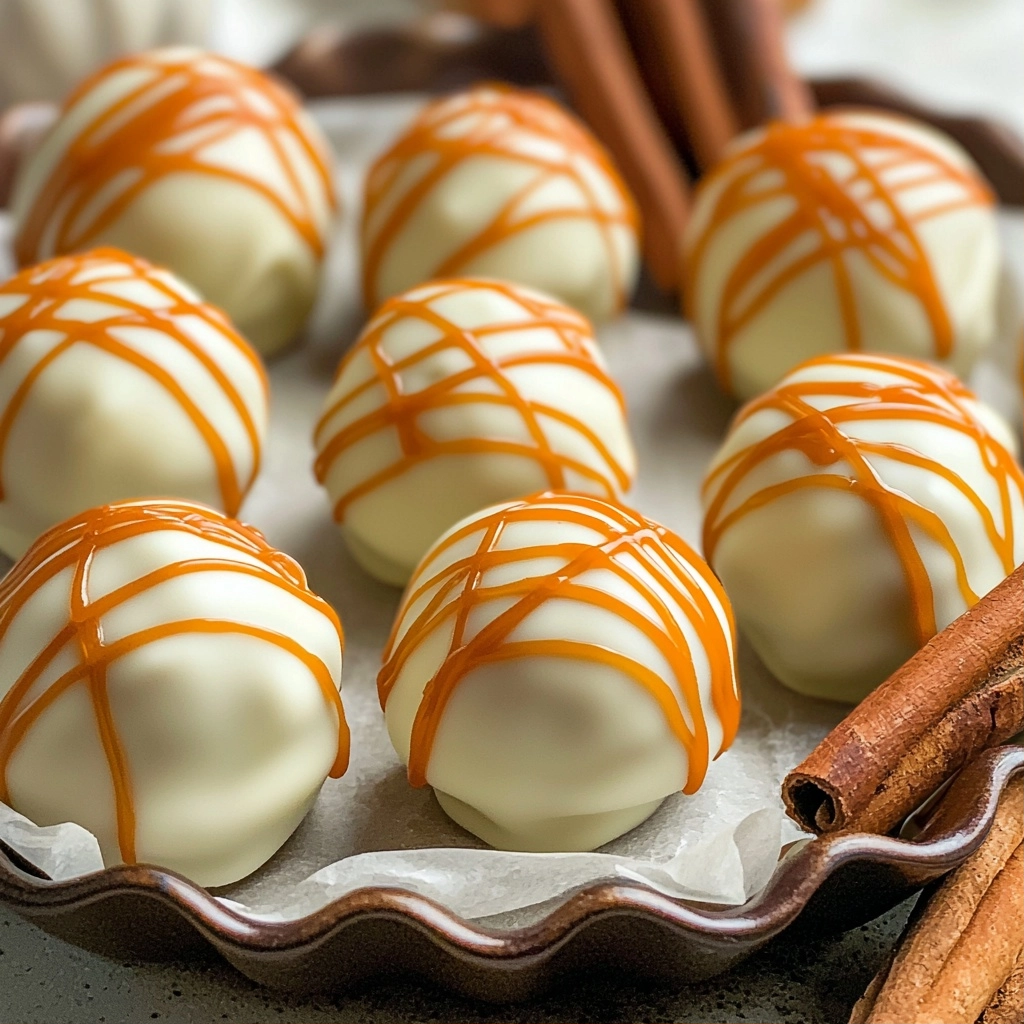
- Ghirardelli vanilla melting wafers: These melt beautifully and give a fantastic, smooth coating. You can use other good quality melting wafers if you can’t find Ghirardelli, but avoid chocolate chips as they don’t melt as smoothly for dipping.
- Cookie butter: This is for the drizzle and just amps up that Biscoff flavor even more! It’s usually found near the peanut butter in most grocery stores.
How to Make Biscoff truffles (cookie balls) Step by Step
First things first, let’s get organized! Grab a baking sheet and line it with parchment paper. This will be your landing pad for all those delicious truffles. Set it aside so it’s ready when you need it.
Now for the Biscoff magic! Take those lovely cookies and pop them into a food processor or a high-powered blender. You want to crush them until they’re super fine crumbs, almost like sand. This is where the base of our truffles really begins to take shape.
Next, in a big bowl, get your softened cream cheese ready. Use a hand mixer and whip it on medium-high speed until it’s beautifully smooth and fluffy. Then, add those Biscoff crumbs to the cream cheese and mix on medium speed until everything is fully combined. It will come together into a lovely, dough-like consistency – this is where the magic happens! Don’t worry if it seems a little sticky, that’s just right.
Time to roll! Grab a cookie scoop, about 1.5 inches, to portion out the mixture into even balls. Then, gently roll each portion between your hands until they’re nice and smooth. Place them carefully on your prepared baking sheet. Once all your balls are formed, pop that tray into the fridge for 1-2 hours. This chilling time is super important to help them firm up, making them much easier to dip later.
Once your truffle centers are perfectly chilled, it’s time for their luxurious coating! Melt your vanilla melting wafers. You can use a double boiler over low heat – just make sure the water isn’t touching the bottom of your bowl – or microwave them in a heat-safe bowl, stirring every 30 seconds. The key is to melt them slowly and gently to keep the coating smooth and shiny. Avoid overheating at all costs, or it might seize up!
Now for the dipping! Take one chilled ball and dip it into the melted coating. Use a fork to lift it out, letting any excess drip off by gently tapping the fork on the side of your bowl. Place the coated truffle back onto your parchment-lined tray. Keep going until all your beautiful truffles are coated. For the drizzle, melt another ½ cup of vanilla wafers and stir in 2-3 tablespoons of cookie butter. You can add more cookie butter for a deeper color if you like! Drizzle this over your coated truffles using a fork, spoon, or even a piping bag if you want to get fancy.
Finally, back into the refrigerator they go until that coating is completely set. If you have any excess drizzle around the base, you can gently break it off once they’re firm. Store them in the fridge until you’re ready to enjoy these delightful Biscoff truffles (cookie balls)!
My Top Tips for Success
- I always make sure my cream cheese is at true room temperature; it mixes so much smoother.
- In my experience, finely crushed cookies make for the best truffle texture, so don’t skimp on the food processor time.
- Trust me on this one: chilling the truffle centers thoroughly before dipping is non-negotiable for a smooth, even coat.
- When melting the wafers, low and slow is the way to go. Overheating them can make them thick and clumpy.
- For a super neat drizzle, a small piping bag with the tip snipped off works wonders!
Common Mistakes to Avoid
- Using cold cream cheese: This will result in lumpy truffle centers. Always let it soften completely at room temperature.
- Not chilling the balls long enough: If the centers aren’t firm, they’ll fall apart or make the coating difficult to apply. Chill for the full 1-2 hours.
- Overheating the melting wafers: This can cause them to seize and become unusable. Melt slowly, stirring frequently, especially in the microwave.
- Using chocolate chips instead of melting wafers: Chocolate chips contain less cocoa butter and are formulated differently, making them prone to seizing and not setting as smoothly for dipping.
- Adding too much cookie butter to the drizzle: While delicious, too much can make the drizzle too thick to flow nicely. Start with 2 tablespoons and add more only if needed for color.
How to Store Biscoff truffles (cookie balls)
- Refrigerator: Up to 1 week in an airtight container.
- Freezer: Up to 1 month in an airtight container. Thaw in the refrigerator before serving.
Frequently Asked Questions
Can I use a different type of cookie?
While these are specifically Biscoff truffles (cookie balls), you can experiment with other crisp, plain cookies like graham crackers or shortbread. The flavor profile will change, of course!
What if my melting wafers seize?
If your wafers seize, it means they got too hot. You can try stirring in a tiny bit of vegetable shortening (about 1/2 teaspoon at a time) to try and smooth it out, but it’s often hard to fully recover.
Can I make these ahead of time?
Absolutely! These truffles are perfect for making ahead. They store well in the refrigerator for up to a week, making them great for parties.
Do I have to use Ghirardelli brand melting wafers?
No, you don’t have to use Ghirardelli specifically, but do choose a good quality vanilla melting wafer. They are designed to melt smoothly and set firmly, which is essential for these truffles.
Why is my cookie butter drizzle too thick?
This usually happens if the cookie butter itself is too cold or if you added too much. Gently warm the cookie butter slightly before mixing it with the melted wafers, and add it gradually.
I hope these Biscoff truffles (cookie balls) bring a little bit of joy and that unique Biscoff flavor to your kitchen! They’re truly a simple pleasure to make and even better to share. If you whip up a batch, I’d absolutely love to hear how they turned out for you!
