Life can get so busy, right? Some days, it feels like there’s no time to grab a healthy snack, and I end up reaching for something less-than-ideal. That’s exactly why I started making these Homemade Protein Bars. They’re a lifesaver for busy mornings or an afternoon pick-me-up, and honestly, they taste so much better than anything you’d buy at the store. Plus, I love knowing exactly what goes into them!
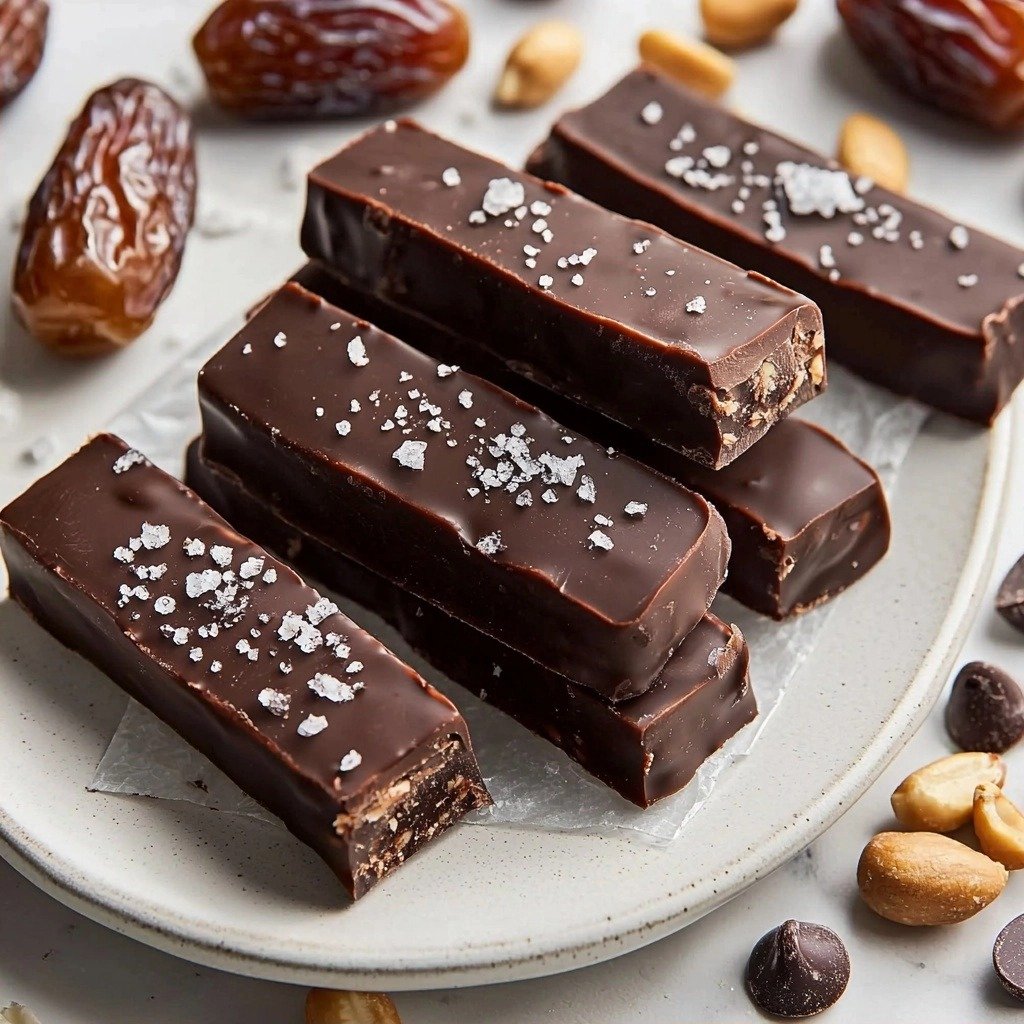
Why You’ll Love This Homemade Protein Bars
- They’re incredibly easy to make with simple ingredients you probably already have.
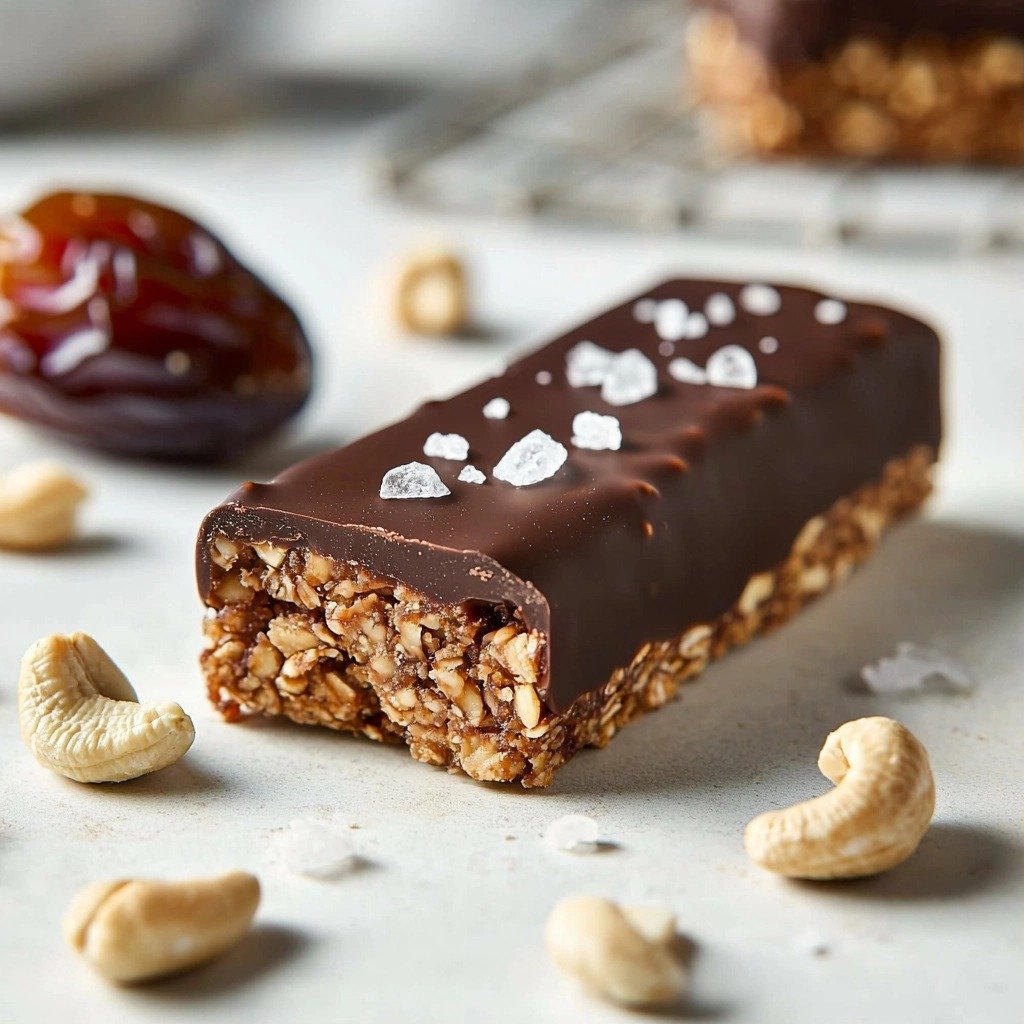
- The texture is wonderfully chewy and satisfying, just like a soft cookie bar.
- You can customize the flavor with optional protein powder or a sprinkle of cinnamon.
- Perfect for meal prep – make a batch on Sunday and have healthy snacks all week!
Ingredients You’ll Need
- Medjool Dates: These are the sticky, sweet binder for our bars. If yours feel a bit firm, a quick soak in warm water will soften them right up.
- Raw Cashews and Walnuts: These nuts add healthy fats and a lovely richness. Soaking them briefly helps them blend smoothly.
- Almond Flour: This gives our bars structure and a delicate, nutty flavor.
- Honey or Maple Syrup: Both work beautifully to add natural sweetness and help bind everything together.
- Peanut Butter: Make sure it’s a drippy, natural kind for the best texture and flavor.
- Chia Seed Powder: A little powerhouse for extra nutrients and binding.
- Coconut Oil: We use it melted in the bar mixture and again with the chocolate for a smooth topping.
- Dark Chocolate Chips: Pick your favorite! Dairy-free works great if you need it.
- Flaky Sea Salt: This is optional, but trust me, a sprinkle on top makes the chocolate pop!
How to Make Homemade Protein Bars Step by Step
First things first, let’s get those dates and nuts ready. If your Medjool dates are a bit firm, just pop them into some lukewarm water for a little while until they soften up. While they’re soaking, grab your cashews and walnuts and let them soak in a separate bowl for about ten minutes. This little step makes a big difference in how smoothly everything blends!
Once your dates and nuts are prepped, it’s time for the food processor. Pulse the chopped dates and nuts together until they start to combine. This is where the magic happens! Then, add in all the other bar ingredients: the almond flour, honey or maple syrup, peanut butter, chia seed powder, melted coconut oil, and vanilla extract. If you’re using protein powder or a pinch of cinnamon, add those in now too. Process everything until it forms a delicious, thick mixture that looks a lot like cookie dough. Don’t worry if it takes a minute or two to come together; just keep pulsing!
Now for the fun part! Press that amazing mixture into your prepared loaf pan. You can use your hands or the back of a spoon to really pack it down into an even, flat layer. The firmer you press, the better your bars will hold together. Next, melt your dark chocolate chips and a tablespoon of coconut oil. You can do this gently in a double boiler or in the microwave, stirring every 30 seconds until it’s smooth and glossy. Pour that dreamy chocolate over your bars, spread it evenly, and if you’re feeling fancy, sprinkle with some flaky sea salt. Pop the pan into the freezer for two hours, or until they’re nice and firm. Once chilled, slice them into bars or squares and enjoy!
My Top Tips for Success
- I always recommend using a good quality, drippy peanut butter for the best texture.
- In my experience, Medjool dates are key for their natural sweetness and stickiness; don’t skip the soaking step if they’re firm!
- Trust me on this one: don’t over-process the mixture. You want it to be like cookie dough, not a paste.
- When pressing the mixture into the pan, really get in there and compact it. This helps the bars hold their shape.
- For easy cleanup, line your loaf pan with parchment paper, leaving some overhang.
- If you like a thicker bar, use a smaller pan. For thinner bars, a larger square pan works well.
Common Mistakes to Avoid
- Not soaking dates or nuts: This can lead to a grainy texture and bars that don’t bind well. Always soften your dates if they’re hard, and soak the nuts for easier blending.
- Over-processing the mixture: If you process too much, the natural oils from the nuts can separate, making the bars oily. Stop when it looks like a cohesive cookie dough.
- Not packing the mixture firmly enough: Loose mixture means crumbly bars. Press it down really well into the pan to ensure they hold together.
- Overheating the chocolate: This can make the chocolate seize or become dull. Melt it slowly, stirring frequently, especially in the microwave.
How to Store Homemade Protein Bars
- Freezer: Store the cut bars in an airtight container in the freezer for up to 3 months.
- Refrigerator: Keep them in an airtight container in the fridge for up to 2 weeks.
- Room Temperature: They can sit at room temperature for a day or two, but are best chilled for firmness.
Frequently Asked Questions
Can I use other nuts?
Yes, you can! Almonds or pecans would also work well in place of cashews or walnuts, but the flavor will change slightly.
Do I have to use protein powder?
No, protein powder is completely optional. The bars are delicious and nutritious without it.
Are these bars gluten-free?
Yes, as long as your protein powder and any other optional ingredients are gluten-free, these bars are naturally gluten-free.
Can I use a different sweetener?
You can use honey or maple syrup interchangeably. Other liquid sweeteners might alter the texture, so stick to those two for best results.
How do I make them dairy-free?
Ensure you use dairy-free dark chocolate chips and maple syrup instead of honey if you’re avoiding all animal products.
I genuinely hope you give these Homemade Protein Bars a try! They’ve become such a staple in my kitchen, and I just know you’ll love how easy and satisfying they are. If you make them, please let me know how they turn out!
PrintHomemade Protein Bars
Chewy, delicious, and easy-to-make protein bars packed with wholesome ingredients and topped with a decadent chocolate layer.
- Prep Time: 20
- Total Time: 140
- Yield: 12 servings
- Category: Snack
- Method: No-Bake
- Cuisine: American
- Diet: Vegetarian
Ingredients
- 10 Medjool Dates, pitted
- 1/2 cup raw cashews
- 1/2 cup raw walnuts
- 3/4 cup almond flour
- 2 Tbsp. honey or maple syrup
- 2 Tbsp. peanut butter, drippy
- 1 Tbsp. chia seed powder
- 3/4 Tbsp. coconut oil, melted
- 1 tsp. vanilla extract
- pinch of cinnamon, optional
- 1-2 scoops protein powder, optional
- 1 cup dark chocolate chips (dairy free if needed)
- 1 Tbsp. coconut oil
- 1 Tbsp. flaky sea salt (such as Maldon), optional
Instructions
- Soak Medjool dates in lukewarm water until soft, if they are hard.
- Soak raw cashews and raw walnuts together in a separate bowl for about 10 minutes.
- Line a standard loaf pan with parchment paper, if desired.
- Pulse chopped dates in a food processor.
- Add nuts to the food processor with the dates.
- Pulse dates and nuts in the food processor to incorporate.
- Add almond flour to the food processor.
- Add honey or maple syrup to the food processor.
- Add drippy peanut butter to the food processor.
- Add chia seed powder to the food processor.
- Add melted coconut oil to the food processor.
- Add vanilla extract to the food processor.
- Add protein powder, if using, to the food processor.
- Add a pinch of cinnamon, if using, to the food processor.
- Process all ingredients until a cookie dough consistency forms.
- Press the mixture into the prepared loaf pan with your hands or the back of a spoon.
- Spread the mixture into an even, flat layer.
- Melt dark chocolate chips and 1 Tbsp. coconut oil in a double boiler.
- Alternatively, melt dark chocolate chips and 1 Tbsp. coconut oil in 30-second increments in the microwave, stirring every 30 seconds.
- Pour the melted chocolate over the top of the bars.
- Spread the chocolate evenly over the bars.
- Sprinkle with flaky sea salt, if desired.
- Freeze bars for 2 hours, or until firm.
- Once chilled, cut into bars or squares.
- Serve and enjoy.
Notes
Always use drippy, natural peanut butter for the best texture.
Make sure to press the bar mixture very firmly into the pan for best results.
Line your pan with parchment paper for easy removal and cleanup.
Bars are best stored in the freezer to maintain their firmness.